
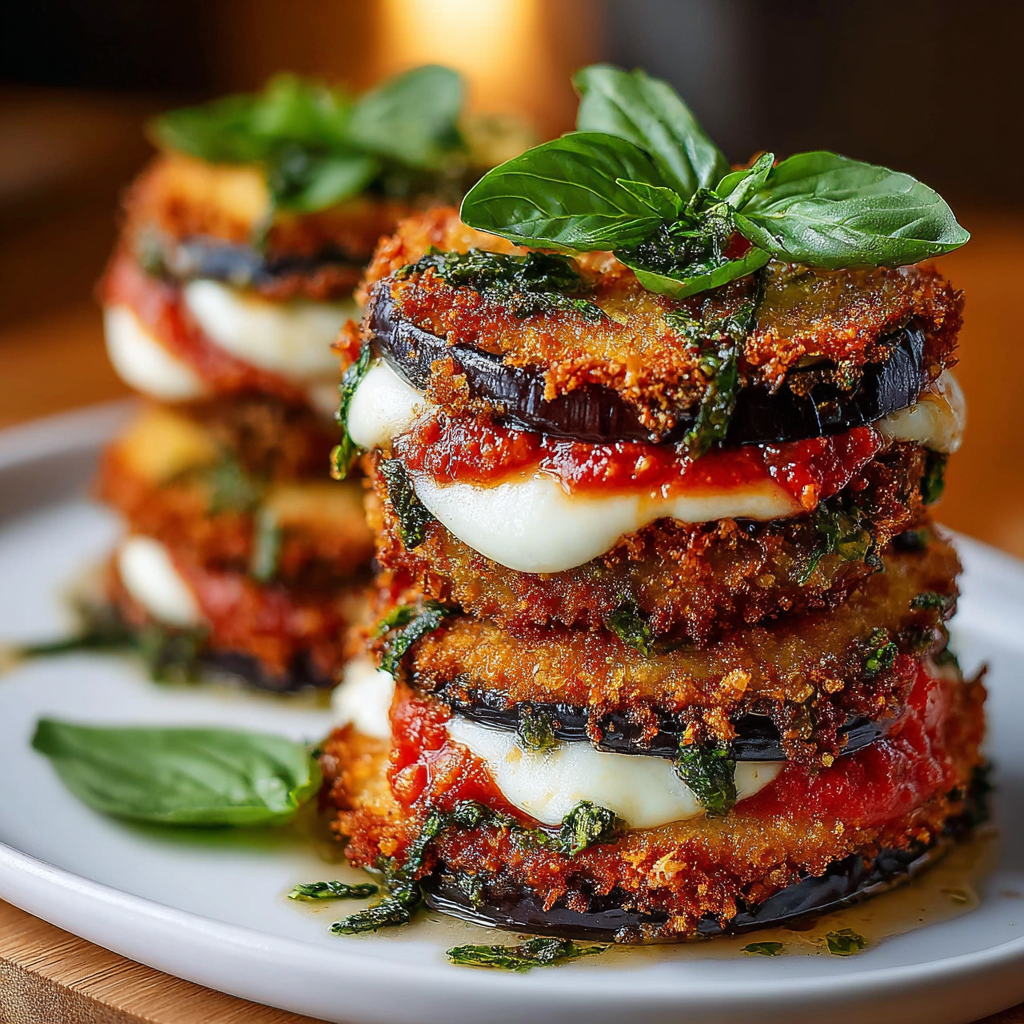
Introduction to Torrejas Crujientes de Berenjena para un Sándwich Saludable
Hola, amigas! If you’re anything like me, juggling work, family, and a million other responsibilities can feel like a circus act. That’s why I’m excited to share my recipe for Torrejas Crujientes de Berenjena para un Sándwich Saludable. This dish is not just a feast for the eyes; it’s a quick solution for those busy weeknights when you want something delicious yet healthy. Imagine crispy eggplant slices layered with creamy feta and fresh greens, all nestled in a warm sandwich. It’s a delightful way to impress your loved ones without spending hours in the kitchen!
Why You’ll Love This Torrejas Crujientes de Berenjena para un Sándwich Saludable
Let’s be real—life is busy, and we all need meals that are quick, easy, and delicious. These Torrejas Crujientes de Berenjena para un Sándwich Saludable check all the boxes! They’re not only a breeze to whip up, but they also pack a punch of flavor that will have your family asking for seconds. Plus, they’re a fantastic way to sneak in those veggies without anyone batting an eye. Who knew healthy could taste this good?
Ingredients for Torrejas Crujientes de Berenjena para un Sándwich Saludable
Now, let’s dive into the ingredients that make these Torrejas Crujientes de Berenjena para un Sándwich Saludable a reality. You’ll find that most of these items are pantry staples, making it easy to whip this up even on a busy day!
- Berenjenas medianas: The star of the show! Eggplants are not only delicious but also packed with nutrients. They add a lovely texture and absorb flavors beautifully.
- Pan rallado integral: This whole grain breadcrumb gives a satisfying crunch. You can also use gluten-free breadcrumbs if you’re avoiding gluten.
- Queso feta desmenuzado: This tangy cheese adds a burst of flavor. If you prefer a milder taste, feel free to swap it for ricotta or even a vegan cheese alternative.
- Huevos: They help bind everything together and create a lovely golden crust. For a vegan option, consider using flax eggs or a commercial egg replacer.
- Harina de garbanzo: This flour is a fantastic gluten-free option that adds protein and a nutty flavor. You can also use regular flour if that’s what you have on hand.
- Pimentón dulce: This sweet paprika adds a warm, smoky flavor. It’s a great way to elevate the dish without much effort.
- Albahaca seca: Dried basil brings a hint of Mediterranean flair. Fresh basil works too, but you’ll need a bit more of it.
- Sal y pimienta: Essential for seasoning! Adjust to your taste, but don’t be shy—seasoning is key to bringing out the flavors.
- Aceite de oliva virgen extra: A drizzle of this liquid gold not only helps with baking but also adds a rich flavor. You can substitute with avocado oil if you prefer.
- Salsa de yogur con limón: This creamy sauce is the perfect finishing touch. You can make it from scratch or buy a pre-made version. A squeeze of fresh lemon juice brightens it up!
- Hojas de rúcula fresca: These peppery greens add a nice crunch and freshness. If your family isn’t a fan, feel free to swap in spinach or arugula.
- Queso cheddar rallado: This melty cheese adds richness to the layers. You can use any cheese you love, or skip it for a lighter version.
For exact measurements, check the bottom of the article where you can find everything listed for easy printing. Now that we have our ingredients ready, let’s get cooking!
How to Make Torrejas Crujientes de Berenjena para un Sándwich Saludable
Alright, let’s roll up our sleeves and get cooking! Making these Torrejas Crujientes de Berenjena para un Sándwich Saludable is easier than you might think. Follow these simple steps, and you’ll have a delicious meal ready in no time!
Step 1: Preheat the Oven
First things first, preheat your oven to 190°C (375°F). This step is crucial because it ensures that your eggplant slices will bake evenly and get that lovely golden color. While the oven is heating up, line a baking tray with parchment paper. This will prevent the torrejas from sticking and make cleanup a breeze!
Step 2: Prepare the Eggplant
Now, let’s tackle those eggplants! Wash them thoroughly and slice them into rounds about 1 cm thick. Sprinkle a little salt on both sides of the slices and let them sit for about 20 minutes. This process helps draw out excess moisture and any bitterness. After 20 minutes, rinse the slices under cold water and pat them dry with a clean kitchen towel. You want them nice and dry for the next steps!
Step 3: Set Up the Breading Stations
Time to get organized! Grab three shallow containers. In the first one, add your chickpea flour. In the second, crack and beat the eggs. In the third, mix together the whole grain breadcrumbs, crumbled feta, sweet paprika, dried basil, salt, and pepper. This setup will make the breading process smooth and efficient, so you can get those torrejas into the oven faster!
Step 4: Bread the Eggplant Slices
Let’s get those eggplant slices dressed! Take a slice and first coat it in the chickpea flour, shaking off any excess. Next, dip it into the beaten eggs, letting the extra drip off. Finally, roll it in the breadcrumb mixture, pressing gently to ensure it sticks well. Repeat this process for all the slices. You’ll love how they start to look like little golden nuggets!
Step 5: Bake the Eggplant
Now, it’s time to bake! Place the breaded eggplant slices on the prepared baking tray in a single layer. Drizzle a little olive oil over the top to help them crisp up. Bake in the preheated oven for about 20-25 minutes, flipping them halfway through. You want them to be golden brown and crispy. Keep an eye on them; every oven is a little different!
Step 6: Assemble the Torrejas
Once your eggplant is perfectly baked, it’s assembly time! Start with a slice of eggplant as your base. Spread a tablespoon of the yogurt sauce on top, followed by a sprinkle of cheddar cheese and a handful of fresh arugula. Repeat the layering process, stacking more eggplant, sauce, cheese, and greens until you’ve created a delicious tower of flavor. Finish with another slice of eggplant on top!
Step 7: Final Bake
For the grand finale, pop your assembled torrejas back into the oven for an additional 8-10 minutes. This final bake will melt the cheese and bring everything together beautifully. When you pull them out, the cheese should be bubbly and slightly golden. Let them cool for a minute before serving, and get ready to enjoy a scrumptious, healthy sandwich!
Tips for Success
- Don’t skip the salting step for the eggplant; it really helps reduce bitterness.
- For extra crunch, try adding some crushed nuts to the breadcrumb mixture.
- Make a double batch and freeze the extra torrejas for a quick meal later!
- Experiment with different cheeses to find your family’s favorite flavor.
- Serve with a side of fresh veggies or a light salad for a complete meal.
Equipment Needed
- Baking tray: A standard baking sheet works perfectly, but a cast-iron skillet can add extra crispiness.
- Parchment paper: This is great for easy cleanup; aluminum foil can be used in a pinch.
- Three shallow containers: Any bowls will do, but pie plates are ideal for breading.
- Sharp knife: A good chef’s knife makes slicing the eggplant a breeze.
- Cutting board: Essential for safe and easy slicing.
Variations
- Spicy Kick: Add a pinch of cayenne pepper or red pepper flakes to the breadcrumb mixture for a spicy twist that will wake up your taste buds!
- Herb Infusion: Mix in fresh herbs like parsley or cilantro into the yogurt sauce for an extra layer of flavor.
- Cheesy Delight: Swap out the cheddar for mozzarella or provolone for a gooey, melty experience.
- Vegan Version: Use flax eggs and a plant-based cheese to make this dish completely vegan-friendly.
- Stuffed Torrejas: Add roasted red peppers or sun-dried tomatoes between the layers for a Mediterranean flair.
Serving Suggestions
- Fresh Salad: Pair your torrejas with a light salad of mixed greens, cherry tomatoes, and a lemon vinaigrette for a refreshing contrast.
- Chilled Beverage: Serve with a glass of iced herbal tea or sparkling water with lemon for a delightful drink.
- Presentation: Stack the torrejas on a wooden board, garnished with fresh herbs for a beautiful, rustic look.
FAQs about Torrejas Crujientes de Berenjena para un Sándwich Saludable
1. ¿Puedo hacer las Torrejas Crujientes de Berenjena con anticipación?
¡Claro que sí! Puedes preparar las torrejas con anticipación y almacenarlas en el refrigerador. Simplemente caliéntalas en el horno antes de servir para que recuperen su crujiente. Esto es perfecto para esas noches ocupadas cuando necesitas una comida rápida.
2. ¿Qué puedo usar en lugar de queso feta?
Si el queso feta no es de tu agrado, puedes sustituirlo por queso ricotta o incluso un queso vegano si prefieres una opción sin lácteos. La clave es elegir un queso que se derrita bien y complemente los sabores de la berenjena.
3. ¿Las Torrejas Crujientes de Berenjena son aptas para congelar?
Sí, estas torrejas se congelan muy bien. Después de hornearlas, déjalas enfriar completamente y luego colócalas en un recipiente hermético. Cuando estés lista para disfrutarlas, simplemente hornéalas directamente del congelador. ¡Es una excelente manera de tener una comida saludable lista en un abrir y cerrar de ojos!
4. ¿Puedo usar otras verduras en lugar de berenjena?
¡Definitivamente! Aunque la berenjena es la estrella de esta receta, puedes experimentar con calabacines o incluso champiñones. Solo asegúrate de ajustar el tiempo de cocción según la verdura que elijas, ya que algunas pueden cocinarse más rápido que otras.
5. ¿Cómo puedo hacer que mis Torrejas sean más crujientes?
Para obtener un extra de crujiente, asegúrate de que las rodajas de berenjena estén bien secas después de salarlas. También puedes rociarlas con un poco más de aceite de oliva antes de hornear. Si te sientes aventurera, prueba añadir un poco de maicena a la mezcla de pan rallado para un crujido adicional.
Final Thoughts
Making Torrejas Crujientes de Berenjena para un Sándwich Saludable is more than just cooking; it’s about creating a moment of joy in our busy lives. This recipe brings together the warmth of home-cooked meals and the excitement of trying something new. Each bite is a delightful crunch, bursting with flavor and nutrition. Whether you’re serving it for a family dinner or enjoying it solo, these torrejas are sure to impress. So, roll up your sleeves, gather your loved ones, and savor the experience of cooking together. Trust me, you’ll be glad you did!
“` Print
Torrejas Crujientes de Berenjena para un Sándwich Saludable que Te Sorprenderá
- Total Time: 1 hora 5 minutos
- Yield: 4 porciones 1x
- Diet: Vegetarian
Description
Torrejas Crujientes de Berenjena para un Sándwich Saludable que Te Sorprenderá, una deliciosa opción mediterránea.
Ingredients
- 2 berenjenas medianas
- 1 taza de pan rallado integral
- 1/2 taza de queso feta desmenuzado
- 2 huevos
- 1 taza de harina de garbanzo
- 1 cucharadita de pimentón dulce
- 1 cucharadita de albahaca seca
- Sal y pimienta al gusto
- Aceite de oliva virgen extra
- 1 taza de salsa de yogur con limón
- Hojas de rúcula fresca
- 1 taza de queso cheddar rallado
Instructions
- Precalienta el horno a 190°C (375°F) y prepara una bandeja para hornear con papel encerado.
- Lava las berenjenas y córtalas en rodajas de aproximadamente 1 cm. Espolvorea con sal y déjalas reposar durante 20 minutos para eliminar el exceso de agua. Enjuágalas y sécalas bien.
- Prepara tres recipientes: uno con la harina de garbanzo, otro con los huevos batidos y el tercero con la mezcla de pan rallado, queso feta, pimentón, albahaca, sal y pimienta.
- Reboza cada rodaja de berenjena comenzando por la harina, luego sumérgelas en el huevo y finalmente cúbrelas con la mezcla de pan rallado.
- Coloca las berenjenas en la bandeja para hornear y rocía con un poco de aceite de oliva. Hornea durante 20-25 minutos, volteándolas a la mitad del tiempo, hasta que estén doradas y crujientes.
- Para montar las torrejas, coloca una rodaja de berenjena, añade una cucharada de salsa de yogur, un poco de queso cheddar y unas hojas de rúcula. Repite el proceso formando varias capas y termina con otra rodaja de berenjena.
- Hornea las torrejas apiladas durante 8-10 minutos más, hasta que el queso se derrita y esté burbujeante.
- Sirve caliente como un exquisito sándwich mediterráneo, acompañado de una ensalada de tomate y pepino. ¡A disfrutar de esta deliciosa opción saludable!
Notes
- Las berenjenas pueden ser amargas, así que es importante dejarlas reposar con sal.
- Se puede sustituir el queso feta por queso ricotta si se desea.
- Para una opción vegana, se pueden usar sustitutos de huevo y queso vegano.
- Prep Time: 30 minutos
- Cook Time: 35 minutos
- Category: Entrante
- Method: Horneado
- Cuisine: Mediterránea
Nutrition
- Serving Size: 1 porción
- Calories: 250
- Sugar: 3g
- Sodium: 400mg
- Fat: 12g
- Saturated Fat: 4g
- Unsaturated Fat: 8g
- Trans Fat: 0g
- Carbohydrates: 30g
- Fiber: 8g
- Protein: 10g
- Cholesterol: 100mg