
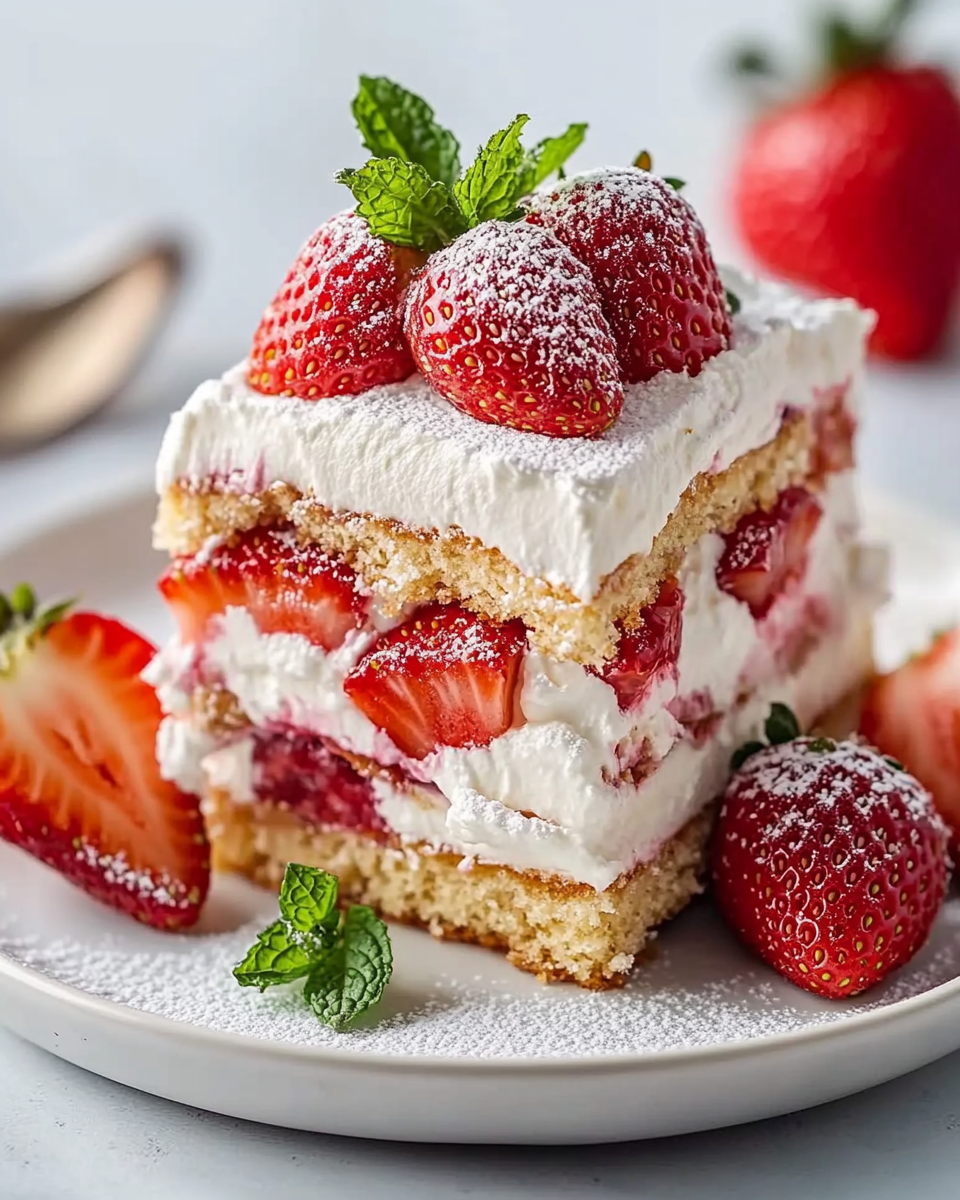
Introduction to Tiramisú de Fresa y Bizcocho
Hola, amigas! If you’re anything like me, your days can feel like a whirlwind of work, family, and endless to-do lists. That’s why I’m excited to share my recipe for Tiramisú de Fresa y Bizcocho—a delightful dessert that’s not only easy to whip up but also a guaranteed crowd-pleaser! Imagine a luscious, creamy treat layered with fresh strawberries and soft ladyfingers, all without spending hours in the kitchen. This recipe is perfect for those busy evenings when you want to impress your loved ones without the fuss. Let’s dive in!
Why You’ll Love This Tiramisú de Fresa y Bizcocho
Let’s be real—life gets hectic, and finding time to cook can feel like a juggling act. That’s why this Tiramisú de Fresa y Bizcocho is a game-changer! It’s quick to prepare, requiring just 20 minutes of your time, and it’s a showstopper at any gathering. Plus, the combination of creamy mascarpone and fresh strawberries is simply irresistible. You’ll love how it brings smiles to your family’s faces without breaking a sweat!
Ingredients for Tiramisú de Fresa y Bizcocho
Now, let’s gather our ingredients for this scrumptious Tiramisú de Fresa y Bizcocho. Don’t worry; it’s a simple list, and I promise you’ll find everything at your local grocery store. Here’s what you’ll need:
- Fresas frescas: The star of our dessert! Look for ripe, juicy strawberries that will add a burst of flavor and color.
- Bizcochos de soletilla: Also known as ladyfingers, these light and airy cookies are perfect for soaking up the coffee mixture without getting too soggy.
- Queso mascarpone: This creamy Italian cheese is what gives our tiramisú its rich texture. If you can’t find mascarpone, cream cheese can be a decent substitute, though it will change the flavor slightly.
- Nata para montar: This is heavy cream that whips up beautifully. It adds a lightness to our dessert. If you’re in a pinch, you can use whipped topping, but I recommend going for the real deal!
- Azúcar: A little sweetness goes a long way! You can adjust the amount based on your taste or use a sugar substitute if you’re watching your sugar intake.
- Café fuerte, frío: Brew a strong cup of coffee and let it cool. This is what gives our tiramisú its signature flavor. If you’re not a coffee fan, you can use strong tea instead.
- Licor de fresa (opcional): This adds a delightful twist to the flavor. If you prefer a non-alcoholic version, feel free to skip it or use a splash of strawberry syrup instead.
- Extracto de vainilla: A dash of vanilla enhances the overall flavor of the mascarpone cream. It’s a small touch that makes a big difference!
- Cacao en polvo: This is for dusting on top before serving. It adds a lovely bitterness that balances the sweetness of the dessert.
- Fresas adicionales: These are for decoration. A few whole strawberries on top make for a beautiful presentation!
For exact measurements, you can find them at the bottom of the article, ready for printing. Now that we have our ingredients, let’s get cooking!
How to Make Tiramisú de Fresa y Bizcocho
Now that we have our ingredients ready, let’s get to the fun part—making this delicious Tiramisú de Fresa y Bizcocho! Follow these simple steps, and you’ll have a stunning dessert that will impress everyone. Trust me, it’s easier than you think!
Step 1: Prepare the Strawberries
First things first, let’s wash those beautiful strawberries! Rinse them under cold water and gently pat them dry with a paper towel. Now, slice them into thin rounds. This will help them layer beautifully in our tiramisú. Remember to set aside a few whole strawberries for decoration later. They’ll make your dessert look extra special!
Step 2: Whip the Cream
Next up, grab a mixing bowl and pour in the heavy cream. Using an electric mixer, beat the cream on medium speed until it starts to thicken. Gradually add the sugar and continue beating until you achieve stiff peaks. This means the cream should hold its shape when you lift the beaters. Don’t forget to add a splash of vanilla extract for that lovely flavor. It’s like a warm hug for your taste buds!
Step 3: Combine with Mascarpone
Now, it’s time to bring in the star of the show—mascarpone cheese! Gently fold the mascarpone into the whipped cream using a spatula. Be careful not to overmix; we want to keep that light and airy texture. The goal is to create a smooth, creamy mixture that’s just begging to be layered!
Step 4: Prepare the Coffee Mixture
In a shallow dish, mix your cold coffee with the optional strawberry liqueur. If you’re skipping the liqueur, no worries! The coffee alone will give our tiramisú that rich flavor. Just make sure the coffee is cold; we don’t want to melt our ladyfingers!
Step 5: Dip the Ladyfingers
Now comes the fun part—dipping the ladyfingers! Take each one and quickly dip it into the coffee mixture. Be careful not to soak them; a quick dip is all you need. We want them to absorb just enough coffee flavor without turning mushy. Think of it like a quick swim in a refreshing pool!
Step 6: Layer the Ingredients
Grab your rectangular dish and start layering! Place a single layer of dipped ladyfingers at the bottom. Then, spread a generous layer of the mascarpone cream over the ladyfingers, followed by a layer of sliced strawberries. Repeat this process until you run out of ingredients, finishing with a layer of mascarpone cream on top. It’s like building a delicious tower of happiness!
Step 7: Chill the Tiramisú
Once you’ve layered everything, cover the dish with plastic wrap and pop it in the refrigerator. This is where the magic happens! Let it chill for at least 4 hours, but if you can wait overnight, do it! The flavors will meld together beautifully, making each bite even more delightful.
Step 8: Serve and Enjoy
Finally, it’s time to serve your masterpiece! Just before serving, dust the top with cocoa powder for that classic tiramisú touch. Then, add the reserved whole strawberries for a pop of color. Slice it up, and watch as everyone’s eyes light up with joy. Enjoy every creamy, fruity bite of your Tiramisú de Fresa y Bizcocho—you’ve earned it!
Tips for Success
- Use ripe strawberries for the best flavor—trust me, it makes a difference!
- Don’t over-soak the ladyfingers; a quick dip is all they need.
- For a richer taste, let the tiramisú chill overnight.
- Feel free to experiment with different liqueurs or skip them entirely for a family-friendly version.
- Dust with cocoa powder just before serving for a beautiful finish!
Equipment Needed
- Mixing bowls: A set of various sizes is handy; you can use any large bowl you have.
- Electric mixer: If you don’t have one, a whisk will work, but it’ll take a bit more elbow grease!
- Spatula: A silicone spatula is great for folding; a regular one will do just fine.
- Rectangular dish: Any baking dish or even a trifle bowl will work for layering.
- Measuring cups and spoons: Essential for accuracy, but you can eyeball it if you’re feeling adventurous!
Variations
- Chocolate Lovers: Swap out some of the strawberries for chocolate shavings or use chocolate-flavored ladyfingers for a decadent twist!
- Berry Medley: Mix in other berries like blueberries or raspberries for a colorful and flavorful combination.
- Gluten-Free Option: Use gluten-free ladyfingers or sponge cake to make this dessert suitable for those with gluten sensitivities.
- Vegan Version: Substitute mascarpone with a vegan cream cheese and use coconut cream instead of heavy cream for a plant-based delight.
- Nutty Addition: Add crushed nuts like almonds or hazelnuts between the layers for a delightful crunch!
Serving Suggestions
- Pair with Coffee: Serve alongside a cup of freshly brewed coffee or espresso to complement the flavors of the tiramisú.
- Fresh Mint: Garnish with a sprig of fresh mint for a pop of color and a refreshing aroma.
- Fruit Platter: Create a colorful fruit platter with seasonal fruits to enhance the dessert experience.
- Elegant Presentation: Use individual dessert cups for a chic presentation at gatherings.
FAQs about Tiramisú de Fresa y Bizcocho
As you embark on your journey to create this delightful Tiramisú de Fresa y Bizcocho, you might have a few questions. Don’t worry; I’ve got you covered! Here are some common queries that pop up when making this scrumptious dessert:
1. Can I make Tiramisú de Fresa y Bizcocho ahead of time?
Absolutely! In fact, making it ahead of time is one of the best things you can do. The flavors meld beautifully when it sits in the fridge for at least 4 hours, but overnight is even better. Just remember to dust with cocoa powder right before serving for that perfect finish!
2. What can I substitute for mascarpone cheese?
If you can’t find mascarpone, don’t fret! Cream cheese can work as a substitute, though it will give a slightly different flavor. You can also blend cream cheese with a bit of heavy cream to mimic the texture of mascarpone. Just keep in mind that the taste will vary a bit!
3. Is it possible to make this dessert without coffee?
Yes, indeed! If coffee isn’t your thing, you can use strong brewed tea instead. A rich chai or even a berry-infused tea can add a unique twist to your Tiramisú de Fresa y Bizcocho. Just make sure it’s cooled before dipping the ladyfingers!
4. How do I store leftovers?
Leftovers? If you’re lucky enough to have any, store your tiramisú in an airtight container in the fridge. It should last for about 2-3 days. Just be aware that the ladyfingers may soften a bit more over time, but it will still taste delicious!
5. Can I use frozen strawberries instead of fresh?
While fresh strawberries are ideal for this recipe, you can use frozen strawberries in a pinch. Just make sure to thaw and drain them well to avoid excess moisture. They might not have the same texture as fresh, but they’ll still add that lovely fruity flavor!
Final Thoughts
Making Tiramisú de Fresa y Bizcocho is more than just preparing a dessert; it’s about creating moments of joy and connection with your loved ones. This delightful treat brings a touch of elegance to any gathering, all while being incredibly easy to whip up. I love how it transforms a simple evening into a special occasion, with each creamy, fruity bite sparking smiles and happy chatter around the table. So, whether it’s a family dinner or a casual get-together with friends, this tiramisú is sure to be a hit. Enjoy every delicious moment!
“` Print
Tiramisú de Fresa y Bizcocho: ¡Delicia fácil y rápida!
- Total Time: 4 horas 20 minutos
- Yield: 8 porciones 1x
- Diet: Vegetarian
Description
Delicioso tiramisú de fresa y bizcocho, fácil y rápido de preparar.
Ingredients
- 250 g de fresas frescas
- 200 g de bizcochos de soletilla
- 250 g de queso mascarpone
- 200 ml de nata para montar
- 100 g de azúcar
- 1 taza de café fuerte, frío
- 50 ml de licor de fresa (opcional)
- 1 cucharadita de extracto de vainilla
- Cacao en polvo para decorar
- Fresas adicionales para decorar
Instructions
- Comienza lavando las fresas y cortándolas en rodajas finas. Reserva algunas para la presentación final.
- En un bol, bate la nata con el azúcar hasta que esté firme y añade el extracto de vainilla.
- Incorpora el queso mascarpone a la mezcla de nata, utilizando una espátula para combinar suavemente hasta que no queden grumos.
- En un plato hondo, mezcla el café frío con el licor de fresa, si decides usarlo.
- Toma cada bizcocho de soletilla y sumérgelo brevemente en la mezcla de café, evitando que se empapen demasiado.
- En un molde rectangular, coloca una primera capa de bizcochos en el fondo.
- Vierte una capa generosa de la crema de mascarpone sobre los bizcochos, seguida de una capa de rodajas de fresas.
- Repite el proceso, alternando capas de bizcochos, crema y fresas, hasta que el molde esté lleno, finalizando con una capa de crema.
- Cubre el tiramisú con papel film y déjalo en el refrigerador por un mínimo de 4 horas, siendo ideal dejarlo toda la noche.
- Justo antes de servir, espolvorea cacao en polvo sobre la superficie y adorna con las fresas que habías reservado. ¡Listo para disfrutar!
Notes
- Para un sabor más intenso, utiliza fresas maduras.
- El licor de fresa es opcional, pero añade un toque especial.
- Dejar reposar toda la noche mejora el sabor y la textura.
- Prep Time: 20 minutos
- Cook Time: 0 minutos
- Category: Postre
- Method: Refrigerado
- Cuisine: Italiana
Nutrition
- Serving Size: 1 porción
- Calories: 350
- Sugar: 25 g
- Sodium: 50 mg
- Fat: 20 g
- Saturated Fat: 10 g
- Unsaturated Fat: 8 g
- Trans Fat: 0 g
- Carbohydrates: 30 g
- Fiber: 2 g
- Protein: 5 g
- Cholesterol: 60 mg