
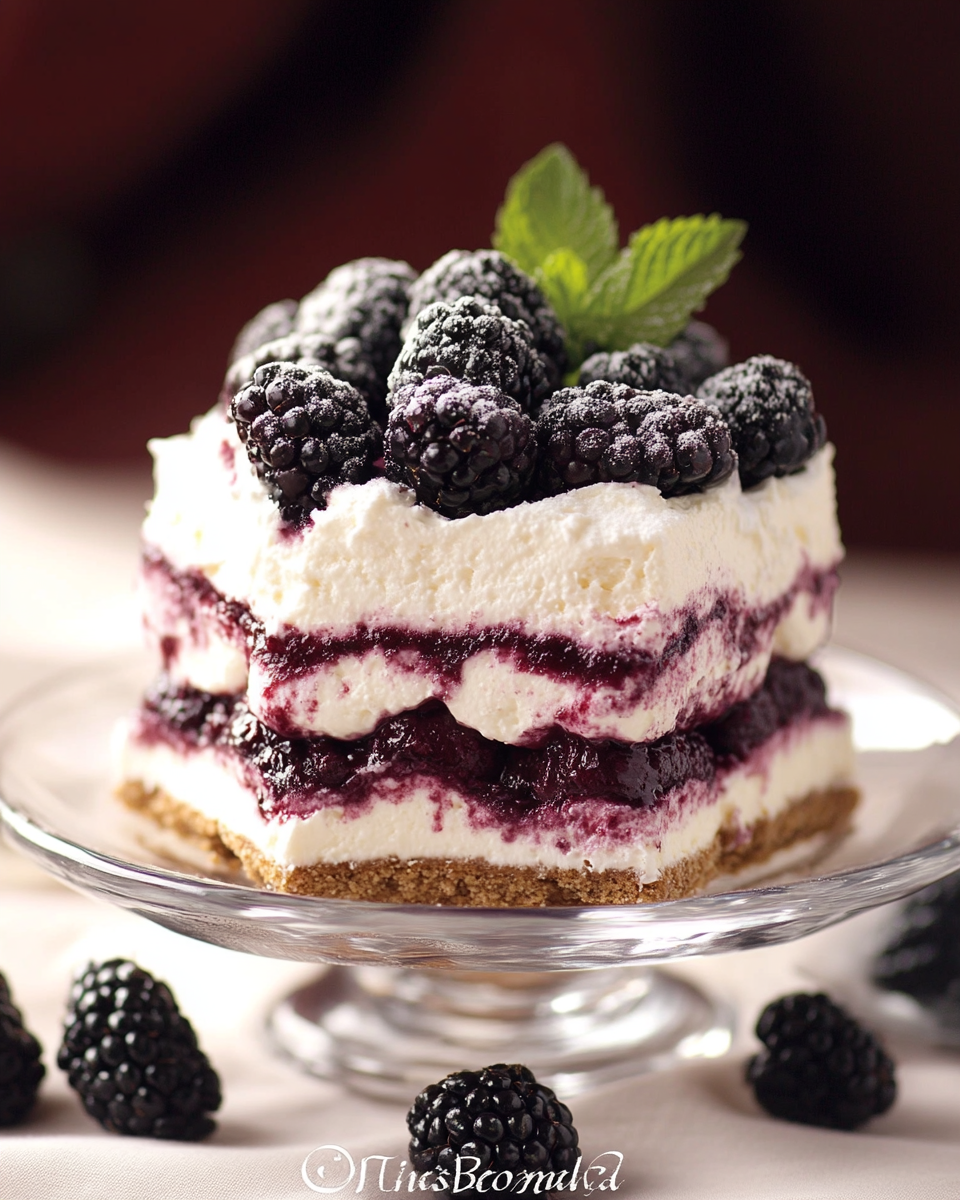
Introduction to Tiramisú de Mora
Hola, amigos! If you’re anything like me, you know that life can get pretty hectic, especially when juggling work, family, and everything in between. That’s why I’m excited to share my delightful Tiramisú de Mora recipe with you! This luscious dessert is not only a refreshing twist on the classic Italian tiramisú, but it’s also a quick solution for those busy days when you want to impress your loved ones without spending hours in the kitchen. Trust me, this dessert will have everyone asking for seconds, and you’ll feel like a culinary rockstar!
Why You’ll Love This Tiramisú de Mora
Let’s be real—who doesn’t love a dessert that’s both easy to make and absolutely delicious? This Tiramisú de Mora checks all the boxes! It’s quick to whip up, requiring just 30 minutes of prep time, and it’s a crowd-pleaser that will have your family raving. Plus, the fresh raspberries add a burst of flavor that makes it feel special, even on the busiest of days. You’ll love how effortlessly it elevates any meal!
Ingredients for Tiramisú de Mora
Now, let’s dive into the delicious components that make up this Tiramisú de Mora. Each ingredient plays a vital role in creating that perfect balance of flavors and textures. Here’s what you’ll need:
- Queso mascarpone: This creamy Italian cheese is the star of the show! It adds a rich, velvety texture that makes the tiramisú indulgent.
- Crema para batir: Whipping cream is essential for achieving those fluffy peaks. It lightens the mascarpone and gives the dessert its airy feel.
- Azúcar moreno: This adds a hint of caramel flavor and sweetness. You can also use granulated sugar if that’s what you have on hand.
- Frambuesas frescas: The fresh raspberries not only provide a pop of color but also a tartness that beautifully contrasts with the creamy layers.
- Café frío: A good cup of cold coffee is crucial for soaking the ladyfingers. It infuses the dessert with a rich coffee flavor. If you prefer, you can use espresso for a stronger kick!
- Bizcochos de soletilla: These ladyfingers are light and sponge-like, perfect for soaking up the coffee without falling apart.
- Licor de frambuesa (opcional): This optional ingredient adds a delightful fruity note. If you’re not a fan of alcohol, feel free to skip it!
- Cacao en polvo: A dusting of cocoa powder on top gives a classic tiramisú finish and a touch of bitterness that balances the sweetness.
- Hojas de albahaca: For a unique twist, fresh basil leaves can be used as a garnish. They add a surprising freshness that complements the raspberries beautifully.
For exact measurements, you can find them at the bottom of the article, ready for printing. Happy cooking!
How to Make Tiramisú de Mora
Now that we have all our ingredients ready, let’s get to the fun part—making this scrumptious Tiramisú de Mora! Follow these simple steps, and you’ll have a dessert that’s sure to impress. Trust me, it’s easier than you think!
Step 1: Prepare the Cream Mixture
First things first, grab a large mixing bowl. Pour in the crema para batir and sprinkle in the azúcar moreno. Using an electric mixer, beat the cream on medium speed until you see those lovely peaks forming. It should take about 3-5 minutes. You want it fluffy but not overbeaten—think of it as the perfect cloud! Once you’ve got that, gently fold in the queso mascarpone using a spatula. Be careful not to deflate the cream; we want to keep that airy texture. This creamy mixture is the heart of your tiramisú!
Step 2: Prepare the Coffee Mixture
Next up, let’s get that coffee ready! In a shallow dish, pour your café frío. If you’re feeling adventurous, add the licor de frambuesa at this point. It’s optional, but it adds a delightful twist. Stir the mixture gently to combine. This coffee bath is what will give your ladyfingers that rich flavor, so make sure it’s well mixed!
Step 3: Soak the Ladyfingers
Now, it’s time to soak those bizcochos de soletilla. Take each ladyfinger and dip it into the coffee mixture for just a second—don’t let them soak too long, or they’ll turn mushy! You want them to absorb just enough coffee to flavor them without falling apart. Lay them in a single layer at the bottom of your serving dish. This is the foundation of your tiramisú, so make sure they’re snug!
Step 4: Layer the Ingredients
Here comes the fun part—layering! Start by spreading a generous portion of your cream mixture over the soaked ladyfingers. Use a spatula to smooth it out evenly. Then, sprinkle a handful of frambuesas frescas on top. Repeat this process: another layer of soaked ladyfingers, followed by cream, and more raspberries. Keep going until you run out of ingredients, but make sure to finish with a layer of that luscious cream. It’s like building a delicious tower of happiness!
Step 5: Chill the Tiramisú
Once you’ve layered everything beautifully, it’s time to let it chill. Cover your dish with plastic wrap and pop it in the fridge for at least 4 hours. If you can wait overnight, even better! This chilling time allows the flavors to meld together and the tiramisú to set properly. Trust me, the wait will be worth it!
Step 6: Serve and Garnish
Finally, the moment we’ve all been waiting for! When you’re ready to serve, take the tiramisú out of the fridge. Dust the top with a generous sprinkle of cacao en polvo for that classic touch. For a pop of color and flavor, add a few fresh raspberries and some hojas de albahaca as a garnish. It’s like putting the finishing touches on a masterpiece! Slice it up, serve it to your family or guests, and watch their faces light up with joy. Enjoy every bite of your homemade Tiramisú de Mora!
Tips for Success
- Use cold ingredients for the cream mixture; it helps achieve better volume.
- Don’t soak the ladyfingers for too long—just a quick dip will do!
- For a richer flavor, opt for espresso instead of regular coffee.
- Let the tiramisú chill overnight for the best taste and texture.
- Feel free to experiment with different berries for a unique twist!
Equipment Needed
- Mixing bowl: A large bowl for combining ingredients. A sturdy pot can work in a pinch!
- Electric mixer: For whipping cream. A whisk will do if you’re feeling strong!
- Shallow dish: To soak the ladyfingers. Any flat dish will suffice.
- Spatula: For folding and spreading. A wooden spoon can also work.
- Plastic wrap: To cover the tiramisú while it chills. A lid or plate can be a good alternative.
Variations of Tiramisú de Mora
- Tiramisú de Mora Vegano: Sustituye el queso mascarpone por un queso vegano a base de anacardos y utiliza crema de coco en lugar de crema para batir. Asegúrate de que los bizcochos de soletilla sean veganos.
- Tiramisú de Mora Sin Gluten: Opta por bizcochos de soletilla sin gluten o hazlos tú misma con harina de almendra o harina de avena. ¡Delicioso y apto para todos!
- Tiramisú de Mora con Chocolate: Agrega trozos de chocolate negro entre las capas de crema y frambuesas para un toque extra de indulgencia. ¡El chocolate y las frambuesas son una combinación ganadora!
- Tiramisú de Mora con Otras Frutas: Experimenta con diferentes frutas como fresas, arándanos o incluso mango. Cada fruta aportará su propio sabor único y fresco.
- Tiramisú de Mora con Café Aromatizado: Prueba usar café con sabor, como vainilla o avellana, para darle un giro interesante a la base de café. ¡Una explosión de sabor en cada bocado!
Serving Suggestions for Tiramisú de Mora
- Pair your Tiramisú de Mora with a cup of freshly brewed coffee or a light herbal tea for a delightful contrast.
- Serve with a side of whipped cream for an extra touch of indulgence.
- For a beautiful presentation, use clear glass dishes to showcase the layers.
- Add a sprinkle of fresh mint leaves for a pop of color and freshness.
- Consider serving with a fruit salad for a refreshing balance to the rich dessert.
FAQs about Tiramisú de Mora
As you embark on your journey to create this delightful Tiramisú de Mora, you might have a few questions. Don’t worry; I’ve got you covered! Here are some common queries that pop up when making this scrumptious dessert:
1. Can I make Tiramisú de Mora ahead of time?
Absolutely! In fact, making it a day in advance is ideal. The flavors meld beautifully overnight, and the texture improves, making it even more delicious. Just be sure to keep it covered in the fridge until you’re ready to serve!
2. What can I substitute for mascarpone cheese?
If you can’t find mascarpone, you can use a mixture of cream cheese and heavy cream as a substitute. Just blend equal parts of each until smooth. It won’t be exactly the same, but it will still yield a creamy and tasty result!
3. Is it possible to make a non-alcoholic version of this dessert?
Definitely! Simply skip the licor de frambuesa and stick to the coffee mixture. You can also add a splash of vanilla extract for extra flavor without the alcohol. Your family will love it just the same!
4. How long can I store leftover Tiramisú de Mora?
Leftover tiramisú can be stored in the fridge for up to 3 days. Just make sure it’s covered well to keep it fresh. However, I doubt there will be much left after everyone gets a taste!
5. Can I use frozen raspberries instead of fresh?
While fresh raspberries are ideal for this Tiramisú de Mora, you can use frozen ones in a pinch. Just thaw them and drain any excess liquid before layering. They’ll still add that lovely fruity flavor!
Final Thoughts
Making this Tiramisú de Mora is more than just whipping up a dessert; it’s about creating a moment of joy for yourself and your loved ones. The blend of creamy mascarpone, fresh raspberries, and that hint of coffee brings a delightful balance that’s hard to resist. Whether it’s a family gathering or a quiet evening at home, this dessert adds a touch of elegance and happiness to any occasion. So, roll up your sleeves, embrace the process, and enjoy every delicious bite. Trust me, you’ll be the star of the kitchen, and your family will thank you for it!
Print
Tiramisú de Mora: ¡Descubre esta deliciosa receta!
- Total Time: 4 horas 30 minutos
- Yield: 8 porciones 1x
- Diet: Vegetarian
Description
Delicioso tiramisú de mora, una variante fresca y afrutada del clásico postre italiano.
Ingredients
- 250 g de queso mascarpone
- 200 ml de crema para batir
- 100 g de azúcar moreno
- 200 g de frambuesas frescas
- 1 taza de café frío
- 24 bizcochos de soletilla
- 2 cucharadas de licor de frambuesa (opcional)
- Cacao en polvo para decorar
- Unas hojas de albahaca para decorar
Instructions
- En un tazón grande, bate la crema para batir junto con el azúcar moreno hasta que obtengas picos firmes. Luego, con movimientos envolventes, agrega el queso mascarpone hasta que esté bien integrado.
- En un plato hondo, combina el café frío con el licor de frambuesa, si decides usarlo.
- Sumerge cada bizcocho de soletilla en la mezcla de café por un instante, cuidando que no se empapen demasiado.
- En un molde cuadrado, coloca una primera capa de bizcochos en el fondo. Luego, vierte una porción de la mezcla de mascarpone y crema, y distribuye algunas frambuesas sobre esta capa.
- Repite el procedimiento alternando capas de bizcochos, mezcla de mascarpone y frambuesas hasta que termines con los ingredientes, asegurándote de finalizar con la mezcla de mascarpone.
- Cubre el molde con papel film y deja enfriar en la nevera durante al menos 4 horas, aunque lo ideal es dejarlo toda la noche.
- Justo antes de servir, espolvorea cacao en polvo por encima y adorna con frambuesas frescas y hojas de albahaca. ¡Disfruta de tu exquisito tiramisú de frambuesa!
Notes
- Para un sabor más intenso, utiliza café expreso.
- El licor de frambuesa es opcional, pero añade un toque especial.
- Dejar reposar toda la noche mejora la textura y el sabor del tiramisú.
- Prep Time: 30 minutos
- Cook Time: 0 minutos
- Category: Postre
- Method: Refrigeración
- Cuisine: Italiana
Nutrition
- Serving Size: 1 porción
- Calories: 350
- Sugar: 25 g
- Sodium: 50 mg
- Fat: 20 g
- Saturated Fat: 10 g
- Unsaturated Fat: 8 g
- Trans Fat: 0 g
- Carbohydrates: 30 g
- Fiber: 2 g
- Protein: 5 g
- Cholesterol: 60 mg