
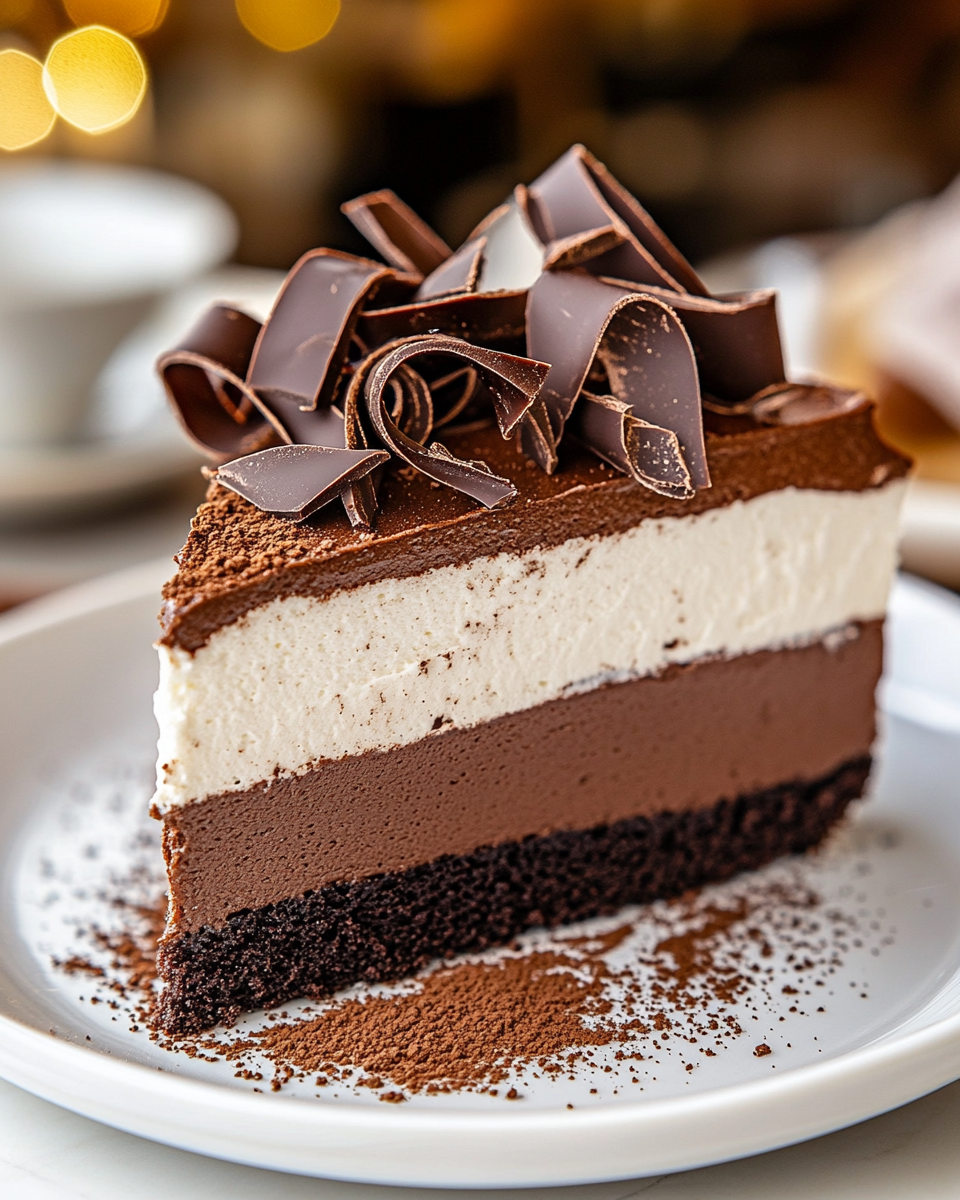
Introduction to Tarta de Crema de Chocolate
Hey there, fellow chocolate lovers! If you’re anything like me, you know that life can get pretty hectic, especially when juggling work, family, and everything in between. That’s why I’m excited to share my go-to recipe for Tarta de Crema de Chocolate. This delightful dessert is not just a treat for the taste buds; it’s a quick solution for those busy days when you want to impress your loved ones without spending hours in the kitchen. With its rich chocolate flavor and creamy texture, this tarta is sure to become a favorite in your home!
Why You’ll Love This Tarta de Crema de Chocolate
This Tarta de Crema de Chocolate is a dream come true for busy women like us! It’s incredibly easy to whip up, taking just about 30 minutes of hands-on time. Plus, the rich, velvety chocolate flavor is simply irresistible. Whether you’re celebrating a special occasion or just need a sweet pick-me-up after a long day, this tarta is the perfect way to treat yourself and your family without the fuss!
Ingredients for Tarta de Crema de Chocolate
Let’s dive into the delicious components that make up this Tarta de Crema de Chocolate. Each ingredient plays a vital role in creating that rich, creamy goodness we all crave. Here’s what you’ll need:
- Base de tarta de galleta: You can use Digestive or graham crackers for a sweet, crunchy crust. It’s the perfect foundation for our creamy filling.
- Chocolate negro: Aim for chocolate with at least 70% cacao for a deep, rich flavor. If you prefer something sweeter, feel free to swap in milk chocolate!
- Crema para batir: This heavy cream is what gives our tarta its luscious texture. You can use a lighter version if you’re watching your calories, but the taste will be a bit different.
- Azúcar: A little sweetness goes a long way! This balances the bitterness of the dark chocolate. You can adjust the amount based on your taste preferences.
- Yemas de huevo: These add richness and help thicken the filling. They’re essential for that smooth, custard-like consistency.
- Fécula de maíz: Also known as cornstarch, this helps stabilize the filling, ensuring it sets perfectly. It’s a must for that creamy texture!
- Esencia de vainilla: A splash of vanilla enhances the chocolate flavor, making it even more delightful. You can use pure vanilla extract for the best taste.
- Pizca de sal: Just a pinch of salt elevates the flavors, bringing out the chocolate’s richness. Don’t skip this step!
- Chocolate rallado o virutas de chocolate: These are optional but make for a beautiful and tasty decoration on top of your tarta.
For exact measurements, check the bottom of the article where you can find everything listed for easy printing. Now that we have our ingredients ready, let’s get cooking!
How to Make Tarta de Crema de Chocolate
Now that we have our ingredients ready, let’s get into the fun part—making this delicious Tarta de Crema de Chocolate! Follow these simple steps, and you’ll have a show-stopping dessert that’s sure to impress.
Step 1: Preheat the Oven
First things first, let’s get that oven preheating to 180°C (350°F). Preheating is crucial because it ensures that your crust bakes evenly and gets that perfect crunch. While the oven warms up, grab your base de tarta de galleta and press it into your tart pan. This will be the sturdy foundation for our creamy filling. Bake it for about 10 minutes, just enough to firm it up a bit. Once it’s done, let it cool completely. Trust me, a well-prepared crust makes all the difference!
Step 2: Prepare the Cream Mixture
Next, let’s whip up that luscious cream mixture! In a medium saucepan, pour in 300 ml of crema para batir and add the azúcar along with a pinch of salt. Heat it over medium heat, stirring gently until the sugar dissolves completely. You want to see tiny bubbles forming around the edges, but don’t let it boil. This step is all about infusing the cream with sweetness and flavor, setting the stage for our rich filling.
Step 3: Temper the Egg Yolks
Now, let’s talk about those yemas de huevo. In a separate bowl, whisk together the egg yolks and the fécula de maíz until smooth. This is where the magic happens! To prevent the yolks from scrambling, we need to temper them. Slowly pour a bit of the warm cream mixture into the yolks while whisking constantly. This warms them up gradually. Once combined, pour everything back into the saucepan. This little trick ensures a silky-smooth filling!
Step 4: Thicken the Mixture
Time to thicken things up! Place the saucepan back on the heat and cook the mixture, stirring continuously. You’ll notice it starting to thicken and bubble gently. Keep stirring until it reaches a custard-like consistency—this usually takes about 5-7 minutes. Once it’s thickened, remove it from the heat and add the chopped chocolate negro and the esencia de vainilla. Stir until the chocolate is completely melted and the mixture is smooth and glossy. Oh, the aroma is heavenly!
Step 5: Assemble the Tarta
Now comes the fun part—assembling our Tarta de Crema de Chocolate! Carefully pour the chocolate mixture over the cooled crust, spreading it evenly. It’s like a warm hug for your tart! Let it cool at room temperature for a bit, then cover it with plastic wrap and pop it in the fridge. You’ll want to let it chill for at least 4 hours, or overnight if you can wait. This allows the filling to set perfectly, making it easier to slice later.
Step 6: Whip the Cream
While we wait, let’s prepare the topping! Take the remaining 100 ml of crema para batir and whip it until soft peaks form. This will add a light, airy touch to our rich tarta. You can sweeten it with a little sugar if you like, but I usually keep it simple. Once whipped, set it aside in the fridge until you’re ready to serve. It’s the perfect finishing touch!
Step 7: Serve and Enjoy
Finally, the moment we’ve all been waiting for! Once your tarta has chilled and set, take it out of the fridge. Gently remove it from the tart pan and place it on a serving platter. Spread the whipped cream on top, and don’t be shy with the chocolate rallado or virutas de chocolate for decoration. Now, grab a sharp knife and cut it into slices. Serve it up and watch as your family’s eyes light up with delight. Enjoy every bite of this creamy, chocolatey goodness!
Tips for Success
- Make sure your ingredients are at room temperature for better mixing.
- Don’t rush the cooling process; letting the tarta chill properly ensures a perfect slice.
- Use high-quality chocolate for the best flavor—trust me, it makes a difference!
- Feel free to experiment with toppings; fresh berries or a drizzle of caramel can elevate your tarta.
- For a fun twist, add a splash of coffee to the chocolate mixture for a mocha flavor!
Equipment Needed
- Tart pan: A standard tart pan works best, but a pie dish can be a great alternative.
- Medium saucepan: Essential for heating the cream; any sturdy pot will do.
- Whisk: A hand whisk is perfect, but an electric mixer can save time.
- Mixing bowls: Use any size you have on hand for mixing ingredients.
- Spatula: A silicone spatula is great for scraping down the sides of the bowl.
Variations
- Chocolate Mint: Add a few drops of peppermint extract to the chocolate mixture for a refreshing minty twist.
- Nutty Delight: Incorporate crushed nuts like hazelnuts or almonds into the crust for added texture and flavor.
- Fruit Fusion: Top your tarta with fresh berries or sliced bananas for a fruity contrast to the rich chocolate.
- Gluten-Free Option: Use gluten-free cookies for the crust to make this dessert suitable for those with gluten sensitivities.
- Vegan Version: Substitute the cream with coconut cream and use dairy-free chocolate for a delicious vegan treat.
Serving Suggestions
- Pair your Tarta de Crema de Chocolate with a scoop of vanilla ice cream for a delightful contrast.
- Serve alongside fresh berries like raspberries or strawberries for a pop of color and tartness.
- Drizzle with chocolate sauce or caramel for an extra indulgent touch.
- Enjoy with a cup of coffee or a glass of dessert wine to elevate the experience.
- For a beautiful presentation, dust with powdered sugar before serving!
FAQs about Tarta de Crema de Chocolate
As you embark on your journey to create this delightful Tarta de Crema de Chocolate, you might have a few questions. Don’t worry; I’ve got you covered! Here are some common queries I’ve encountered, along with helpful answers to guide you along the way.
1. Can I make Tarta de Crema de Chocolate ahead of time?
Absolutely! In fact, making this tarta a day in advance is a great idea. It allows the flavors to meld beautifully and ensures that the filling sets perfectly. Just keep it covered in the fridge until you’re ready to serve. Your future self will thank you for the time saved!
2. What can I use instead of heavy cream?
If you’re looking for a lighter option, you can use half-and-half or a lower-fat cream. Just keep in mind that the texture might be slightly different. For a dairy-free alternative, coconut cream works wonderfully and adds a lovely tropical flavor!
3. How do I store leftovers?
Leftover Tarta de Crema de Chocolate can be stored in an airtight container in the fridge for up to 3 days. Just make sure to keep it covered to maintain its freshness. If you’re like me, you might want to hide a slice or two for yourself!
4. Can I freeze the tarta?
Yes, you can freeze this tarta! Just make sure it’s well-wrapped in plastic wrap and then placed in an airtight container. It can be frozen for up to a month. When you’re ready to enjoy it, let it thaw in the fridge overnight before serving.
5. What’s the best way to cut the tarta for serving?
To get those perfect slices, use a sharp knife and dip it in hot water before cutting. Wipe the knife clean between slices for a neat presentation. This little trick makes all the difference, especially when serving guests!
Final Thoughts
Creating this Tarta de Crema de Chocolate is more than just baking; it’s about bringing joy to your home. The rich, creamy layers and the delightful crunch of the crust make every bite a celebration. Whether it’s a special occasion or a simple family dinner, this tarta is sure to impress. Plus, knowing you made it with love adds an extra sprinkle of happiness. So, gather your loved ones, slice up this delicious dessert, and enjoy the smiles it brings. Trust me, it’s a sweet moment you won’t want to miss!
“` Print
Tarta de Crema de Chocolate: Disfruta un postre único.
- Total Time: 4 horas 40 minutos
- Yield: 8 porciones 1x
- Diet: Vegetarian
Description
Deliciosa tarta de chocolate con una suave crema, perfecta para cualquier ocasión.
Ingredients
- 1 base de tarta de galleta (puede ser de galletas tipo Digestive o graham)
- 200 g de chocolate negro (70% cacao)
- 400 ml de crema para batir
- 100 g de azúcar
- 3 yemas de huevo
- 2 cucharadas de fécula de maíz
- 1 cucharadita de esencia de vainilla
- Pizca de sal
- Chocolate rallado o virutas de chocolate para decorar
Instructions
- Comienza precalentando el horno a 180°C. Coloca la base de galleta en un molde y hornea durante 10 minutos para que se endurezca ligeramente. Sácala del horno y deja que se enfríe por completo.
- En una olla a fuego medio, calienta 300 ml de crema con el azúcar y una pizca de sal, removiendo hasta que el azúcar se disuelva completamente.
- En un tazón, mezcla las yemas de huevo con la fécula de maíz. Agrega un poco de la mezcla caliente a las yemas para que se templen, y luego incorpora todo de nuevo a la olla.
- Cocina a fuego lento, removiendo sin parar, hasta que la mezcla espese y empiece a burbujear. Retira del fuego y añade el chocolate negro troceado junto con la esencia de vainilla, mezclando hasta que el chocolate esté completamente derretido.
- Vierte la mezcla de chocolate sobre la base de galleta y deja que se enfríe a temperatura ambiente. Luego, cubre con papel film y refrigera por un mínimo de 4 horas.
- Antes de servir, bate el resto de la crema (100 ml) hasta que esté montada y extiéndela sobre la tarta. Decora con chocolate rallado o virutas de chocolate al gusto.
- Corta en porciones y disfruta de esta exquisita tarta de chocolate y nata.
Notes
- Se puede usar chocolate con leche si prefieres un sabor más dulce.
- La tarta se puede preparar un día antes para que esté bien refrigerada.
- Para una versión más ligera, puedes usar crema baja en grasa.
- Prep Time: 30 minutos
- Cook Time: 10 minutos
- Category: Postre
- Method: Horneado y refrigerado
- Cuisine: Internacional
Nutrition
- Serving Size: 1 porción
- Calories: 350
- Sugar: 20 g
- Sodium: 50 mg
- Fat: 25 g
- Saturated Fat: 15 g
- Unsaturated Fat: 5 g
- Trans Fat: 0 g
- Carbohydrates: 30 g
- Fiber: 2 g
- Protein: 5 g
- Cholesterol: 100 mg