
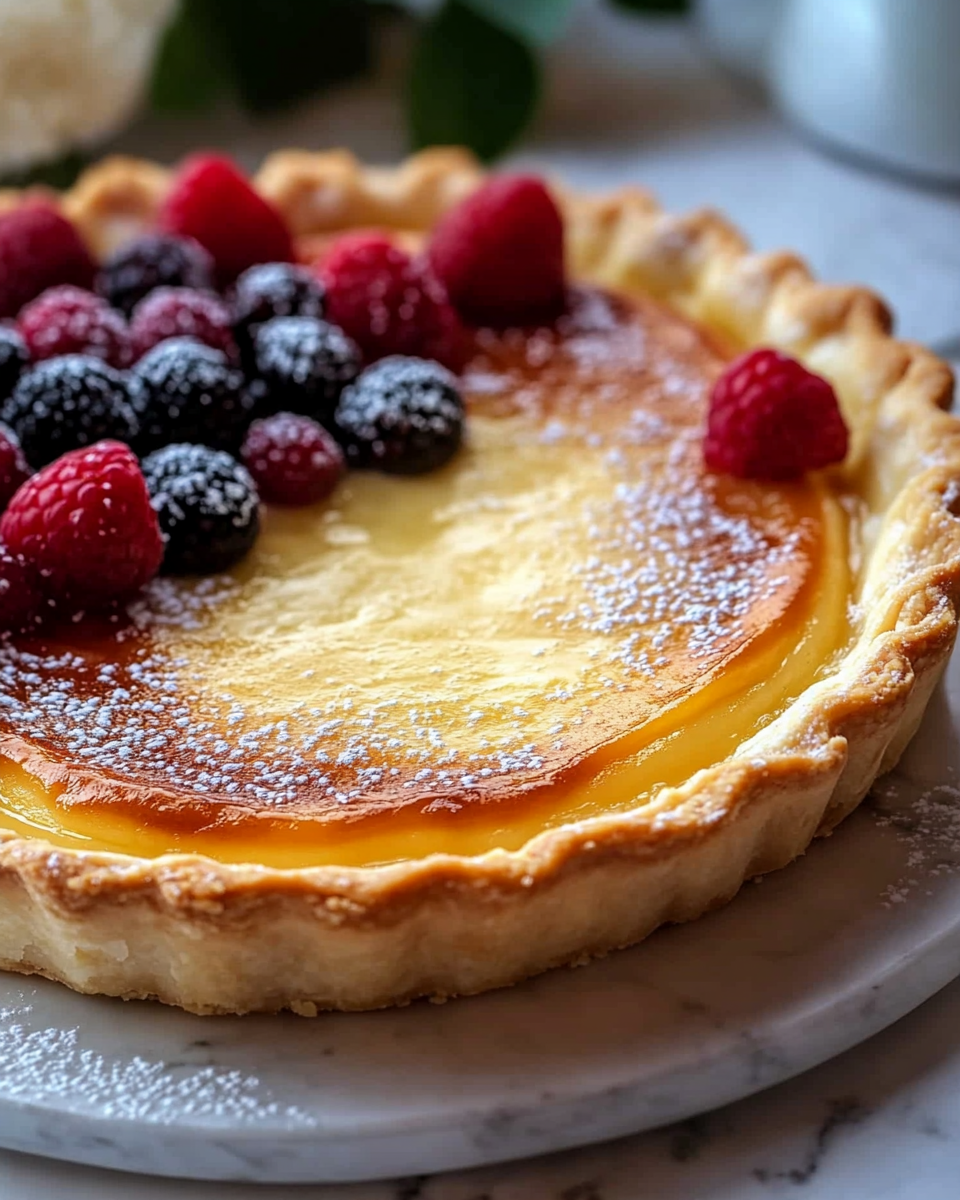
Introduction to Tarta Clásica de Crema Pastelera de Vainilla
Hola, amigas! If you’re anything like me, you know that life can get pretty hectic. Between juggling work, family, and everything in between, finding time to whip up something special can feel like a daunting task. That’s where this Tarta Clásica de Crema Pastelera de Vainilla comes in! It’s a delightful dessert that’s not only easy to make but also sure to impress your loved ones. Whether it’s a birthday, a family gathering, or just a sweet treat for a busy weeknight, this tart is the perfect solution. Let’s dive into this deliciousness together!
Why You’ll Love This Tarta Clásica de Crema Pastelera de Vainilla
This Tarta Clásica de Crema Pastelera de Vainilla is a game-changer for busy women like us! It’s incredibly easy to whip up, taking just a little over two hours from start to finish. The creamy vanilla filling is rich and satisfying, making it a hit with both kids and adults. Plus, it’s versatile enough for any occasion, so you can impress your guests without breaking a sweat!
Ingredients for Tarta Clásica de Crema Pastelera de Vainilla
Let’s gather our ingredients for this delightful Tarta Clásica de Crema Pastelera de Vainilla. Don’t worry; I’ll keep it simple! You can find the exact measurements at the bottom of the article for easy printing. Here’s what you’ll need:
- Base de masa quebrada: You can either buy a pre-made tart shell or make your own from scratch. If you’re short on time, the store-bought option is a lifesaver!
- Leche entera: Whole milk gives the cream a rich and creamy texture. If you’re looking for a lighter option, you can use 2% milk, but the flavor might be slightly less indulgent.
- Azúcar: This sweetener is essential for balancing the flavors in the cream. You can use granulated sugar, but feel free to experiment with alternatives like coconut sugar for a different twist.
- Yemas de huevo: The egg yolks are the secret to a luscious, velvety cream. They add richness and help thicken the mixture, so don’t skip this ingredient!
- Maicena: Cornstarch is your thickening agent here. It helps the cream set perfectly, giving it that delightful texture we all love.
- Vaina de vainilla: Fresh vanilla beans elevate the flavor to a whole new level. If you can’t find them, 2 teaspoons of pure vanilla extract will do the trick.
- Mantequilla: Butter adds a lovely richness and helps to create a smooth finish in the cream. Use unsalted butter for better control over the sweetness.
- Pizca de sal: A pinch of salt enhances the flavors and balances the sweetness. It’s a small but mighty ingredient!
- Azúcar glas (opcional): This powdered sugar is perfect for dusting on top before serving. It adds a lovely touch of sweetness and makes your tart look extra special.
Now that we have our ingredients ready, we’re all set to create this delicious Tarta Clásica de Crema Pastelera de Vainilla. Let’s move on to the fun part—making it!
How to Make Tarta Clásica de Crema Pastelera de Vainilla
Now that we have our ingredients ready, let’s get our hands a little messy and create this delightful Tarta Clásica de Crema Pastelera de Vainilla. Follow these simple steps, and I promise you’ll be rewarded with a creamy, dreamy dessert that will have everyone asking for seconds!
Step 1: Preheat the Oven
First things first, let’s preheat that oven to 180°C (350°F). Preheating is crucial because it ensures that your tart base cooks evenly and gets that lovely golden color. While the oven warms up, grab your base de masa quebrada and place it in a tart pan. Use a fork to poke holes in the bottom. This little trick prevents the crust from puffing up while baking. Bake it for about 15 minutes or until it’s beautifully golden. Once done, let it cool completely. Trust me, a well-prepared base is the foundation of a great tart!
Step 2: Prepare the Cream
Next, let’s make that luscious cream! In a medium saucepan, pour in the whole milk and add the opened vaina de vainilla (or your vanilla extract). This step is where the magic happens! Heating the milk with the vanilla infuses it with that rich, aromatic flavor we all love. Bring it to a gentle boil, then remove it from the heat. Let it sit for a few minutes to allow the flavors to meld. Your kitchen will smell heavenly, and you’ll be tempted to sneak a taste!
Step 3: Mix the Egg Yolks
In a separate bowl, it’s time to whisk those egg yolks! Combine the yolks with the sugar and maicena (cornstarch). Whisk them together until the mixture becomes light and creamy. This step is essential because it helps to create that velvety texture in your cream. Make sure there are no lumps from the cornstarch; we want a smooth filling. It’s like creating a little magic potion that will transform into a delicious dessert!
Step 4: Combine Ingredients
Now, let’s bring it all together! Slowly pour the hot milk mixture into the egg yolk mixture, whisking continuously. This is super important—if you pour too quickly, you might end up with scrambled eggs instead of a smooth cream. Take your time and enjoy the process! Once combined, return the mixture to the saucepan. This is where the real thickening happens.
Step 5: Cook the Mixture
Place the saucepan back on medium heat. Stir the mixture constantly with a wooden spoon or a whisk. You’ll notice it starting to thicken after a few minutes. Keep an eye on it; you want it to bubble gently, not boil vigorously. When it reaches a pudding-like consistency, remove it from the heat. This is the moment to add the butter, stirring until it melts completely. Your cream should be smooth and glossy, ready to fill that tart shell!
Step 6: Assemble the Tart
Finally, it’s time to assemble our masterpiece! Pour the creamy filling into the cooled tart shell, smoothing the top with a spatula. Let it cool at room temperature for a bit, then pop it in the fridge for at least two hours. This chilling time allows the cream to set perfectly. When you’re ready to serve, sprinkle a little azúcar glas on top for that extra touch of sweetness. And voilà! You’ve created a stunning Tarta Clásica de Crema Pastelera de Vainilla that’s sure to impress!
Tips for Success
- Always preheat your oven to ensure even baking.
- Use a fork to poke holes in the tart base to prevent puffing.
- Whisk the egg yolks thoroughly to avoid lumps in your cream.
- Pour the hot milk slowly into the egg mixture to prevent curdling.
- Let the tart chill for at least two hours for the best texture.
Equipment Needed
- Tart pan: A standard tart pan works best, but a pie dish can be a great alternative.
- Medium saucepan: Any saucepan will do, just ensure it has a heavy bottom for even heating.
- Whisk: A hand whisk is perfect, but an electric mixer can save time.
- Spatula: A silicone spatula is ideal for smooth mixing and scraping.
- Mixing bowls: Use any size, but a medium bowl is perfect for the egg mixture.
Variations
- Chocolate Twist: Add 100g of melted dark chocolate to the cream mixture for a rich chocolate version of the Tarta Clásica de Crema Pastelera de Vainilla.
- Fruit Topping: Top the tart with fresh berries or sliced fruits like strawberries, kiwi, or peaches for a refreshing twist.
- Almond Flavor: Substitute the vanilla with almond extract for a nutty flavor that pairs beautifully with the cream.
- Gluten-Free Option: Use a gluten-free tart crust to make this dessert suitable for those with gluten sensitivities.
- Vegan Version: Replace the egg yolks with silken tofu and use almond milk instead of whole milk for a plant-based alternative.
Serving Suggestions
- Pair your Tarta Clásica de Crema Pastelera de Vainilla with a dollop of freshly whipped cream for added indulgence.
- Serve alongside a cup of rich coffee or a refreshing herbal tea to balance the sweetness.
- For a pop of color, garnish with fresh berries or mint leaves on top.
- Present the tart on a beautiful cake stand for an elegant touch at gatherings.
FAQs about Tarta Clásica de Crema Pastelera de Vainilla
As you embark on your journey to create this delightful Tarta Clásica de Crema Pastelera de Vainilla, you might have a few questions. Don’t worry; I’ve got you covered! Here are some common queries that pop up when making this creamy dessert:
1. Can I make the cream ahead of time?
Absolutely! You can prepare the crema pastelera a day in advance. Just store it in an airtight container in the fridge. When you’re ready to assemble your tart, give it a good stir to smooth it out before pouring it into the crust.
2. How do I know when the cream is thick enough?
Great question! The cream should be thick enough to coat the back of a spoon. When you stir it, it should leave a trail. If it’s still runny, keep cooking it on medium heat, stirring constantly until it reaches that perfect pudding-like consistency.
3. Can I use a different flavor of extract?
Of course! While vanilla is classic, you can experiment with other extracts like almond or hazelnut for a unique twist. Just remember to adjust the amount to your taste, as some extracts can be stronger than others.
4. What should I do if my tart crust is too crumbly?
If your crust is crumbly, it might need a bit more moisture. Try adding a teaspoon of cold water or milk to the dough while mixing. If you’re using a store-bought crust, make sure it’s thawed properly before baking to avoid crumbling.
5. How long can I store the Tarta Clásica de Crema Pastelera de Vainilla?
This tart can be stored in the fridge for up to three days. Just make sure to cover it with plastic wrap to keep it fresh. The flavors will continue to develop, making it even more delicious!
Final Thoughts
Creating this Tarta Clásica de Crema Pastelera de Vainilla is more than just baking; it’s about bringing joy to your kitchen and your loved ones. The creamy, dreamy filling paired with a perfectly baked crust is a little slice of happiness that can brighten any day. Whether you’re celebrating a special occasion or simply treating yourself after a long week, this tart is sure to impress. So roll up your sleeves, embrace the process, and enjoy the sweet rewards of your hard work. Trust me, every bite will be worth it!
“` Print
Tarta Clásica de Crema Pastelera de Vainilla: Deliciosa y Fácil
- Total Time: 2 horas 45 minutos
- Yield: 8 porciones 1x
- Diet: Vegetarian
Description
Deliciosa tarta clásica de crema pastelera de vainilla, fácil de preparar y perfecta para cualquier ocasión.
Ingredients
- 1 base de masa quebrada (puedes usar una comprada o hacerla tú mismo)
- 500 ml de leche entera
- 150 g de azúcar
- 4 yemas de huevo
- 40 g de maicena
- 1 vaina de vainilla (o 2 cucharaditas de extracto de vainilla)
- 50 g de mantequilla
- Pizca de sal
- Azúcar glas para decorar (opcional)
Instructions
- Comienza por precalentar el horno a 180°C. Coloca la masa quebrada en un molde para tarta y utiliza un tenedor para pinchar la base. Hornea durante 15 minutos o hasta que adquiera un color dorado. Saca del horno y deja que se enfríe completamente.
- En una olla, calienta la leche junto con la vaina de vainilla abierta (o el extracto) y una pizca de sal. Lleva a ebullición y luego retira del fuego.
- En un tazón, bate las yemas de huevo con el azúcar hasta que la mezcla se vuelva clara y cremosa. Incorpora la maicena y mezcla bien para que no queden grumos.
- Vierte la leche caliente poco a poco sobre la mezcla de yemas, batiendo sin parar para evitar que se cuajen.
- Regresa la mezcla a la olla y cocina a fuego medio, removiendo constantemente, hasta que espese y empiece a burbujear. Retira del fuego y añade la mantequilla, mezclando hasta que se derrita por completo.
- Vierte la crema suave sobre la base de la tarta que ya está fría y alisa la superficie con una espátula. Deja que se enfríe a temperatura ambiente y luego refrigera por un mínimo de 2 horas.
- Antes de servir, si lo deseas, espolvorea con azúcar glas y disfruta de esta exquisita tarta de vainilla.
Notes
- Se puede usar masa quebrada comprada para ahorrar tiempo.
- La tarta se puede refrigerar por más tiempo para un mejor sabor.
- El azúcar glas es opcional, pero añade un toque decorativo.
- Prep Time: 30 minutos
- Cook Time: 15 minutos
- Category: Postre
- Method: Horneado
- Cuisine: Española
Nutrition
- Serving Size: 1 porción
- Calories: 250
- Sugar: 20 g
- Sodium: 50 mg
- Fat: 10 g
- Saturated Fat: 6 g
- Unsaturated Fat: 4 g
- Trans Fat: 0 g
- Carbohydrates: 35 g
- Fiber: 1 g
- Protein: 5 g
- Cholesterol: 150 mg