
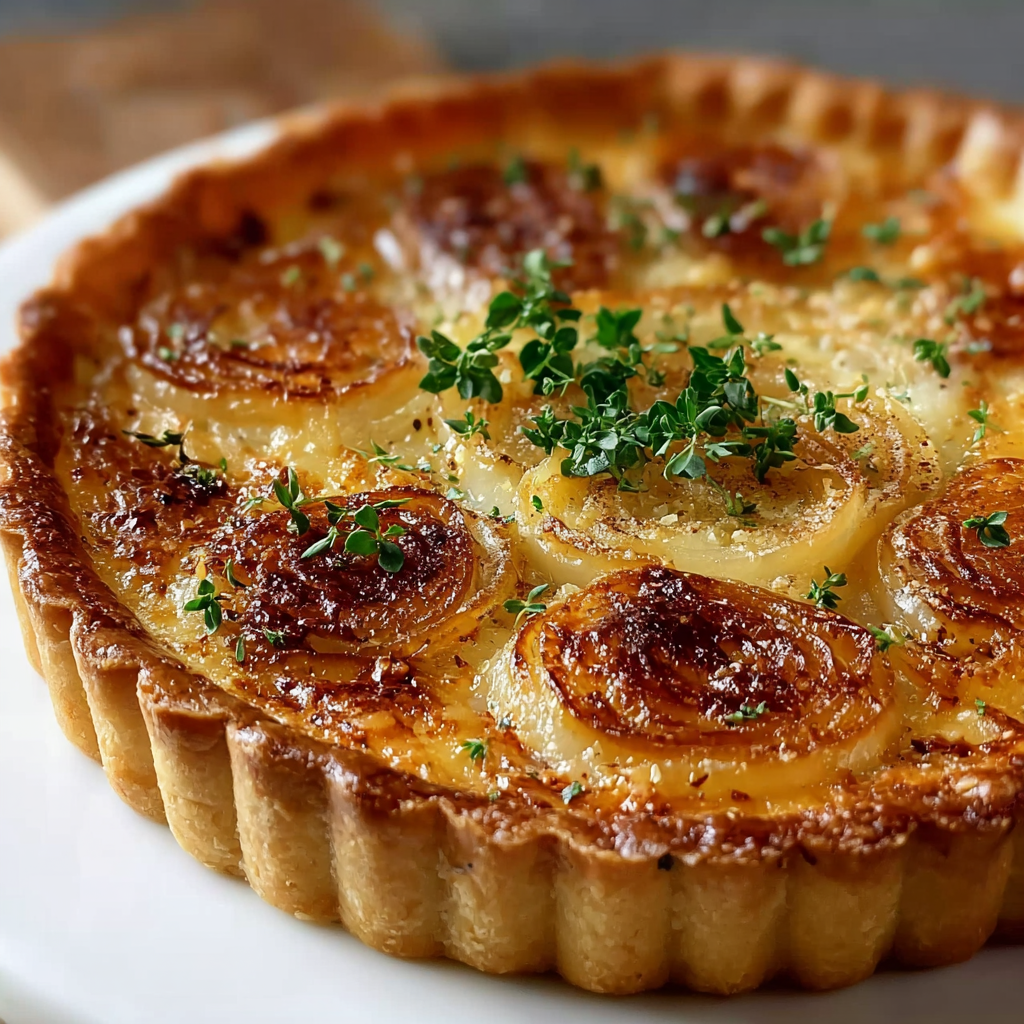
Introduction to Tarta alsaciana de cebolla y queso blanco
Hola, amigas! If you’re anything like me, your days can feel like a whirlwind of work, family, and endless to-do lists. That’s why I’m excited to share my go-to recipe for Tarta alsaciana de cebolla y queso blanco. This delightful dish is not just a feast for the eyes; it’s a quick solution for those busy evenings when you want to impress your loved ones without spending hours in the kitchen. With its rich flavors and comforting textures, this tarta is sure to become a family favorite, making your meal times feel special again!
Why You’ll Love This Tarta alsaciana de cebolla y queso blanco
Let’s be honest—life can get hectic, and finding time to cook can feel like a juggling act. That’s where this Tarta alsaciana de cebolla y queso blanco shines! It’s not only easy to whip up, but it also packs a punch of flavor that will have your family asking for seconds. Plus, it’s versatile enough to serve as a main dish or a delightful appetizer, making it perfect for any occasion!
Ingredients for Tarta alsaciana de cebolla y queso blanco
Now, let’s gather our ingredients for this scrumptious Tarta alsaciana de cebolla y queso blanco. Don’t worry; I’ll keep it simple and straightforward. Here’s what you’ll need:
- Base de masa quebrada: You can either buy a pre-made crust or make your own from scratch. If you’re short on time, the store-bought option is a lifesaver!
- Cebollas grandes: Three large onions, sliced thinly. They’re the star of the show, bringing sweetness and depth to the tarta.
- Queso blanco: This creamy cheese adds a lovely texture. If you can’t find it, ricotta or cottage cheese can work as substitutes.
- Crema de leche: A splash of heavy cream makes the filling rich and luscious. You can swap it for half-and-half if you prefer a lighter option.
- Huevos: Two eggs help bind everything together, giving the tarta its structure.
- Queso rallado: About 100 grams of grated cheese, like gruyère or emmental, adds a delightful cheesy flavor. Feel free to experiment with your favorite cheese!
- Aceite de oliva: A couple of tablespoons for sautéing the onions. It adds a nice flavor and helps with caramelization.
- Sal y pimienta: To taste, of course! These basic seasonings enhance all the flavors.
- Nuez moscada: This is optional, but a pinch can elevate the dish with a warm, nutty aroma.
- Perejil fresco: Chopped parsley for garnish. It adds a pop of color and freshness to your tarta.
For exact measurements, don’t forget to check the bottom of the article where you can find everything listed for easy printing. Now, let’s get cooking!
How to Make Tarta alsaciana de cebolla y queso blanco
Now that we have our ingredients ready, let’s dive into the fun part—making this delicious Tarta alsaciana de cebolla y queso blanco! Follow these simple steps, and you’ll have a mouthwatering dish that will impress everyone at the table.
Preheat the Oven and Prepare the Crust
First things first, let’s get that oven preheating to 180°C (350°F). This is crucial because a hot oven helps the crust bake evenly and become nice and crispy.
While the oven warms up, take your base de masa quebrada and place it in a tart pan. If you’re using a store-bought crust, it’s a breeze! Just unroll it and fit it into the pan. Use a fork to poke holes in the bottom of the crust. This little trick prevents it from puffing up while baking. Trust me, you don’t want a ballooning crust!
Caramelize the Onions
Next, let’s move on to the onions. In a medium skillet, heat a couple of tablespoons of olive oil over medium heat. Once it’s hot, toss in those thinly sliced onions. Stir them occasionally, letting them cook for about 15 minutes. You want them to turn a beautiful golden brown and become sweet and caramelized. This step is where the magic happens! The onions will develop a rich flavor that will elevate your tarta to new heights.
Mix the Filling
Now, grab a large mixing bowl and combine the queso blanco, crema de leche, and eggs. Whisk them together until you have a smooth mixture. It should be creamy and inviting! Then, add in the grated cheese, salt, pepper, and if you’re feeling adventurous, a pinch of nutmeg. This spice adds a warm, cozy flavor that complements the onions beautifully. Mix everything until well combined.
Combine and Pour
Once your onions are caramelized and slightly cooled, gently fold them into the cheese mixture. Be careful not to break them apart too much; we want those lovely onion pieces to shine in the tarta! Now, pour this delicious filling into your prepared crust, spreading it evenly. It’s like a warm hug in a pie!
Bake the Tarta
Time to bake! Place your tarta in the preheated oven and let it bake for about 30 to 35 minutes. You’ll know it’s done when the top is golden brown and the center is set. A little tip: if you gently shake the pan, the filling should jiggle slightly but not be liquidy. If it’s still wobbly, give it a few more minutes.
Cool and Serve
Once your tarta is out of the oven, let it cool for about 10 minutes. This resting time helps it set up a bit more, making it easier to slice. Before serving, sprinkle some fresh chopped parsley on top for a pop of color and freshness. You can serve it warm or at room temperature—either way, it’s going to be a hit!
Tips for Success
- Use a good quality olive oil for caramelizing the onions; it enhances the flavor.
- Don’t rush the onion caramelization; patience is key for that sweet, rich taste.
- Let the tarta cool slightly before slicing; it helps maintain its shape.
- Feel free to experiment with different cheeses for a unique twist!
- Make it ahead of time; it tastes even better the next day!
Equipment Needed
- Tart pan: A standard tart pan works best, but a pie dish can be a great alternative.
- Medium skillet: For caramelizing onions; a non-stick skillet makes cleanup easier.
- Mixing bowl: Any large bowl will do for mixing the filling.
- Whisk: A whisk is ideal, but a fork can work in a pinch.
- Fork: For poking holes in the crust; any fork will suffice!
Variations
- Vegetable Medley: Add some sautéed mushrooms, spinach, or bell peppers to the filling for extra flavor and nutrition.
- Meat Lover’s Delight: Incorporate cooked bacon or ham for a savory twist that meat lovers will adore.
- Gluten-Free Option: Use a gluten-free pie crust or make a crustless version by baking the filling directly in a greased pan.
- Herb Infusion: Experiment with fresh herbs like thyme or rosemary mixed into the filling for an aromatic touch.
- Spicy Kick: Add a pinch of red pepper flakes or some diced jalapeños for a bit of heat!
Serving Suggestions
- Fresh Salad: Pair your tarta with a light green salad dressed in a tangy vinaigrette for a refreshing contrast.
- Wine Pairing: A crisp white wine, like Sauvignon Blanc, complements the flavors beautifully.
- Presentation: Serve slices on colorful plates, garnished with extra parsley for a pop of color.
- Side Dishes: Roasted vegetables or a simple soup can round out the meal nicely.
FAQs about Tarta alsaciana de cebolla y queso blanco
1. Can I make Tarta alsaciana de cebolla y queso blanco ahead of time?
Absolutely! This tarta is perfect for making ahead. You can prepare it a day in advance and store it in the fridge. Just reheat it in the oven before serving for that fresh-baked taste!
2. What can I serve with Tarta alsaciana de cebolla y queso blanco?
This tarta pairs wonderfully with a light salad or roasted vegetables. A glass of crisp white wine also complements the flavors beautifully. It’s versatile enough to be served as a main dish or an appetizer!
3. Can I use different types of cheese in this recipe?
Definitely! While the traditional recipe calls for queso blanco, you can experiment with other cheeses like ricotta, feta, or even a sharp cheddar. Each will bring its unique flavor to the tarta!
4. Is Tarta alsaciana de cebolla y queso blanco suitable for vegetarians?
Yes! This tarta is vegetarian-friendly, making it a great option for meatless meals. Just be sure to check your cheese for any animal rennet if you’re serving strict vegetarians.
5. How do I store leftovers?
Store any leftovers in an airtight container in the fridge for up to three days. You can enjoy it cold or reheat it in the oven for a delicious meal later on!
Final Thoughts
Making Tarta alsaciana de cebolla y queso blanco is more than just cooking; it’s about creating moments of joy and connection around the dinner table. This dish brings warmth and comfort, transforming a busy weeknight into a special occasion. Whether you’re serving it to your family or sharing it with friends, the delightful aroma and rich flavors will surely impress. Plus, it’s a fantastic way to sneak in some veggies while keeping everyone happy! So, roll up your sleeves, embrace the process, and enjoy every delicious bite of this French classic!
“` Print
Pastel Monstruo de Chocolate: ¡Sorprendente receta fácil!
- Total Time: 55 minutos
- Yield: 8 porciones 1x
- Diet: Vegetarian
Description
Delicioso pastel de chocolate con un toque divertido, ideal para fiestas y celebraciones.
Ingredients
- 200 g de chocolate negro
- 150 g de mantequilla
- 250 g de azúcar
- 4 huevos
- 150 g de harina
- 1 cucharadita de levadura en polvo
- 1 pizca de sal
- Colorante verde para repostería
- Ojos de azúcar (para decorar)
- 100 g de crema de chocolate para el relleno
Instructions
- Comienza precalentando el horno a 180 °C y preparando un molde redondo con un poco de mantequilla y harina.
- En un cazo, derrite el chocolate junto con la mantequilla a fuego lento, removiendo constantemente hasta que esté completamente derretido y suave.
- En un bol grande, bate los huevos con el azúcar hasta que la mezcla se vuelva pálida y espumosa.
- Vierte el chocolate derretido en la mezcla de huevos y azúcar, y mezcla bien hasta que se integren.
- En otro recipiente, combina la harina, la levadura y la sal, luego añade esta mezcla seca a la mezcla húmeda, incorporando suavemente con una espátula.
- Añade el colorante verde y mezcla hasta que el color sea homogéneo.
- Vierte la mezcla en el molde preparado y hornea durante 30-35 minutos, o hasta que un palillo insertado en el centro salga limpio.
- Retira el pastel del horno y déjalo enfriar en el molde durante 10 minutos antes de desmoldarlo sobre una rejilla para que se enfríe por completo.
- Una vez frío, corta el pastel por la mitad y extiende la crema de chocolate en el centro, luego coloca la parte superior de nuevo.
- Para finalizar, adorna la parte superior del pastel con los ojos de azúcar, creando un divertido y espeluznante efecto, y ¡disfruta de tu creación!
Notes
- El colorante verde puede ser ajustado según la intensidad deseada.
- Se puede sustituir la crema de chocolate por mermelada o cualquier otro relleno de preferencia.
- Este pastel es ideal para Halloween o fiestas temáticas.
- Prep Time: 20 minutos
- Cook Time: 35 minutos
- Category: Postre
- Method: Horneado
- Cuisine: Internacional
Nutrition
- Serving Size: 1 porción
- Calories: 350
- Sugar: 30 g
- Sodium: 150 mg
- Fat: 20 g
- Saturated Fat: 10 g
- Unsaturated Fat: 8 g
- Trans Fat: 0 g
- Carbohydrates: 40 g
- Fiber: 2 g
- Protein: 5 g
- Cholesterol: 100 mg