
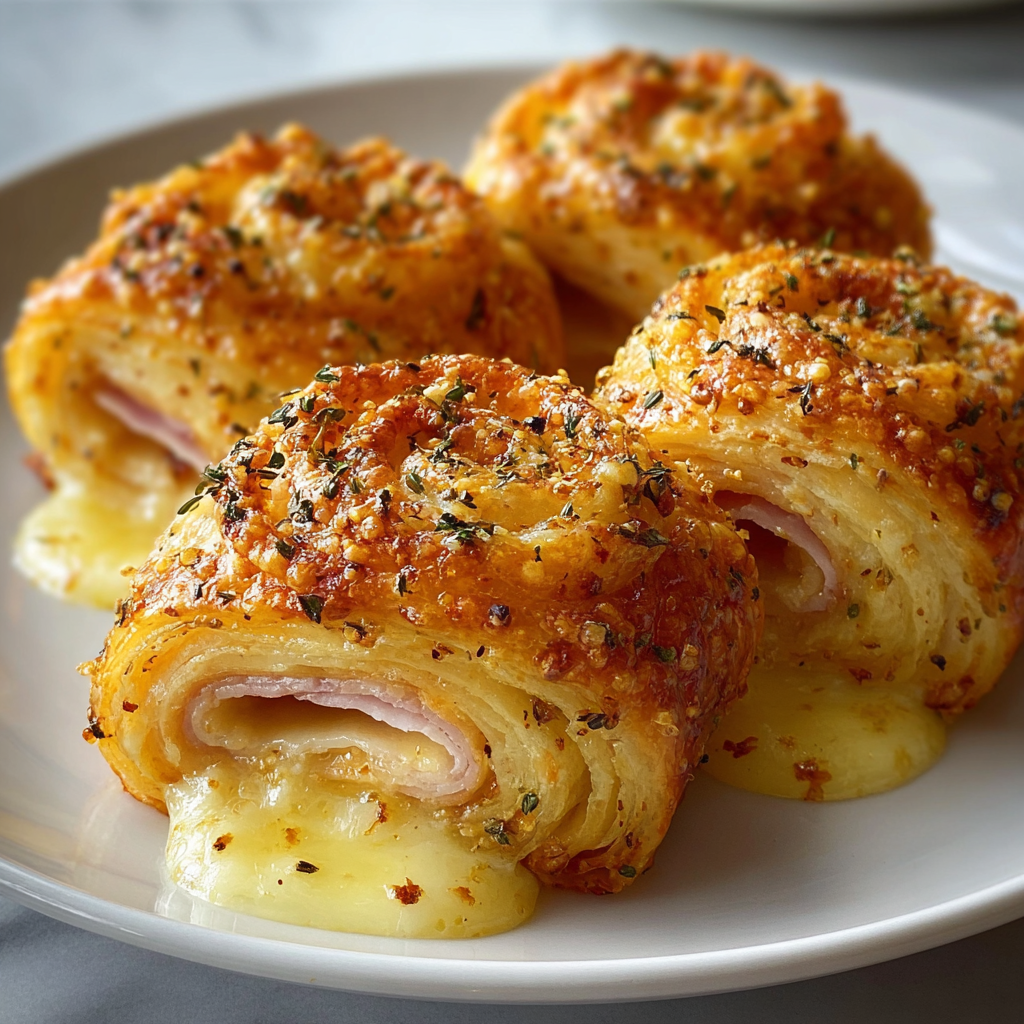
Introduction to Rouleaux de Pollo y Queso
Hola, amigos! If you’re anything like me, juggling work, family, and a million other things, you know how precious time can be. That’s why I’m excited to share my recipe for Rouleaux de Pollo y Queso. These delightful chicken and cheese rolls wrapped in flaky puff pastry are not just a treat for the taste buds; they’re a quick solution for those busy weeknights when you want to impress your loved ones without spending hours in the kitchen. Trust me, once you try these, they’ll become a staple in your home!
Why You’ll Love This Rouleaux de Pollo y Queso
Let’s be honest—life can get hectic, and finding time to cook can feel like a juggling act. That’s where these Rouleaux de Pollo y Queso come in! They’re not only super easy to whip up, but they also pack a flavor punch that will have your family asking for seconds. Plus, they’re versatile enough to serve as a snack, appetizer, or even a light meal. Who doesn’t love a dish that’s quick, delicious, and sure to please everyone at the table?
Ingredients for Rouleaux de Pollo y Queso
Now, let’s dive into the ingredients that make these Rouleaux de Pollo y Queso so irresistible! You’ll find that most of these items are pantry staples, making it easy to whip them up on a whim. Here’s what you’ll need:
- Masa de hojaldre: This flaky pastry is the star of the show! It provides a buttery, crispy exterior that perfectly complements the savory filling. You can find it in the freezer section of your grocery store.
- Pechuga de pollo cocida y desmenuzada: Shredded cooked chicken is the heart of this dish. You can use leftover rotisserie chicken or quickly boil some chicken breasts. It’s a great way to use up leftovers!
- Queso crema: Cream cheese adds a rich, creamy texture to the filling. It helps bind everything together and gives a delightful tang. If you’re looking for a lighter option, you can use low-fat cream cheese.
- Queso rallado: Shredded cheese, like mozzarella or cheddar, brings that gooey, melty goodness we all love. Feel free to mix and match your favorite cheeses for a unique flavor!
- Huevo: An egg is used to brush the tops of the rolls, giving them a beautiful golden color when baked. If you’re vegan, you can skip this step or use a plant-based egg wash.
- Ajo en polvo: Garlic powder adds a savory depth to the filling. It’s a quick way to infuse flavor without the hassle of chopping fresh garlic.
- Cebolla en polvo: Onion powder complements the garlic and enhances the overall taste. It’s a great shortcut for busy cooks!
- Sal y pimienta: These basic seasonings are essential for bringing out the flavors in your filling. Adjust to your taste—don’t be shy!
- Semillas de sésamo: Optional, but they add a lovely crunch and a nutty flavor on top of the rolls. If you don’t have them, don’t worry; they’re not necessary!
For exact measurements, check the bottom of the article where you can find everything listed for easy printing. Now that you know what you need, let’s get cooking!
How to Make Rouleaux de Pollo y Queso
Now that we have our ingredients ready, let’s dive into the fun part—making these delicious Rouleaux de Pollo y Queso! Follow these simple steps, and you’ll have a mouthwatering dish that’s sure to impress.
Preheat the Oven
First things first, let’s get that oven preheating! Set it to 200°C (392°F). While it warms up, grab a baking sheet and line it with parchment paper. This little step will save you from a sticky mess later on!
Prepare the Filling
In a large bowl, combine your shredded chicken with the cream cheese, shredded cheese, garlic powder, onion powder, salt, and pepper. Mix everything together until it’s well blended. You want that creamy goodness to coat every piece of chicken. Trust me, this filling is the heart of your Rouleaux de Pollo y Queso!
Cut the Puff Pastry
Next, roll out your puff pastry on a clean surface. It should be nice and smooth. Now, cut it into squares, about 10 cm on each side. Don’t stress if they’re not perfect; a little imperfection adds character! Plus, they’ll taste just as good.
Assemble the Rolls
Now comes the fun part—assembling the rolls! Take a generous spoonful of your chicken and cheese mixture and place it in the center of each square. Then, fold the corners towards the center, pinching them together to seal in all that delicious filling. Make sure they’re sealed tight; we don’t want any of that cheesy goodness escaping!
Bake the Rolls
Arrange your beautifully assembled rolls on the prepared baking sheet. Brush the tops with the beaten egg for that golden, shiny finish. If you’re feeling fancy, sprinkle some sesame seeds on top for added crunch. Now, pop them in the oven and bake for 15-20 minutes. Keep an eye on them; you want them to be golden brown and crispy. The aroma wafting through your kitchen will be irresistible!
Tips for Success
- Make sure your puff pastry is cold; it puffs up better when it’s chilled.
- Don’t overfill the rolls; a little filling goes a long way!
- For extra flavor, try adding herbs like parsley or cilantro to the filling.
- Let the rolls cool for a few minutes before serving; they’ll be easier to handle.
- Experiment with different cheeses for a unique twist each time!
Equipment Needed
- Baking sheet: A standard baking sheet works perfectly. If you don’t have one, a large oven-safe dish will do.
- Parchment paper: This helps prevent sticking. If you’re out, a light coating of cooking spray can work too.
- Mixing bowl: Any large bowl will suffice for mixing your filling.
- Rolling pin: If you don’t have one, a wine bottle can be a great substitute!
Variations
- Vegetarian Option: Swap the chicken for sautéed mushrooms, spinach, or a mix of your favorite vegetables. Add some feta cheese for a tangy twist!
- Spicy Kick: Mix in some diced jalapeños or a dash of hot sauce to the filling for those who love a little heat.
- Herbed Delight: Incorporate fresh herbs like basil, cilantro, or dill into the filling for an aromatic boost.
- Cheese Lovers: Experiment with different cheeses such as pepper jack for a spicy flavor or goat cheese for a creamy texture.
- Gluten-Free Version: Use gluten-free puff pastry available at specialty stores to make this dish suitable for gluten-sensitive family members.
Serving Suggestions
- Pair your Rouleaux de Pollo y Queso with a fresh garden salad for a light meal.
- Serve with a side of salsa or guacamole for dipping—yum!
- A chilled glass of white wine or sparkling water complements the flavors beautifully.
- For a fun presentation, arrange them on a colorful platter with fresh herbs.
FAQs about Rouleaux de Pollo y Queso
As you embark on your culinary adventure with Rouleaux de Pollo y Queso, you might have a few questions. Don’t worry; I’ve got you covered! Here are some common queries that pop up, along with my friendly advice.
Can I use leftover chicken for this recipe?
Absolutely! Leftover rotisserie chicken is a fantastic option. It saves time and adds great flavor. Just shred it up, and you’re good to go!
How do I store leftover Rouleaux de Pollo y Queso?
If you have any leftovers (which is rare in my house!), store them in an airtight container in the fridge for up to three days. You can reheat them in the oven for that crispy texture!
Can I freeze these rolls before baking?
Yes, you can! Assemble the rolls, place them on a baking sheet, and freeze them until solid. Then, transfer them to a freezer bag. When you’re ready to bake, just pop them in the oven straight from the freezer—no need to thaw!
What can I serve with Rouleaux de Pollo y Queso?
These rolls pair wonderfully with a fresh salad, some salsa, or even a side of guacamole. They’re versatile enough to be a snack, appetizer, or light meal!
Can I make these rolls vegetarian?
Definitely! Just swap out the chicken for sautéed veggies like mushrooms, spinach, or even a mix of your favorites. Add some cheese for that creamy goodness, and you’re all set!
Final Thoughts
Making Rouleaux de Pollo y Queso is more than just cooking; it’s about creating moments of joy in the kitchen and sharing delicious bites with loved ones. Whether you’re whipping them up for a quick weeknight dinner or serving them at a gathering, these rolls are sure to bring smiles all around. The flaky pastry, creamy filling, and endless variations make them a delightful addition to any meal. So, roll up your sleeves, get cooking, and enjoy the satisfaction of serving something that’s not only easy but also utterly delicious!
“` Print
Rouleaux de Pollo y Queso: ¡disfruta un bocado delicioso!
- Total Time: 40 minutos
- Yield: 4 porciones 1x
- Diet: Gluten Free
Description
Deliciosos rollos de pollo y queso envueltos en masa de hojaldre, perfectos para un aperitivo o una comida ligera.
Ingredients
- 1 lámina de masa de hojaldre
- 200 g de pechuga de pollo cocida y desmenuzada
- 150 g de queso crema
- 100 g de queso rallado (puede ser mozzarella o cheddar)
- 1 huevo (para barnizar)
- 1 cucharadita de ajo en polvo
- 1 cucharadita de cebolla en polvo
- Sal y pimienta al gusto
- Semillas de sésamo (opcional, para decorar)
Instructions
- Comienza precalentando el horno a 200°C (392°F) y forra una bandeja para hornear con papel encerado.
- En un tazón grande, combina el pollo desmenuzado con el queso crema, el queso rallado, el ajo en polvo, la cebolla en polvo, sal y pimienta, mezclando bien hasta que todos los ingredientes estén integrados.
- Extiende la masa de hojaldre sobre una superficie limpia y córtala en cuadrados de aproximadamente 10 cm de lado.
- En el centro de cada cuadrado, coloca una porción generosa de la mezcla de pollo y queso.
- Cierra cada cuadrado llevando las esquinas hacia el centro y presionando para sellar bien el relleno.
- Dispón los rollos en la bandeja preparada y pinta la parte superior con el huevo batido. Si lo prefieres, añade semillas de sésamo para decorar.
- Hornea durante 15-20 minutos o hasta que los rollos estén dorados y crujientes al tacto.
- Saca del horno y deja reposar unos minutos antes de servir. ¡Saborea tus rollos de pollo y queso!
Notes
- Se pueden servir calientes o a temperatura ambiente.
- Se pueden acompañar con salsa de tu elección.
- Se pueden congelar antes de hornear y hornear directamente desde el congelador.
- Prep Time: 20 minutos
- Cook Time: 20 minutos
- Category: Aperitivo
- Method: Hornear
- Cuisine: Mexicana
Nutrition
- Serving Size: 1 rollo
- Calories: 250
- Sugar: 1 g
- Sodium: 300 mg
- Fat: 15 g
- Saturated Fat: 7 g
- Unsaturated Fat: 5 g
- Trans Fat: 0 g
- Carbohydrates: 20 g
- Fiber: 1 g
- Protein: 12 g
- Cholesterol: 70 mg