
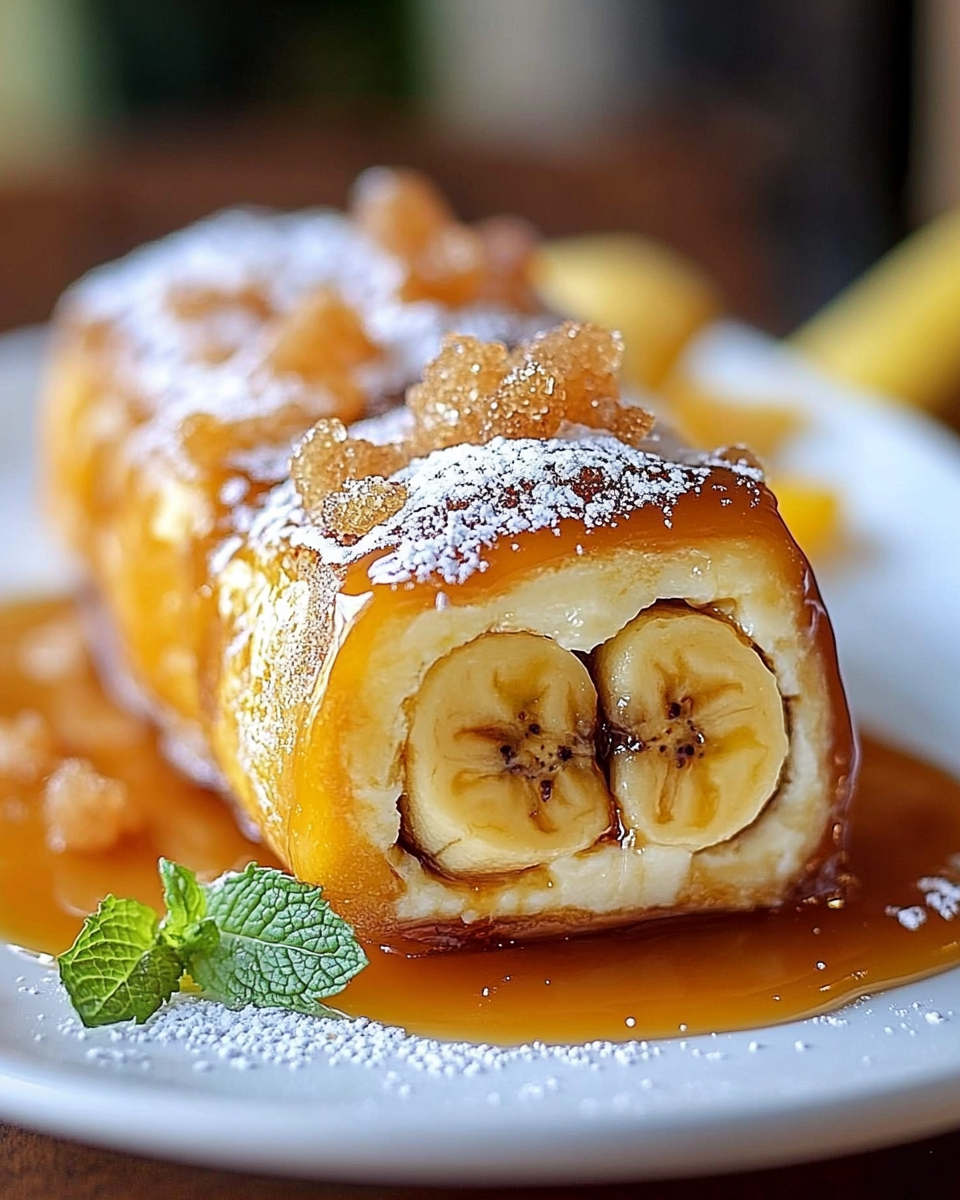
Introduction to Pastelito de Plátano Caramelizado
Hey there, fellow kitchen warriors! If you’re anything like me, juggling work, family, and a million other things, you know how precious time can be. That’s why I’m excited to share my recipe for Pastelito de Plátano Caramelizado. This delightful treat is not just a dessert; it’s a warm hug on a plate! Perfect for those busy days when you want to impress your loved ones without spending hours in the kitchen. Trust me, this easy-to-make pastelito will have everyone asking for seconds, and you’ll feel like a superstar chef!
Why You’ll Love This Pastelito de Plátano Caramelizado
Let’s be real—life can get hectic, and finding time to whip up something delicious can feel like a daunting task. That’s where this Pastelito de Plátano Caramelizado shines! It’s quick to prepare, bursting with flavor, and uses simple ingredients you probably already have on hand. Plus, the sweet aroma of caramelized bananas wafting through your kitchen? Pure bliss! Your family will adore it, and you’ll love how easy it is to make!
Ingredients for Pastelito de Plátano Caramelizado
Now, let’s gather our ingredients for this scrumptious Pastelito de Plátano Caramelizado. Don’t worry; it’s a straightforward list, and you might even have most of these items in your pantry already!
- Plátanos muy maduros: The star of our show! Look for bananas that are well-ripened, with plenty of brown spots. They’ll be sweeter and perfect for caramelizing.
- Azúcar moreno: This adds a rich, deep sweetness and helps create that lovely caramel flavor. If you’re out, you can substitute with regular granulated sugar, but the taste will be a bit different.
- Mantequilla derretida: Butter brings richness to our pastelito. You can use unsalted butter for better control over the saltiness, or even coconut oil for a dairy-free option.
- Huevos grandes: Eggs help bind everything together and add moisture. If you’re looking for a vegan alternative, you can use flax eggs or applesauce.
- Harina de trigo: This is your all-purpose flour, giving structure to the cake. If you need a gluten-free option, almond flour or a gluten-free blend can work, but the texture may vary.
- Harina de almendra: This adds a lovely nutty flavor and moisture. If you’re nut-free, feel free to skip this or replace it with more all-purpose flour.
- Levadura en polvo: Baking powder helps the cake rise, making it light and fluffy. Make sure it’s fresh for the best results!
- Bicarbonato de sodio: This works alongside the baking powder to give the cake a nice lift. It’s essential for that perfect texture.
- Sal marina: Just a pinch enhances all the flavors. Don’t skip it; it balances the sweetness beautifully!
- Esencia de vainilla: A splash of vanilla adds warmth and depth to the flavor. You can use pure vanilla extract or imitation, depending on what you have on hand.
- Nata para montar: This whipped cream topping is optional but oh-so-delicious! If you’re looking for a lighter option, you can use whipped coconut cream instead.
- Nueces troceadas: These are optional but add a delightful crunch. If you or your family have nut allergies, feel free to leave them out or substitute with chocolate chips for a fun twist!
For exact measurements, check the bottom of the article where you can find everything listed for easy printing. Now that we have our ingredients ready, let’s dive into the fun part—making this delightful pastelito!
How to Make Pastelito de Plátano Caramelizado
Now that we have our ingredients ready, let’s dive into the fun part—making this delightful Pastelito de Plátano Caramelizado! Follow these simple steps, and you’ll have a delicious dessert that will impress everyone.
Step 1: Preheat the Oven
First things first, let’s get that oven preheating to 180°C (350°F). Preheating is crucial because it ensures that your cake bakes evenly. While the oven warms up, grab a rectangular baking pan and grease it with a little butter. This will help your pastelito slide out easily once it’s baked. Trust me, you don’t want to be wrestling with a stuck cake!
Step 2: Make the Caramelized Bananas
In a medium saucepan over medium heat, combine the melted butter and brown sugar. Stir it gently until the sugar dissolves and starts bubbling, creating a lovely caramel. This is where the magic happens! Now, add your sliced ripe bananas to the pan. Cook them for about 3-5 minutes, stirring occasionally, until they’re beautifully caramelized and fragrant. The smell will make your mouth water! Once done, remove the pan from the heat and let it cool slightly.
Step 3: Beat the Eggs
In a large mixing bowl, crack your eggs and add the vanilla extract. Using a whisk or an electric mixer, beat the eggs until they’re light and frothy. This step is essential because it incorporates air into the mixture, making your pastelito fluffy. The vanilla adds a warm, inviting aroma that will have everyone peeking into the kitchen!
Step 4: Combine Dry Ingredients
In another bowl, mix together the all-purpose flour, almond flour, baking powder, baking soda, and sea salt. Whisk them together until they’re well combined. This step ensures that the leavening agents are evenly distributed throughout the flour, which is key for a perfectly risen cake. Plus, it’s a great way to get your kids involved—let them help with the whisking!
Step 5: Mix Everything Together
Now it’s time to bring everything together! Gradually add the dry ingredients to the egg mixture, alternating with the caramelized bananas. Gently fold the mixtures together using a spatula or wooden spoon. Be careful not to overmix; you want a smooth batter without lumps, but a few small bits of banana are perfectly fine. This is where the magic of flavors starts to blend!
Step 6: Bake the Cake
Pour the batter into your prepared baking pan and smooth the top with a spatula. Pop it into the preheated oven and bake for 25-30 minutes. To check if it’s done, insert a toothpick into the center of the cake. If it comes out clean or with just a few crumbs, you’re good to go! If it’s still wet, give it a few more minutes. The anticipation will be worth it!
Step 7: Cool and Prepare for Serving
Once your pastelito is baked to perfection, remove it from the oven and let it cool in the pan for about 10 minutes. This helps it set and makes it easier to remove. After that, carefully transfer it to a wire rack to cool completely. While it’s cooling, whip up some heavy cream until it forms stiff peaks. This will be the perfect topping for your cake!
Step 8: Roll and Chill
When the cake is completely cool, it’s time to roll it up! Place a clean kitchen towel on your counter and sprinkle a little powdered sugar on it to prevent sticking. Carefully flip the cake onto the towel, peel off the parchment paper, and roll it up tightly, using the towel to help. Wrap the rolled cake in plastic wrap and refrigerate for at least an hour. This chilling step helps the flavors meld together and makes slicing easier. Plus, it’s a great way to build anticipation for that first bite!
Tips for Success
- Use very ripe bananas for maximum sweetness and flavor.
- Don’t skip the cooling step; it helps the cake set properly.
- For a fun twist, try adding chocolate chips or dried fruit to the batter.
- Make sure your baking powder is fresh for the best rise.
- Feel free to experiment with different nuts or leave them out entirely!
Equipment Needed
- Rectangular baking pan: A 9×13 inch pan works perfectly. If you don’t have one, a round cake pan will do!
- Mixing bowls: Use at least two—one for wet ingredients and one for dry.
- Whisk or electric mixer: For beating eggs and mixing batter.
- Spatula: Essential for folding ingredients and smoothing the batter.
- Wire rack: Helps cool the cake evenly; a plate can work in a pinch!
Variations
- Chocolate Lovers: Add 1/2 cup of chocolate chips to the batter for a delightful chocolatey twist!
- Nut-Free Option: Omit the nuts entirely or substitute with sunflower seeds for a crunchy texture without the allergens.
- Vegan Version: Replace eggs with flax eggs (1 tablespoon of ground flaxseed mixed with 2.5 tablespoons of water per egg) and use coconut cream instead of heavy cream.
- Spiced Up: Add a teaspoon of cinnamon or nutmeg to the dry ingredients for a warm, spiced flavor that pairs beautifully with the bananas.
- Fruit Fusion: Mix in 1/2 cup of chopped strawberries or blueberries for a fruity surprise in every bite!
Serving Suggestions
- Pair with Ice Cream: Serve slices of your Pastelito de Plátano Caramelizado with a scoop of vanilla or coconut ice cream for a delightful contrast.
- Fresh Fruit: Add a side of fresh berries or sliced strawberries to brighten up the plate.
- Presentation: Dust with powdered sugar and drizzle with caramel sauce for an elegant touch.
FAQs about Pastelito de Plátano Caramelizado
Got questions about making this delightful Pastelito de Plátano Caramelizado? You’re not alone! Here are some common queries I’ve encountered, along with my answers to help you out.
1. Can I use frozen bananas for this recipe?
Absolutely! If you have frozen bananas, just thaw them and drain any excess liquid before using. They’ll still work wonderfully in your pastelito, giving it that sweet, caramelized flavor we all love.
2. How do I store leftovers?
To keep your pastelito fresh, wrap it tightly in plastic wrap or store it in an airtight container. It can be kept in the fridge for up to 3 days. Just remember to let it come to room temperature before serving for the best taste!
3. Can I make this recipe gluten-free?
Yes, you can! Substitute the all-purpose flour with a gluten-free flour blend or use more almond flour. Just keep in mind that the texture might be slightly different, but it will still be delicious!
4. What can I use instead of heavy cream for the topping?
If you’re looking for a lighter option, you can use whipped coconut cream or even a dairy-free whipped topping. Both will add a lovely creaminess to your pastelito without the heaviness of traditional whipped cream.
5. Can I make this pastelito ahead of time?
Definitely! You can prepare the cake a day in advance and store it in the fridge. Just remember to roll it up and chill it as instructed. This allows the flavors to meld beautifully, making it even tastier when you serve it!
Final Thoughts
Making this Pastelito de Plátano Caramelizado is more than just baking; it’s about creating sweet memories in the kitchen. The joy of watching your family’s faces light up as they take that first bite is priceless. This recipe is a reminder that even on the busiest days, you can whip up something special that brings everyone together. So, roll up your sleeves, embrace the deliciousness, and let the aroma of caramelized bananas fill your home. Trust me, this pastelito will become a cherished favorite, making your kitchen the heart of your family gatherings!
“` Print
Pastelito de Plátano Caramelizado: Deliciosa receta fácil
- Total Time: 1 hora 50 minutos
- Yield: 8 porciones 1x
- Diet: Vegetarian
Description
Delicioso pastel de plátano caramelizado, fácil de preparar y perfecto para cualquier ocasión.
Ingredients
- 4 plátanos muy maduros
- 1 taza de azúcar moreno
- 1/2 taza de mantequilla derretida
- 3 huevos grandes
- 1 taza de harina de trigo
- 1/2 taza de harina de almendra
- 1 cucharadita de levadura en polvo
- 1/2 cucharadita de bicarbonato de sodio
- 1/4 cucharadita de sal marina
- 1 cucharadita de esencia de vainilla
- 1/2 taza de nata para montar
- 1/4 taza de nueces troceadas (opcional)
Instructions
- Comienza precalentando el horno a 180°C y prepara un molde rectangular engrasándolo con mantequilla.
- En una cacerola a fuego medio, combina la mantequilla derretida y el azúcar moreno, removiendo hasta que se forme un caramelo. Agrega los plátanos cortados en rodajas y cocina durante unos minutos hasta que estén bien caramelizados. Retira del fuego y deja que se enfríe un poco.
- En un tazón grande, bate los huevos junto con la esencia de vainilla hasta que la mezcla esté espumosa y clara.
- En otro tazón, mezcla las harinas, la levadura, el bicarbonato y la sal. Incorpora esta mezcla a los huevos batidos, alternando con los plátanos caramelizados. Mezcla bien hasta obtener una masa homogénea.
- Vierte la masa en el molde preparado y alisa la superficie. Hornea durante 25-30 minutos o hasta que al insertar un palillo, este salga limpio.
- Una vez horneado, deja que el pastel repose en el molde durante 10 minutos antes de desmoldarlo sobre una rejilla para que se enfríe completamente.
- Mientras se enfría, bate la nata hasta que forme picos firmes.
- Cuando el pastel esté frío, extiende la nata montada sobre la parte superior y espolvorea las nueces troceadas si lo deseas.
- Con cuidado, enrolla el pastel utilizando un paño limpio para ayudarte a formar un rollo. Envuelve el rollo en papel film y refrigéralo durante al menos 1 hora antes de servir.
- Corta en porciones y disfruta de este exquisito pastel de plátano con caramelo.
Notes
- Se puede sustituir la nata por una opción vegana si se desea.
- El pastel se puede servir con helado de vainilla para un postre más indulgente.
- Prep Time: 20 minutos
- Cook Time: 30 minutos
- Category: Postre
- Method: Horneado
- Cuisine: Latina
Nutrition
- Serving Size: 1 porción
- Calories: 320
- Sugar: 25g
- Sodium: 150mg
- Fat: 15g
- Saturated Fat: 8g
- Unsaturated Fat: 5g
- Trans Fat: 0g
- Carbohydrates: 45g
- Fiber: 2g
- Protein: 4g
- Cholesterol: 70mg