
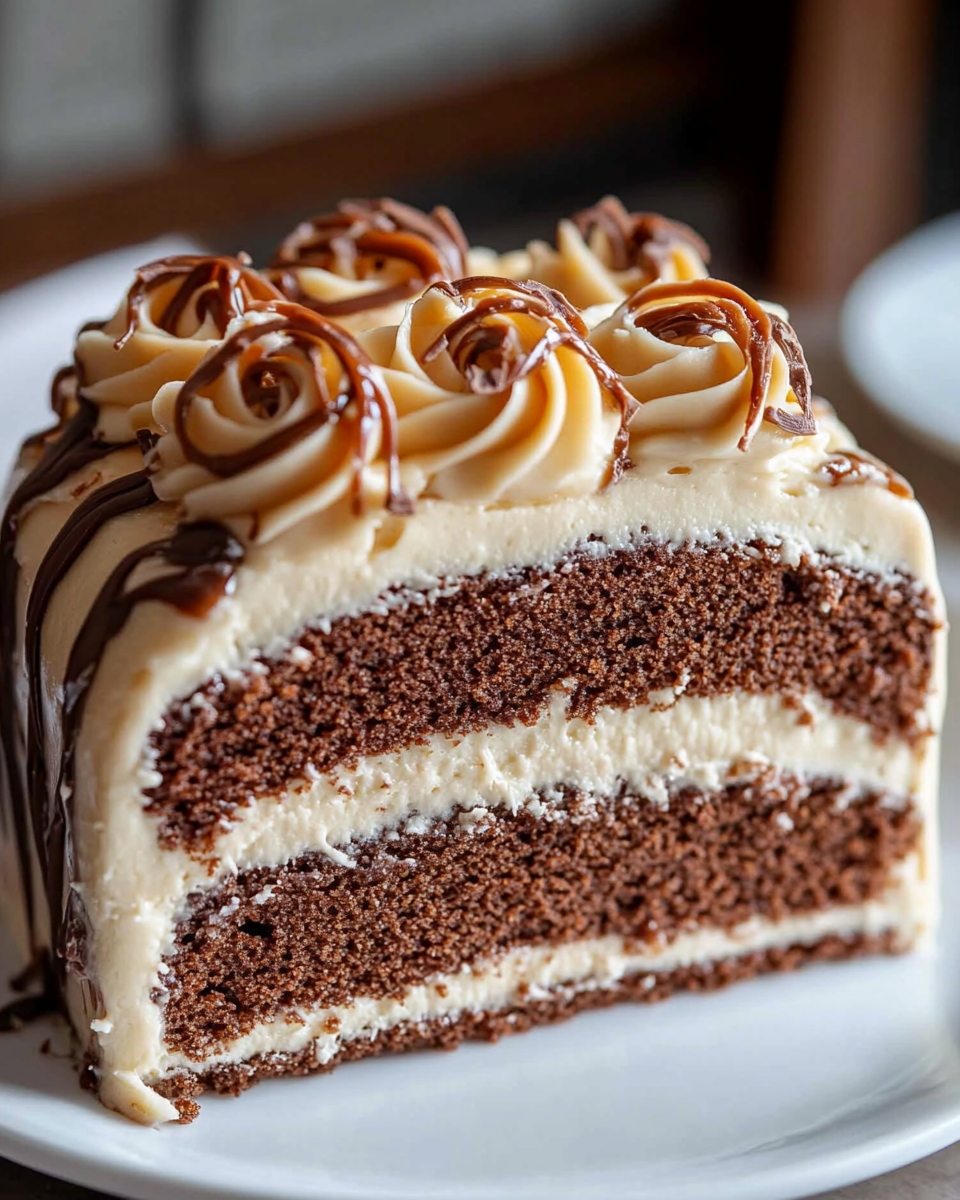
Introduction to Pastel de Chocolate con Dulce de Leche
Hola, amigas! If you’re anything like me, life can get a bit hectic, especially when juggling work, family, and everything in between. That’s why I’m excited to share my recipe for Pastel de Chocolate con Dulce de Leche. This delightful chocolate cake, filled with luscious dulce de leche, is not just a treat; it’s a quick solution for those busy days when you want to impress your loved ones without spending hours in the kitchen. Trust me, this cake will have everyone asking for seconds, and you’ll feel like a superstar for making it!
Why You’ll Love This Pastel de Chocolate con Dulce de Leche
This Pastel de Chocolate con Dulce de Leche is a dream come true for busy women like us! It’s incredibly easy to whip up, taking just about 55 minutes from start to finish. The rich chocolate flavor combined with the creamy dulce de leche creates a taste sensation that’s hard to resist. Plus, it’s versatile enough for any occasion, whether it’s a family gathering or a cozy night in. You’ll love how it brings smiles to the table!
Ingredients for Pastel de Chocolate con Dulce de Leche
Let’s dive into the delicious components that make up this Pastel de Chocolate con Dulce de Leche. Each ingredient plays a vital role in creating that rich, decadent flavor we all crave. Here’s what you’ll need:
- Chocolate amargo: This dark chocolate is the star of the show, providing a deep, rich flavor that balances perfectly with the sweetness of the dulce de leche.
- Mantequilla sin sal: Unsalted butter adds moisture and richness to the cake. It’s essential for that melt-in-your-mouth texture.
- Azúcar moreno: Brown sugar not only sweetens the cake but also adds a hint of caramel flavor, enhancing the overall taste.
- Huevos grandes: Eggs are crucial for binding the ingredients together and giving the cake its structure. They also contribute to the cake’s fluffiness.
- Harina de repostería: All-purpose flour is the backbone of the cake, providing the necessary structure. You can substitute with gluten-free flour if needed.
- Levadura en polvo: Baking powder helps the cake rise, giving it that light and airy texture we all love.
- Sal marina: A pinch of salt enhances the flavors and balances the sweetness of the cake.
- Caramelo líquido: This is the star filling! It adds a creamy, sweet layer that makes each bite heavenly. You can use store-bought or homemade caramel.
- Almendras troceadas (opcional): Chopped almonds add a delightful crunch and nutty flavor. If you or your family aren’t fans, feel free to skip them!
- Azúcar glas: A light dusting of powdered sugar on top adds a beautiful finish and a touch of sweetness.
For exact measurements, check the bottom of the article where you can find everything listed for easy printing. Now, let’s get ready to bake this scrumptious cake!
How to Make Pastel de Chocolate con Dulce de Leche
Now that we have our ingredients ready, let’s dive into the fun part—making this delicious Pastel de Chocolate con Dulce de Leche! Follow these simple steps, and you’ll have a show-stopping dessert that will impress everyone.
Step 1: Preheat the Oven and Prepare the Pan
First things first, preheat your oven to 180°C (350°F). This step is crucial because it ensures that your cake bakes evenly. While the oven is warming up, grab a round 22 cm (9-inch) cake pan. Grease it with a bit of unsalted butter and dust it with flour. This will help the cake slide out easily once it’s baked. Trust me, there’s nothing worse than a cake that sticks to the pan!
Step 2: Melt Chocolate and Butter
Next, let’s melt the chocolate and butter together. In a saucepan over low heat, combine the dark chocolate and unsalted butter. Stir constantly until everything is melted and smooth. This is where the magic happens! The rich aroma of chocolate will fill your kitchen, making it hard to resist sneaking a taste. Just be patient and keep stirring to avoid burning the chocolate.
Step 3: Beat Eggs and Sugar
In a separate bowl, crack your large eggs and add the brown sugar. Using a whisk or an electric mixer, beat them together until the mixture becomes light and fluffy. This step is essential because it incorporates air into the batter, giving your cake that lovely, airy texture. You want it to look pale and creamy—like a cloud of sweetness!
Step 4: Combine Mixtures
Now it’s time to bring the chocolate mixture and the egg mixture together. Pour the melted chocolate and butter into the bowl with the eggs and sugar. Gently fold the two mixtures together using a spatula. Be careful not to overmix; you want to keep that fluffy texture we just created. It’s like a dance—gentle and graceful!
Step 5: Add Dry Ingredients
Next, we’ll add the dry ingredients. Sift the all-purpose flour, baking powder, and a pinch of sea salt over the chocolate mixture. Sifting helps to eliminate lumps and ensures a smooth batter. Gently fold the dry ingredients into the wet mixture until just combined. Remember, a few small lumps are okay—overmixing can lead to a dense cake, and we want it light and fluffy!
Step 6: Incorporate Optional Ingredients
If you’re feeling adventurous, now’s the time to add the chopped almonds. They add a delightful crunch and nutty flavor that pairs beautifully with the chocolate. Just fold them in gently, ensuring they’re evenly distributed throughout the batter. If nuts aren’t your thing, feel free to skip this step. The cake will still be delicious!
Step 7: Bake the Cake
Pour the batter into your prepared cake pan and smooth the top with a spatula. Pop it into the preheated oven and bake for 30-35 minutes. To check for doneness, insert a toothpick into the center of the cake. If it comes out clean or with a few moist crumbs, it’s ready! If it’s still wet, give it a few more minutes. The smell wafting through your kitchen will be heavenly!
Step 8: Cool and Assemble
Once your cake is baked to perfection, remove it from the oven and let it cool in the pan for about 10 minutes. This allows it to set a bit before transferring it to a wire rack to cool completely. Once it’s cool, carefully slice the cake in half horizontally. Spread a generous layer of dulce de leche on the bottom half, then place the top half back on. Drizzle more dulce de leche on top and finish with a dusting of powdered sugar. Voilà! Your Pastel de Chocolate con Dulce de Leche is ready to be devoured!
Tips for Success
- Always preheat your oven; it’s key for even baking.
- Use room temperature eggs for better mixing.
- Don’t skip sifting the dry ingredients; it prevents lumps.
- Check the cake a few minutes before the timer goes off to avoid overbaking.
- Let the cake cool completely before assembling for the best results.
Equipment Needed
- Cake Pan: A 22 cm (9-inch) round cake pan works best, but you can use a square pan if that’s what you have.
- Mixing Bowls: A large bowl for mixing and a smaller one for melting chocolate.
- Whisk or Electric Mixer: Either will do for beating eggs and sugar.
- Spatula: Essential for folding ingredients together.
- Oven Thermometer: Optional, but great for ensuring your oven is at the right temperature.
Variations
- Gluten-Free: Substitute all-purpose flour with a gluten-free blend to make this cake suitable for those with gluten sensitivities.
- Nut-Free: Omit the chopped almonds if you have nut allergies or prefer a smoother texture.
- Vegan Option: Replace eggs with flaxseed meal (1 tablespoon of flaxseed mixed with 2.5 tablespoons of water per egg) and use a plant-based butter alternative.
- Flavor Infusions: Add a teaspoon of vanilla extract or a splash of espresso to the batter for an extra layer of flavor.
- Fruit Additions: Incorporate fresh berries or banana slices into the batter for a fruity twist that complements the chocolate.
Serving Suggestions
- Ice Cream: Serve with a scoop of vanilla or caramel ice cream for a delightful contrast.
- Fresh Berries: Add a side of strawberries or raspberries for a pop of color and freshness.
- Presentation: Garnish with mint leaves or edible flowers for an elegant touch.
- Drinks: Pair with a rich coffee or a glass of dessert wine to enhance the flavors.
FAQs about Pastel de Chocolate con Dulce de Leche
As you embark on your baking adventure with Pastel de Chocolate con Dulce de Leche, you might have a few questions. Don’t worry; I’ve got you covered! Here are some common queries that pop up, along with helpful answers to guide you through the process.
1. Can I make this cake ahead of time?
Absolutely! This cake actually tastes even better the next day as the flavors meld together. Just bake it, let it cool completely, and store it in an airtight container at room temperature. When you’re ready to serve, assemble it with the dulce de leche and enjoy!
2. What can I use instead of dulce de leche?
If you can’t find dulce de leche, you can substitute it with caramel sauce or even a chocolate ganache for a different twist. Just keep in mind that the flavor will change slightly, but it will still be delicious!
3. How do I store leftovers?
Store any leftover Pastel de Chocolate con Dulce de Leche in an airtight container at room temperature for up to three days. If you want to keep it longer, you can refrigerate it, but be sure to let it come to room temperature before serving for the best taste and texture.
4. Can I freeze this cake?
Yes, you can freeze the cake! Just wrap it tightly in plastic wrap and then in aluminum foil. It can be frozen for up to three months. When you’re ready to enjoy it, thaw it in the refrigerator overnight and then assemble with the dulce de leche.
5. What if my cake sinks in the middle?
A sunken cake can be a bummer, but it usually happens due to underbaking or overmixing the batter. Make sure to check for doneness with a toothpick and avoid overmixing after adding the dry ingredients. If it does sink, don’t fret! Just cover it with a generous layer of dulce de leche, and no one will be the wiser!
Final Thoughts
Making this Pastel de Chocolate con Dulce de Leche is more than just baking; it’s about creating sweet memories with your loved ones. The joy of watching their faces light up as they take that first bite is priceless. This cake is a reminder that even on the busiest days, we can carve out a little time for something special. So, whether it’s a birthday celebration or just a Tuesday night, treat yourself and your family to this delightful dessert. Trust me, it’s worth every moment spent in the kitchen!
“` Print
Pastel de Chocolate con Dulce de Leche: ¡Deléitate ya!
- Total Time: 55 minutos
- Yield: 8 porciones 1x
- Diet: Vegetarian
Description
Delicioso pastel de chocolate con un relleno de dulce de leche, perfecto para cualquier ocasión.
Ingredients
- 200 g de chocolate amargo
- 150 g de mantequilla sin sal
- 250 g de azúcar moreno
- 4 huevos grandes
- 200 g de harina de repostería
- 1 cucharadita de levadura en polvo
- 1 pizca de sal marina
- 300 g de caramelo líquido
- 100 g de almendras troceadas (opcional)
- Azúcar glas para decorar
Instructions
- Comienza precalentando el horno a 180°C y prepara un molde redondo de 22 cm con un poco de mantequilla y harina.
- En un cazo a fuego lento, derrite el chocolate junto con la mantequilla, removiendo constantemente hasta que se forme una mezcla suave.
- En un bol aparte, bate los huevos con el azúcar moreno hasta que la mezcla se vuelva clara y espumosa.
- Incorpora el chocolate derretido a la mezcla de huevos, asegurándote de mezclar con movimientos envolventes.
- Agrega la harina, la levadura y la sal, tamizándolas sobre la mezcla, y mezcla con cuidado hasta que no haya grumos visibles.
- Si lo prefieres, añade las almendras troceadas y mezcla bien para distribuirlas.
- Vierte la mezcla en el molde preparado y hornea durante 30-35 minutos, o hasta que un palillo insertado en el centro salga limpio.
- Deja que la torta repose en el molde durante 10 minutos antes de desmoldarla y dejarla enfriar completamente sobre una rejilla.
- Una vez fría, corta la torta por la mitad de manera horizontal y extiende una buena cantidad de caramelo líquido en la parte inferior.
- Coloca la otra mitad de la torta encima y cubre la parte superior con más caramelo.
- Para finalizar, espolvorea con azúcar glas y disfruta de esta exquisita torta de chocolate y caramelo.
Notes
- Se puede añadir más caramelo al gusto.
- Las almendras son opcionales, pero añaden un buen crujido.
- Este pastel se puede servir con helado de vainilla para un postre aún más indulgente.
- Prep Time: 20 minutos
- Cook Time: 35 minutos
- Category: Postre
- Method: Horneado
- Cuisine: Latina
Nutrition
- Serving Size: 1 porción
- Calories: 350
- Sugar: 30 g
- Sodium: 150 mg
- Fat: 20 g
- Saturated Fat: 10 g
- Unsaturated Fat: 8 g
- Trans Fat: 0 g
- Carbohydrates: 40 g
- Fiber: 2 g
- Protein: 5 g
- Cholesterol: 100 mg