
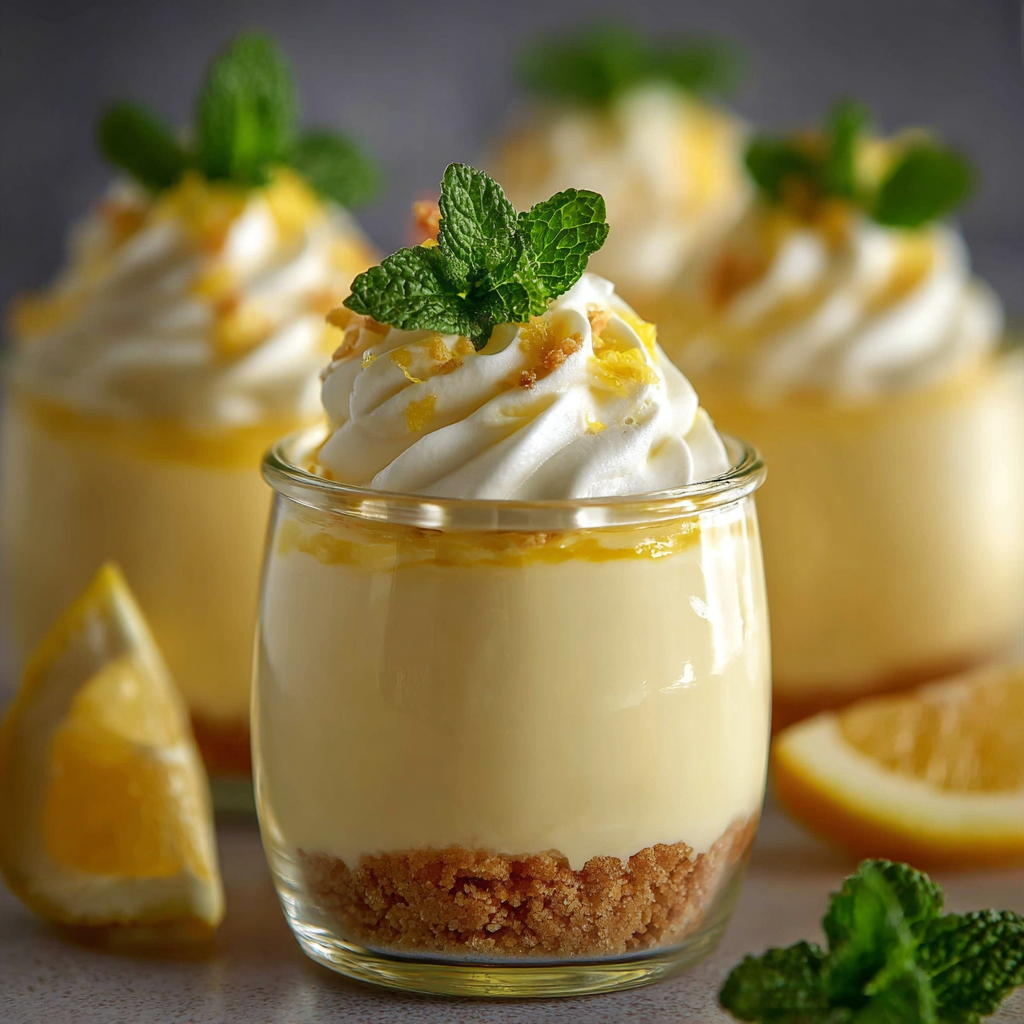
Introduction to Mousse de Queso Crema y Limón
Hola, amigas! If you’re anything like me, your days are a whirlwind of work, family, and a million little tasks that seem to multiply by the hour. That’s why I’m excited to share this delightful Mousse de Queso Crema y Limón recipe with you. It’s a quick and easy dessert that feels like a special treat, perfect for impressing your loved ones or simply indulging yourself after a long day. With its creamy texture and zesty lemon flavor, this mousse is sure to brighten up any occasion, even if it’s just a Tuesday night at home!
Why You’ll Love This Mousse de Queso Crema y Limón
Let’s be honest—life can get hectic, and finding time to whip up a dessert that everyone will love can feel like a daunting task. This Mousse de Queso Crema y Limón is not only incredibly easy to make, but it also comes together in no time! With its refreshing lemon flavor and creamy texture, it’s a crowd-pleaser that will have your family asking for seconds. Plus, it’s a no-bake treat, so you can enjoy more time with your loved ones!
Ingredients for Mousse de Queso Crema y Limón
Now, let’s gather our ingredients for this delightful Mousse de Queso Crema y Limón. Don’t worry; it’s a simple list, and I promise you’ll find everything at your local grocery store. Here’s what you’ll need:
- Galletas María: These sweet cookies form the base of our mousse. They’re buttery and crumbly, making them perfect for a crust. If you can’t find them, graham crackers work just as well!
- Mantequilla derretida: This helps bind the cookie crumbs together, creating a deliciously rich crust. You can use unsalted butter for a more controlled flavor.
- Queso fresco: This creamy cheese is the star of our mousse. It adds a light texture and a mild flavor. If you can’t find queso fresco, cream cheese is a great substitute.
- Crema para batir: Whipping cream gives our mousse that airy, fluffy texture. Make sure to use heavy cream for the best results!
- Miel: Honey adds natural sweetness and a hint of floral flavor. If you prefer, you can swap it for sugar or agave syrup.
- Limones: We’ll use both the juice and zest of fresh lemons for that zesty kick. The freshness of real lemons makes a world of difference!
- Hojas de gelatina: These are essential for setting our mousse. If you’re looking for a vegetarian option, agar-agar is a fantastic alternative.
- Esencia de vainilla: A splash of vanilla enhances the overall flavor, making it even more delightful. You can use pure vanilla extract for the best taste.
- Pizca de sal: Just a pinch helps balance the sweetness and enhances the flavors of the mousse.
For exact measurements, check the bottom of the article where you can find everything listed for easy printing. Now that we have our ingredients ready, let’s dive into making this delicious mousse!
How to Make Mousse de Queso Crema y Limón
Now that we have our ingredients ready, let’s get our hands a little messy and dive into making this delightful Mousse de Queso Crema y Limón. Follow these simple steps, and you’ll have a dessert that’s sure to impress!
Step 1: Prepare the Base
First things first, let’s crush those galletas María. You can pop them into a food processor and pulse until they resemble fine crumbs. If you don’t have a processor, a good old-fashioned rolling pin and a zip-top bag work wonders too! Once crushed, mix the crumbs with the mantequilla derretida until everything is well combined. Now, press this mixture firmly into the bottom of your mold or individual cups. This will be the delicious base of our mousse!
Step 2: Hydrate the Gelatin
Next, let’s hydrate our hojas de gelatina. Place them in a bowl of cold water and let them soak for about 10 minutes. This step is crucial, as it helps the gelatin dissolve smoothly later on. While you wait, you can take a moment to enjoy a cup of tea or coffee!
Step 3: Mix the Cheese Filling
Now, grab a large mixing bowl and add the queso fresco, miel, fresh jugo de limón, and ralladura de limón. Using a hand mixer or a whisk, beat everything together until it’s smooth and creamy. This is where the magic happens! The combination of flavors will make your kitchen smell heavenly. Don’t rush this step; you want it to be perfectly blended!
Step 4: Incorporate the Gelatin
Once your gelatin has soaked, it’s time to incorporate it. Take a small portion of the cheese mixture and heat it gently in the microwave for about 15 seconds. Stir in the hydrated gelatin until it’s completely dissolved. Then, pour this mixture back into the bowl with the rest of the cheese filling, mixing gently to combine. This ensures that the gelatin is evenly distributed throughout the mousse.
Step 5: Whip the Cream
In a separate bowl, it’s time to whip the crema para batir. Using an electric mixer, beat the cream until soft peaks form. This means that when you lift the beaters, the cream should hold its shape but still be soft. Now, gently fold the whipped cream into the cheese mixture using a spatula. Be careful not to deflate the cream; we want to keep that light, airy texture!
Step 6: Chill the Mousse
Finally, pour the luscious mousse over your prepared crust. Smooth the top with a spatula, and then pop it into the refrigerator. Let it chill for at least 4 hours, or until it’s set. This is the hardest part—waiting! But trust me, it’ll be worth it when you take that first bite.
Tips for Success
- Make sure your ingredients are at room temperature for easier mixing.
- Don’t skip the chilling time; it’s essential for the mousse to set properly.
- For a fun twist, try adding a splash of liqueur like limoncello to the cheese mixture.
- Use a rubber spatula to fold in the whipped cream gently, preserving that airy texture.
- Feel free to experiment with different toppings like fresh berries or a drizzle of chocolate!
Equipment Needed
- Food Processor: Ideal for crushing galletas María, but a rolling pin and zip-top bag work just as well.
- Mixing Bowls: A couple of medium-sized bowls will do the trick.
- Electric Mixer: For whipping cream; a whisk can be used if you’re feeling strong!
- Spatula: Essential for folding in the whipped cream gently.
- Refrigerator: To chill your mousse until it’s perfectly set.
Variations
- Chocolate Twist: Add melted dark chocolate to the cheese mixture for a rich chocolate-lemon mousse. Just fold in about 100g of cooled melted chocolate before adding the whipped cream.
- Berry Delight: Incorporate fresh berries like strawberries or blueberries into the mousse for a fruity burst. You can also layer them between the crust and mousse for a beautiful presentation!
- Vegan Option: Substitute the queso fresco with a vegan cream cheese and use coconut cream instead of heavy cream. Make sure to use agar-agar instead of gelatin for a plant-based alternative.
- Herbal Infusion: Add a hint of fresh herbs like mint or basil to the cheese mixture for a unique flavor profile. Just chop finely and mix in with the other ingredients.
- Spiced Version: Sprinkle in a pinch of cinnamon or nutmeg to the cheese mixture for a warm, spiced flavor that pairs beautifully with the lemon.
Serving Suggestions
- Pair your Mousse de Queso Crema y Limón with a refreshing glass of iced tea or lemonade for a delightful contrast.
- Garnish with fresh mint leaves or edible flowers for a beautiful presentation.
- Serve alongside a light fruit salad for a balanced dessert experience.
- Consider drizzling a bit of honey or a fruit coulis on top for added sweetness.
FAQs about Mousse de Queso Crema y Limón
1. Can I make Mousse de Queso Crema y Limón ahead of time?
Absolutely! In fact, I recommend making it a day in advance. This allows the flavors to meld beautifully and ensures that the mousse sets perfectly. Just keep it covered in the refrigerator until you’re ready to serve.
2. What can I use instead of gelatin?
If you’re looking for a vegetarian option, you can use agar-agar instead of gelatin. It works similarly but requires a different preparation method. Just follow the package instructions for the best results!
3. How do I store leftovers?
If you have any leftovers (which is rare in my house!), simply cover the mousse with plastic wrap or transfer it to an airtight container. It will keep well in the refrigerator for up to three days. Just remember to give it a gentle stir before serving!
4. Can I use a different type of cheese?
While queso fresco is the star of this recipe, you can substitute it with cream cheese or mascarpone for a richer flavor. Just keep in mind that the texture may vary slightly, but it will still be delicious!
5. What toppings do you recommend for the mousse?
The sky’s the limit! I love topping my mousse with fresh berries, a drizzle of honey, or even a sprinkle of crushed nuts for added texture. You can also use lemon zest or mint leaves for a pop of color and flavor!
Final Thoughts
Making this Mousse de Queso Crema y Limón is more than just whipping up a dessert; it’s about creating moments of joy in our busy lives. The creamy, zesty flavors dance on your palate, bringing a smile to your face after a long day. Whether you’re celebrating a special occasion or simply treating yourself, this mousse is a delightful reminder that you deserve a little sweetness. So, gather your loved ones, share a slice, and relish the happiness that comes from homemade goodness. Trust me, this mousse will become a cherished favorite in your kitchen!
“` Print
Mousse de Queso Crema y Limón que Encantará tu Paladar
- Total Time: 4 horas 30 minutos
- Yield: 8 porciones 1x
- Diet: Vegetarian
Description
Deliciosa mousse de queso crema y limón, perfecta para cualquier ocasión.
Ingredients
- 250 g de galletas María
- 120 g de mantequilla derretida
- 400 g de queso fresco
- 250 ml de crema para batir
- 180 g de miel
- 3 limones (jugo y ralladura)
- 4 hojas de gelatina
- 1 cucharadita de esencia de vainilla
- Pizca de sal
Instructions
- Comienza triturando las galletas María en un procesador hasta que se conviertan en migas finas. Mezcla estas migas con la mantequilla derretida y distribuye la mezcla en el fondo de un molde grande o en copas individuales, presionando firmemente. Reserva en el refrigerador mientras preparas la mousse.
- Hidrata las hojas de gelatina en agua fría por aproximadamente 10 minutos. En un bol grande, bate el queso fresco con la miel, el jugo y la ralladura de limón, y la esencia de vainilla hasta que la mezcla esté suave y cremosa.
- Calienta un poco de la mezcla de queso fresco en el microondas y disuelve en ella las hojas de gelatina escurridas, asegurándote de que se integren bien. Luego, incorpora esta mezcla al bol con el resto del queso, batiendo suavemente.
- En un recipiente aparte, bate la crema para batir con una pizca de sal hasta que esté espesa y forme picos suaves. Con cuidado, mezcla la crema batida con la mezcla de queso fresco, utilizando una espátula y movimientos envolventes para no perder aire.
- Vierte la mousse sobre la base de galleta y alisa la superficie. Lleva al refrigerador por un mínimo de 4 horas o hasta que esté completamente cuajada.
- Para servir, adorna con un poco de ralladura de limón o rodajas de limón fresco. ¡Disfruta de esta exquisita mousse que combina frescura y cremosidad!
Notes
- Se puede preparar un día antes para que esté bien cuajada.
- Utiliza galletas sin gluten para una versión sin gluten.
- La mousse se puede decorar con frutas frescas o mermelada de limón.
- Prep Time: 30 minutos
- Cook Time: 0 minutos
- Category: Postre
- Method: Refrigeración
- Cuisine: Mexicana
Nutrition
- Serving Size: 1 porción
- Calories: 320
- Sugar: 20 g
- Sodium: 150 mg
- Fat: 22 g
- Saturated Fat: 12 g
- Unsaturated Fat: 8 g
- Trans Fat: 0 g
- Carbohydrates: 30 g
- Fiber: 1 g
- Protein: 5 g
- Cholesterol: 60 mg