
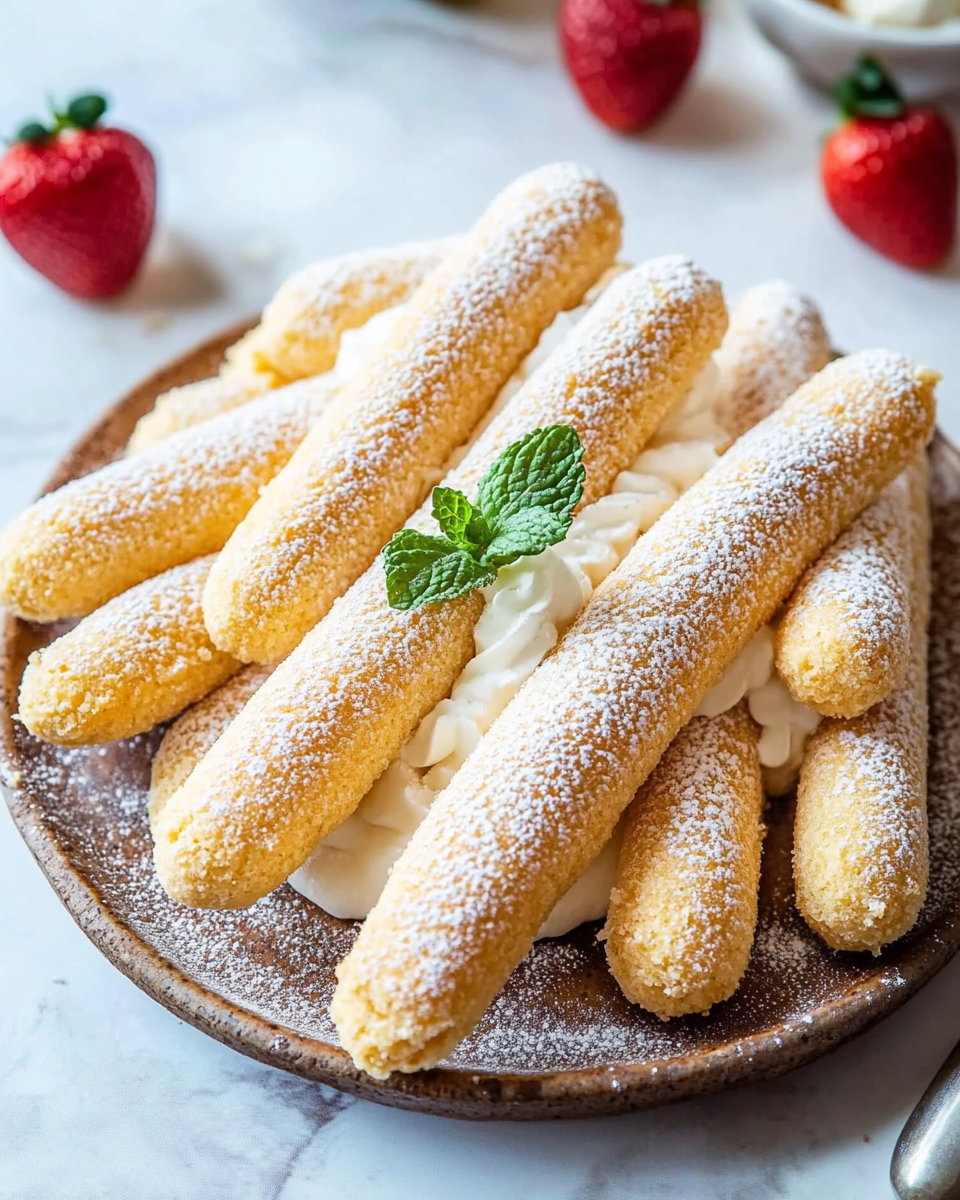
Introduction to Bizcochos de Soletilla Caseros
Hey there, fellow home cooks! If you’re anything like me, your days can feel like a whirlwind of work, family, and endless to-do lists. That’s why I’m excited to share my recipe for Bizcochos de Soletilla Caseros. These delightful little sponge biscuits are not only quick to whip up, but they also bring a touch of sweetness to your busy life. Whether you’re looking for a simple treat to enjoy with your afternoon coffee or a charming addition to a dessert platter, these bizcochos are sure to impress your loved ones without taking up too much of your precious time!
Why You’ll Love This Bizcochos de Soletilla Caseros
Let’s be honest—life can get hectic, and finding time to bake can feel like a luxury. That’s where these Bizcochos de Soletilla Caseros come in! They’re incredibly easy to make, taking just about 27 minutes from start to finish. Plus, their light, airy texture and sweet flavor make them a hit with everyone, from picky kids to discerning adults. You’ll love how they elevate your dessert game without the fuss!
Ingredients for Bizcochos de Soletilla Caseros
Before we dive into the baking magic, let’s gather our ingredients for these delightful Bizcochos de Soletilla Caseros. Each component plays a vital role in creating that perfect sponge texture and sweet flavor. Here’s what you’ll need:
- Huevos grandes: The stars of our recipe! Eggs provide structure and moisture, helping our bizcochos rise beautifully.
- Azúcar: A must-have for sweetness! It not only sweetens the biscuits but also helps create that lovely golden color as they bake.
- Harina de trigo: This is the backbone of our bizcochos. It gives them their light, fluffy texture. You can use all-purpose flour, but if you want a gluten-free option, try almond flour or a gluten-free blend.
- Extracto de vainilla: A splash of vanilla adds warmth and depth to the flavor. If you’re feeling adventurous, you can swap it for almond extract for a different twist!
- Pizca de sal: Just a pinch! Salt enhances the sweetness and balances the flavors, making every bite more delicious.
- Azúcar glas: This is for that final touch! Sprinkling powdered sugar on top before baking gives our bizcochos a sweet, delicate finish. You can also use cocoa powder for a chocolatey twist!
For those of you who love to experiment, consider adding a bit of lemon or orange zest to the batter for a refreshing citrus kick. And remember, the exact measurements are at the bottom of the article, ready for you to print out and keep handy in your kitchen!
How to Make Bizcochos de Soletilla Caseros
Now that we have our ingredients ready, let’s roll up our sleeves and get baking! Making Bizcochos de Soletilla Caseros is a delightful process that’s easier than you might think. Follow these simple steps, and you’ll have a batch of light, fluffy biscuits in no time!
Step 1: Preheat the Oven
First things first, let’s get that oven preheating to 180 °C (350 °F). Preheating is crucial because it ensures that our bizcochos start baking at the right temperature, helping them rise beautifully. While the oven warms up, prepare a baking tray by lining it with parchment paper. This will prevent our delicate biscuits from sticking and make cleanup a breeze!
Step 2: Separate the Eggs
Next, it’s time to separate the eggs. Crack each egg and gently transfer the yolk to one bowl while letting the egg white fall into another. This step is important because we’ll be whipping the egg whites to create that airy texture we love in Bizcochos de Soletilla Caseros. Make sure no yolk gets into the whites, as even a tiny bit of fat can prevent them from whipping up properly!
Step 3: Beat the Egg Whites
Now, grab your mixer and beat those egg whites! Start on a low speed and gradually increase to medium-high. You’re looking for soft peaks, which means the whites should hold their shape but still be a bit glossy. This process usually takes about 3-5 minutes. If you want to impress your family, this is the secret to achieving that light, fluffy texture!
Step 4: Mix Egg Yolks and Sugar
In a separate bowl, combine the egg yolks with the sugar and the vanilla extract. Using a whisk or mixer, beat them together until the mixture becomes pale and fluffy. This step is key because it helps to incorporate air into the yolks, which will contribute to the overall lightness of our bizcochos. You’ll know it’s ready when it looks like a creamy cloud!
Step 5: Combine Mixtures
Now comes the fun part! Gently fold the whipped egg whites into the yolk mixture. Use a spatula and make slow, sweeping motions from the bottom of the bowl to the top. This technique helps maintain the airiness we’ve worked so hard to create. Remember, we want to keep that volume, so be gentle!
Step 6: Add Flour
Time to add the flour! Sift it over the mixture to avoid lumps, and then fold it in just like we did with the egg whites. This step is crucial for keeping our bizcochos light and fluffy. Be careful not to overmix; we want to keep that lovely airiness intact. Just mix until you see no more flour streaks!
Step 7: Pipe the Mixture
Now, let’s get our piping bag ready! If you don’t have one, a zip-top bag with a corner snipped off works just as well. Fill the bag with the batter and pipe it onto the prepared baking tray in long lines, leaving some space between each one. This will allow them to expand as they bake. It’s like creating little clouds of joy!
Step 8: Sprinkle Sugar
Before we pop them in the oven, let’s sprinkle a light dusting of powdered sugar over the top of each biscuit. This not only adds a touch of sweetness but also gives them a beautiful finish. Plus, who doesn’t love a little extra sweetness in their life?
Step 9: Bake
Now it’s time to bake! Place the tray in the preheated oven and let them bake for about 10 to 12 minutes. Keep an eye on them; you want them to be golden and firm to the touch. A good test is to gently press the top; if it springs back, they’re ready to come out!
Step 10: Cool and Serve
Once they’re baked to perfection, remove the tray from the oven and let the bizcochos cool on the tray for a few minutes. Then, transfer them to a wire rack to cool completely. These little treats are perfect on their own, but they also make a fantastic base for desserts like tiramisú or fresh strawberries with cream. Enjoy your homemade Bizcochos de Soletilla Caseros with a cup of coffee or tea, and watch your family smile with delight!
Tips for Success
- Make sure your mixing bowls and utensils are completely clean and dry for the best egg white results.
- Use room temperature eggs; they whip up better than cold ones!
- Don’t rush the folding process; take your time to keep the mixture airy.
- Experiment with flavors by adding citrus zest or a splash of liqueur to the batter.
- Store any leftovers in an airtight container to keep them fresh for longer.
Equipment Needed
- Mixing bowls: A set of various sizes is handy; glass or stainless steel works best.
- Electric mixer: A hand mixer is perfect, but a whisk will do if you’re feeling strong!
- Piping bag: Use a disposable one or a zip-top bag with a corner cut off.
- Baking tray: A standard cookie sheet lined with parchment paper is ideal.
- Sifter: For the flour; a fine mesh strainer can work in a pinch.
Variations of Bizcochos de Soletilla Caseros
- Citrus Zest: Add a teaspoon of lemon or orange zest to the batter for a refreshing twist that brightens the flavor.
- Chocolate Drizzle: Melt some dark chocolate and drizzle it over the cooled bizcochos for a decadent touch.
- Almond Extract: Swap out the vanilla for almond extract to give your bizcochos a nutty flavor that pairs beautifully with coffee.
- Gluten-Free Option: Use a gluten-free flour blend instead of all-purpose flour to make these treats suitable for gluten-sensitive friends.
- Spiced Version: Add a pinch of cinnamon or nutmeg to the batter for a warm, cozy flavor that’s perfect for fall.
- Nutty Crunch: Fold in some finely chopped nuts, like almonds or hazelnuts, for added texture and flavor.
Serving Suggestions for Bizcochos de Soletilla Caseros
- Pair your bizcochos with a steaming cup of coffee or a soothing herbal tea for a delightful afternoon break.
- Serve them alongside fresh berries and whipped cream for a simple yet elegant dessert.
- Arrange them on a decorative platter, dusted with extra powdered sugar, for a charming presentation at gatherings.
- Use them as a base for tiramisú, layering with coffee and mascarpone for a delicious twist.
FAQs about Bizcochos de Soletilla Caseros
As you embark on your journey to create these delightful Bizcochos de Soletilla Caseros, you might have a few questions. Don’t worry; I’ve got you covered! Here are some common queries that pop up when making these sweet treats:
1. Can I make Bizcochos de Soletilla Caseros ahead of time?
Absolutely! These biscuits can be made in advance and stored in an airtight container. They’ll stay fresh for a few days, making them perfect for prepping ahead of a gathering or a busy week. Just remember to keep them away from moisture to maintain their delightful texture!
2. What can I use instead of eggs in this recipe?
If you’re looking for an egg substitute, you can use unsweetened applesauce or a flaxseed meal mixture (1 tablespoon of flaxseed meal mixed with 2.5 tablespoons of water equals one egg). Keep in mind that the texture might vary slightly, but you’ll still get a tasty result!
3. How do I know when my Bizcochos de Soletilla are done baking?
Great question! You’ll know they’re ready when they’re golden brown and spring back when gently pressed. If you’re unsure, a toothpick inserted into the center should come out clean. Trust your instincts; they’ll be worth the wait!
4. Can I freeze Bizcochos de Soletilla Caseros?
Yes, you can! Once they’re completely cooled, place them in a single layer on a baking sheet and freeze until solid. Then, transfer them to a freezer-safe bag or container. They can be frozen for up to three months. Just thaw them at room temperature when you’re ready to enjoy!
5. What are some creative ways to serve Bizcochos de Soletilla Caseros?
There are so many delicious ways to enjoy these biscuits! You can layer them in a trifle with fruit and cream, serve them with a scoop of ice cream, or simply enjoy them with a cup of coffee or tea. The possibilities are endless, so get creative!
Final Thoughts
Making Bizcochos de Soletilla Caseros is more than just baking; it’s about creating sweet moments in our busy lives. These delightful biscuits are a reminder that even on the craziest days, we can whip up something special in just a few minutes. Whether you enjoy them with a cup of coffee or use them as a base for a stunning dessert, they’re sure to bring smiles to your family’s faces. So, roll up your sleeves, embrace the joy of baking, and let these little treats add a sprinkle of happiness to your day!
“` Print
Bizcochos de Soletilla Caseros que Dejarán Huella
- Total Time: 27 minutos
- Yield: 4 porciones 1x
- Diet: Vegetarian
Description
Deliciosos bizcochos de soletilla caseros, perfectos para acompañar postres o disfrutar solos.
Ingredients
- 4 huevos grandes
- 100 g de azúcar
- 100 g de harina de trigo
- 1 cucharadita de extracto de vainilla
- 1 pizca de sal
- Azúcar glas para espolvorear
Instructions
- Comienza precalentando el horno a 180 °C y prepara una bandeja de horno con papel para hornear.
- En un bol grande, separa las claras de las yemas. Bate las claras con una pizca de sal hasta que estén a punto de nieve.
- En otro recipiente, combina las yemas con el azúcar y el extracto de vainilla, batiendo hasta que la mezcla se vuelva esponjosa y clara.
- Con cuidado, incorpora las claras batidas a la mezcla de yemas, utilizando una espátula y haciendo movimientos suaves de arriba hacia abajo para mantener la aireación.
- Agrega la harina tamizada poco a poco, mezclando con delicadeza hasta que todos los ingredientes estén bien integrados.
- Con la ayuda de una manga pastelera, forma líneas de masa en la bandeja, asegurándote de dejar espacio entre cada una para que no se peguen al hornearse.
- Antes de hornear, espolvorea una ligera capa de azúcar glas sobre los bizcochos.
- Hornea durante 10 a 12 minutos, o hasta que estén dorados y firmes al tacto.
- Una vez listos, retira del horno y deja que se enfríen en la bandeja durante unos minutos antes de pasarlos a una rejilla para que se enfríen completamente.
- Saborea tus bizcochos de soletilla solos o úsalos como base para postres como tiramisú o fresas con crema.
Notes
- Se pueden almacenar en un recipiente hermético para mantener su frescura.
- Son ideales para acompañar café o té.
- Se pueden personalizar añadiendo ralladura de limón o naranja a la mezcla.
- Prep Time: 15 minutos
- Cook Time: 12 minutos
- Category: Postre
- Method: Horneado
- Cuisine: Española
Nutrition
- Serving Size: 1 bizcocho
- Calories: 80
- Sugar: 10 g
- Sodium: 50 mg
- Fat: 2 g
- Saturated Fat: 0.5 g
- Unsaturated Fat: 1.5 g
- Trans Fat: 0 g
- Carbohydrates: 15 g
- Fiber: 0 g
- Protein: 2 g
- Cholesterol: 50 mg