
gutenberg
Introduction to Arroz al Horno
Hey there, fellow food lovers! If you’re anything like me, juggling work, family, and a million other things, you know how precious time can be. That’s why I’m excited to share my take on Arroz al Horno, a delightful Spanish baked rice dish that’s not just a feast for the eyes but also a quick solution for those busy weeknights. Imagine a warm, comforting meal that brings everyone to the table, filled with vibrant flavors and hearty ingredients. This dish is perfect for impressing your loved ones or simply treating yourself after a long day. Let’s dive in!
Why You’ll Love This Arroz al Horno
Let’s be real—life can get hectic, and finding time to cook can feel like a juggling act. That’s where Arroz al Horno shines! It’s not only easy to whip up, but it also packs a punch of flavor that’ll have your family asking for seconds. Plus, it’s a one-pan wonder, meaning less cleanup for you. Trust me, this dish will quickly become a go-to for busy nights!
Ingredients for Arroz al Horno
Now, let’s talk about the star players in our Arroz al Horno dish! Each ingredient brings its own flair to the table, making this meal not just delicious but also a colorful feast for the eyes. Here’s what you’ll need:
- Short-grain rice: This is the backbone of our dish. It absorbs flavors beautifully and gives that perfect creamy texture.
- Chicken broth: A flavorful base that adds depth. You can swap it for vegetable broth if you prefer a lighter taste or want a vegetarian option.
- Onion: Finely chopped, it adds sweetness and aroma when sautéed. It’s like the warm hug of the dish!
- Garlic: Minced garlic brings a punch of flavor that’s hard to resist. It’s the secret ingredient that makes everything better.
- Tomato: Diced tomatoes add freshness and a bit of acidity, balancing the richness of the dish.
- Bell pepper: Diced bell pepper not only adds color but also a sweet crunch. You can use any color you like—red, yellow, or green!
- Smoked paprika: This spice gives a lovely smoky flavor that’s characteristic of Spanish cuisine. It’s a must-have for that authentic taste!
- Saffron threads (optional): If you want to elevate your dish, saffron adds a luxurious touch and a beautiful golden hue. It’s a bit pricey, but a little goes a long way.
- Salt and black pepper: Essential for seasoning. Adjust to your taste, but don’t skip these—they bring all the flavors together.
- Chickpeas: Cooked chickpeas add protein and a hearty texture. Canned ones work just fine—just drain and rinse them!
- Green peas: Fresh or frozen, they add a pop of color and sweetness. Plus, they’re a great way to sneak in some veggies!
- Chorizo sausage: Sliced chorizo brings a spicy kick and rich flavor. If you’re looking for a vegetarian version, feel free to skip this and add more veggies instead.
- Grated cheese: A sprinkle of cheese on top creates a deliciously gooey layer. Manchego is traditional, but mozzarella works well too!
- Olive oil: This is what we’ll use to sauté our aromatics. It adds richness and a lovely flavor.
- Fresh parsley: Chopped parsley is for garnish, adding a fresh touch and a pop of color right before serving.
For exact measurements, you can check the bottom of the article where I’ve listed everything for easy printing. Now that we’ve gathered our ingredients, let’s get cooking!
How to Make Arroz al Horno
Now that we have our ingredients ready, let’s dive into the fun part—making Arroz al Horno! This dish is all about layering flavors and textures, and I promise it’s easier than it sounds. Just follow these simple steps, and you’ll have a delicious meal that’ll impress everyone at the table.
Step 1: Preheat the Oven
First things first, let’s get that oven preheating to 375°F (190°C). Preheating is crucial because it ensures even cooking. You don’t want to throw your dish into a cold oven and end up with unevenly cooked rice. Trust me, this little step makes a big difference!
Step 2: Sauté the Aromatics
Next, grab a large oven-safe skillet or a paella pan and heat up 2 tablespoons of olive oil over medium heat. Once the oil is shimmering, toss in the finely chopped onion and minced garlic. Sauté them for about 5 minutes until the onion turns translucent. This step is like setting the stage for a great performance—the aroma will fill your kitchen and get everyone excited for what’s to come!
Step 3: Add Vegetables
Now it’s time to add some color! Stir in the diced tomato and bell pepper, cooking for another 3-4 minutes until they soften. The tomatoes will release their juices, creating a lovely base for our Arroz al Horno. Plus, the vibrant colors will make your dish look as good as it tastes!
Step 4: Toast the Rice
Here comes the fun part—adding the rice! Pour in 2 cups of short-grain rice and stir it around to coat it with the oil and veggies. Let it toast for about 2 minutes. This step is essential because toasting the rice enhances its flavor and helps it absorb all those delicious juices later on. Think of it as giving your rice a little flavor boost!
Step 5: Combine Ingredients
Now, let’s bring everything together. Pour in 4 cups of chicken broth and sprinkle in 1 teaspoon of smoked paprika, along with salt and black pepper to taste. If you’re feeling fancy, add those saffron threads for a touch of luxury. Bring the mixture to a gentle boil. This is where the magic starts to happen!
Step 6: Stir in Proteins and Veggies
Once boiling, it’s time to stir in the cooked chickpeas, green peas, and sliced chorizo. This is where your dish gets hearty and satisfying. If you’re going for a vegetarian version, just skip the chorizo and add more veggies like zucchini or mushrooms. Mix everything well, and let those flavors mingle!
Step 7: Simmer
Reduce the heat to low, cover the skillet, and let it simmer for about 10 minutes. This step is crucial because it allows the rice to absorb the flavors and cook through. Just imagine the aroma wafting through your home—it’s like a warm hug for your senses!
Step 8: Bake
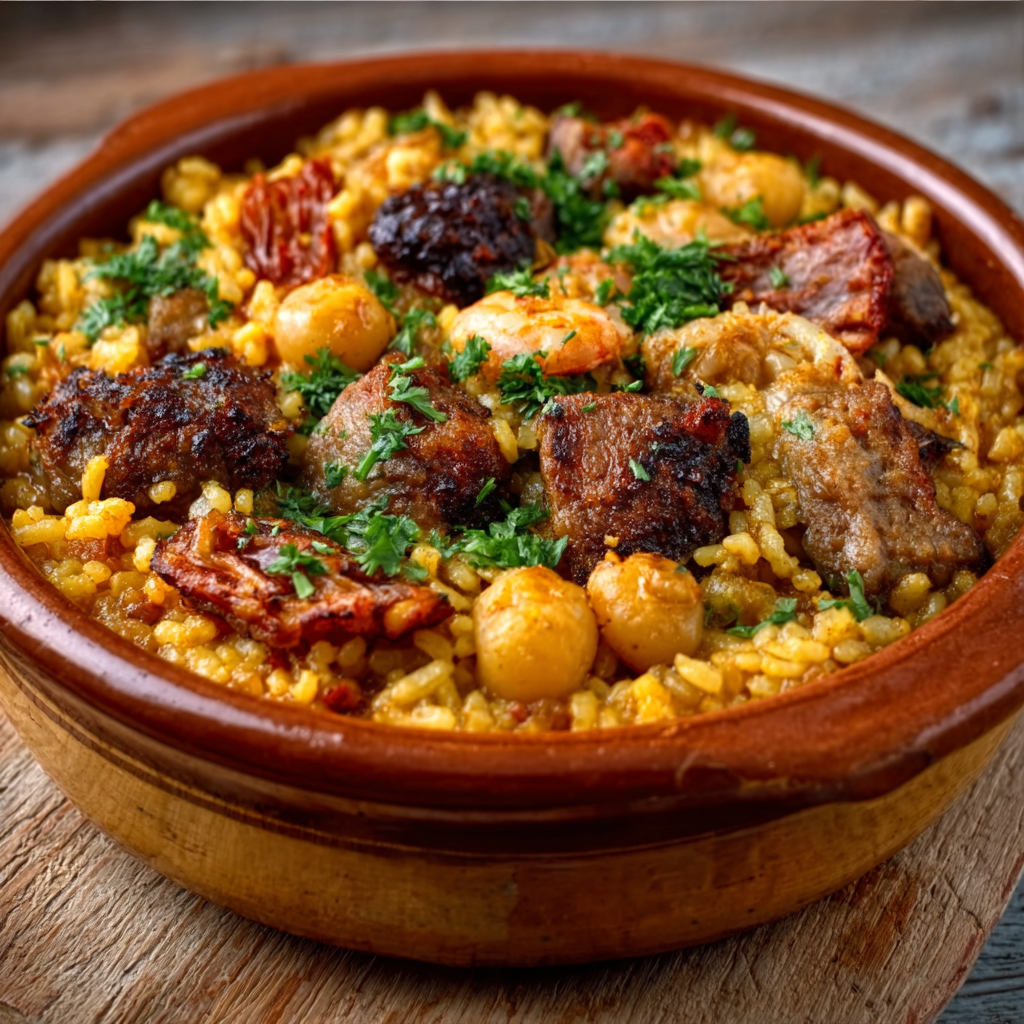
After simmering, remove the lid and sprinkle 1/2 cup of grated cheese on top. Then, transfer the skillet to your preheated oven and bake for 15-20 minutes. The cheese will melt and create a deliciously gooey layer on top, while the rice finishes cooking. When it’s done, let it sit for 5 minutes before serving. Garnish with fresh parsley for that final touch. And there you have it—your very own Arroz al Horno masterpiece!
Tips for Success
- Prep your ingredients ahead of time to save precious minutes during cooking.
- Don’t skip toasting the rice; it enhances the flavor significantly!
- Feel free to customize with your favorite veggies or proteins.
- Let the dish rest after baking; it helps the flavors meld beautifully.
- For a spicier kick, add some red pepper flakes or jalapeños!
Equipment Needed
- Oven-safe skillet or paella pan: A large skillet works well, but a Dutch oven is a great alternative.
- Cutting board and knife: Essential for chopping your veggies and aromatics.
- Measuring cups and spoons: For accurate ingredient measurements.
- Wooden spoon: Perfect for stirring everything together.
Variations of Arroz al Horno
- Vegetarian Delight: Omit the chorizo and add a medley of seasonal vegetables like zucchini, mushrooms, or spinach for a fresh twist.
- Seafood Version: Swap the chorizo for shrimp or mussels. Just add them in during the last few minutes of baking for a delightful seafood flavor.
- Spicy Kick: Add diced jalapeños or a sprinkle of cayenne pepper to the mix for those who love a little heat in their meals.
- Herb Infusion: Experiment with fresh herbs like thyme or rosemary to elevate the flavor profile. Just toss them in with the broth!
- Cheesy Goodness: Try different cheeses like feta or gouda for a unique flavor twist. Each cheese brings its own character to the dish!
Serving Suggestions for Arroz al Horno
- Fresh Salad: Pair your Arroz al Horno with a light green salad dressed in lemon vinaigrette for a refreshing contrast.
- Crusty Bread: Serve with a side of crusty bread to soak up all those delicious flavors.
- Wine Pairing: A chilled white wine, like Sauvignon Blanc, complements the dish beautifully.
- Garnish: Add extra chopped parsley or a sprinkle of paprika on top for a pop of color.
FAQs about Arroz al Horno
Got questions about Arroz al Horno? You’re not alone! Here are some common queries I’ve come across, along with my answers to help you navigate this delicious dish.
1. Can I make Arroz al Horno ahead of time?
Absolutely! You can prepare the dish up to the baking step, cover it, and store it in the fridge for a day. When you’re ready to eat, just pop it in the oven. It’s a great way to save time on busy nights!
2. What can I substitute for chorizo in Arroz al Horno?
If you’re looking for a meat alternative, try using smoked sausage or even diced ham for a different flavor. For a vegetarian option, just load up on more veggies like zucchini or mushrooms. The beauty of Arroz al Horno is its versatility!
3. How do I store leftovers of Arroz al Horno?
Leftovers can be stored in an airtight container in the fridge for up to 3 days. Just reheat in the microwave or oven until warmed through. It’s just as tasty the next day!
4. Can I use brown rice instead of short-grain rice?
While you can use brown rice, keep in mind that it requires a longer cooking time and more liquid. If you decide to go this route, adjust the broth and cooking time accordingly. Short-grain rice is recommended for that creamy texture!
5. Is Arroz al Horno gluten-free?
Yes! As long as you use gluten-free broth and check your chorizo for any gluten-containing ingredients, Arroz al Horno is a delicious gluten-free option. It’s perfect for those with dietary restrictions!
Final Thoughts
Cooking Arroz al Horno is more than just preparing a meal; it’s about creating a moment of joy and togetherness. The aroma wafting through your kitchen, the vibrant colors on your table, and the smiles on your loved ones’ faces make all the effort worthwhile. This dish is a reminder that even on the busiest days, you can whip up something special that brings everyone together. So, roll up your sleeves, embrace the process, and enjoy every bite of this delightful Spanish baked rice. Trust me, it’ll become a cherished favorite in your home!
“`
Print
Arroz al Horno: Discover the Art of Spanish Baking!
- Total Time: 45 minutes
- Yield: 6 servings 1x
- Diet: Gluten Free
Description
Arroz al Horno is a traditional Spanish baked rice dish that combines short-grain rice with flavorful ingredients like chorizo, chickpeas, and vegetables, all baked to perfection.
Ingredients
- 2 cups short-grain rice
- 4 cups chicken broth
- 1 medium onion, finely chopped
- 3 cloves garlic, minced
- 1 medium tomato, diced
- 1 bell pepper, diced
- 1 teaspoon smoked paprika
- 1/2 teaspoon saffron threads (optional)
- 1 teaspoon salt
- 1/2 teaspoon black pepper
- 1 cup cooked chickpeas (canned is fine, drained and rinsed)
- 1/2 cup green peas (fresh or frozen)
- 1/2 pound chorizo sausage, sliced
- 1/2 cup grated cheese (such as Manchego or mozzarella)
- 2 tablespoons olive oil
- Fresh parsley, chopped (for garnish)
Instructions
- Preheat the oven to 375°F (190°C).
- In a large oven-safe skillet or paella pan, heat the olive oil over medium heat. Add the chopped onion and garlic, and sauté until the onion is translucent, about 5 minutes.
- Stir in the diced tomato and bell pepper, cooking for another 3-4 minutes until softened.
- Add the rice to the skillet, stirring to coat it with the oil and vegetables. Cook for 2 minutes, allowing the rice to toast slightly.
- Pour in the chicken broth and add the smoked paprika, saffron (if using), salt, and black pepper. Bring to a gentle boil.
- Stir in the chickpeas, green peas, and sliced chorizo.
- Once boiling, reduce the heat to low, cover the skillet, and simmer for 10 minutes.
- After 10 minutes, remove the lid and sprinkle the grated cheese on top. Transfer the skillet to the preheated oven and bake for 15-20 minutes, or until the rice is tender and the liquid is absorbed.
- Remove from the oven and let it sit for 5 minutes before serving. Garnish with chopped parsley.
Notes
- For a vegetarian version, omit the chorizo and add more vegetables like zucchini or mushrooms.
- You can substitute the chicken broth with vegetable broth for a lighter flavor.
- Prep Time: 15 minutes
- Cook Time: 30 minutes
- Category: Main Course
- Method: Baking
- Cuisine: Spanish
Nutrition
- Serving Size: 1 serving
- Calories: 380
- Sugar: 3g
- Sodium: 800mg
- Fat: 15g
- Saturated Fat: 5g
- Unsaturated Fat: 10g
- Trans Fat: 0g
- Carbohydrates: 45g
- Fiber: 5g
- Protein: 15g
- Cholesterol: 30mg