
gutenberg
Introduction to Chiles en escabeche caseros
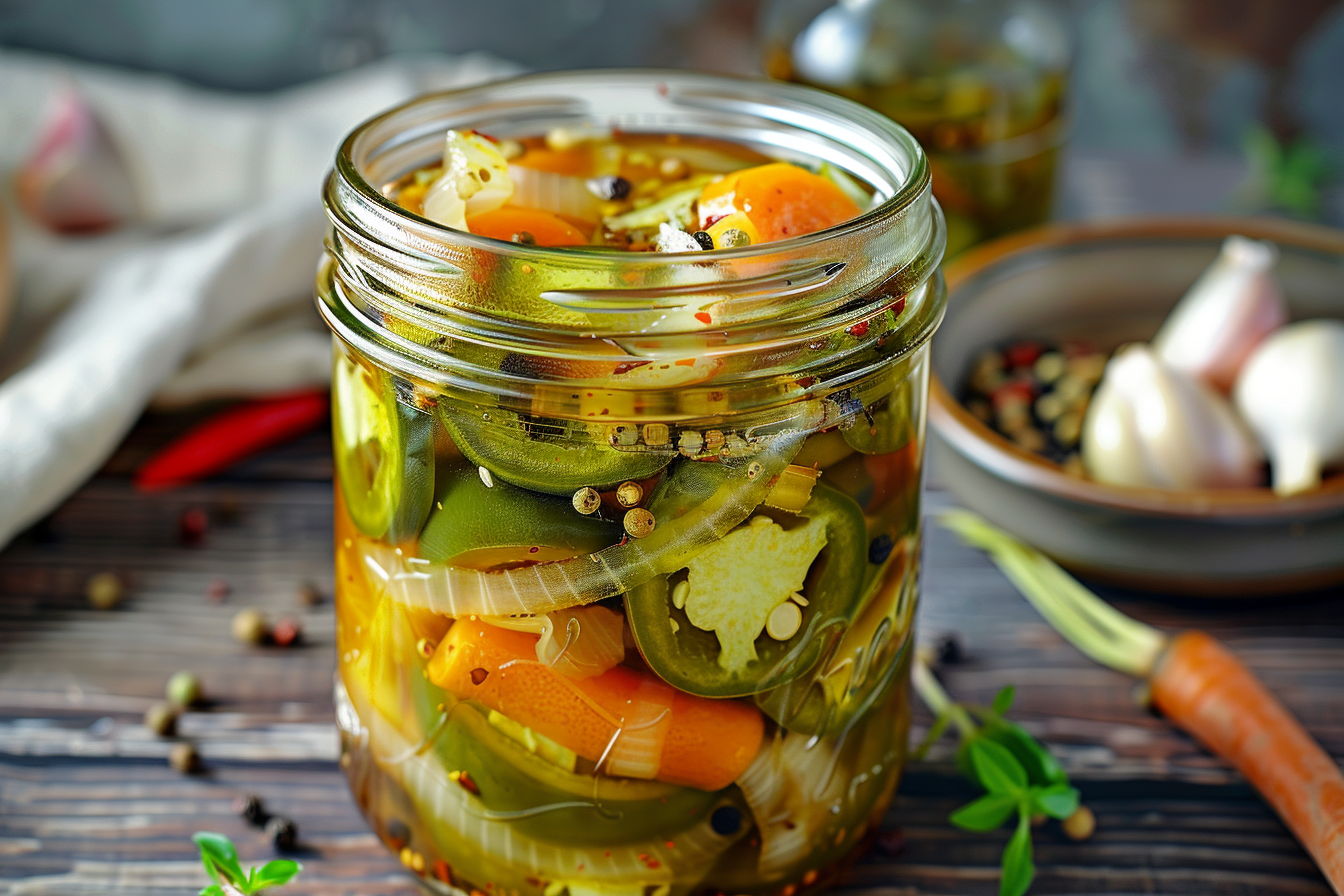
Hola, amigos! If you’re like me, juggling work, family, and a million other things, you know how precious time can be. That’s why I’m excited to share my recipe for chiles en escabeche caseros. These homemade pickled chiles are not just a quick solution for a busy day; they’re a delightful way to add a burst of flavor to your meals. Imagine serving them alongside tacos or sandwiches, instantly elevating your dish! Plus, they’re super easy to make, so you can impress your loved ones without spending hours in the kitchen.
Why You’ll Love This Chiles en escabeche caseros
Let’s be real—life can get hectic, and finding time to cook can feel like a juggling act. That’s where these chiles en escabeche caseros come in! They’re not only quick to whip up, but they also pack a punch of flavor that can transform any meal. Plus, they’re a fantastic way to use up those extra veggies in your fridge. Trust me, your taste buds will thank you!
Ingredients for Chiles en escabeche caseros
Now, let’s dive into the ingredients you’ll need to create these delicious chiles en escabeche caseros. Don’t worry; I’ll keep it simple and straightforward. You can find the exact measurements at the bottom of the article for easy printing!
- Chiles jalapeños or serranos: These are the stars of the show! They bring that signature heat and flavor. If you prefer a milder taste, feel free to remove the seeds before cooking.
- Zanahorias: Carrots add a lovely crunch and a touch of sweetness. Plus, they look beautiful in the jar, don’t you think?
- Cebolla morada: Red onion not only adds a pop of color but also a nice sharpness that balances the heat of the chiles.
- Ajo: Whole garlic cloves infuse the pickling liquid with a rich, aromatic flavor. They soften beautifully during cooking, making them a tasty treat!
- Vinagre blanco: This is the base of your pickling liquid. It provides the tangy flavor that makes these chiles so addictive. You can also use apple cider vinegar for a different twist.
- Agua: Just plain water to balance out the vinegar. It helps create the perfect brine.
- Sal: Salt is essential for flavor and preservation. It helps to draw out moisture from the vegetables, enhancing their crunch.
- Orégano seco: This herb adds a lovely earthy note to the mix. It’s a classic in Mexican cuisine and complements the chiles beautifully.
- Hoja de laurel: A bay leaf adds depth to the flavor profile. Just remember to remove it before serving!
- Pimienta negra: Whole black peppercorns give a subtle warmth and complexity to the brine.
- Azúcar (opcional): A touch of sugar can balance the acidity of the vinegar. If you like a sweeter pickling brine, feel free to add it!
Feel free to get creative! You can also toss in other veggies like cauliflower or radishes for a colorful twist. The beauty of this recipe is its versatility, so don’t hesitate to make it your own!
How to Make Chiles en escabeche caseros
Now that we have our ingredients ready, let’s get cooking! Making chiles en escabeche caseros is a breeze, and I promise you’ll feel like a kitchen superstar in no time. Follow these simple steps, and you’ll have a delicious batch of pickled chiles that will impress your family and friends!
Step 1: Prepare the Pickling Liquid
First things first, grab a large pot and combine the vinegar, water, salt, oregano, bay leaf, and black peppercorns. Stir it all together like you’re mixing up a magic potion! Place the pot over medium heat and bring the mixture to a gentle boil. You’ll know it’s ready when you start to see those little bubbles dancing on the surface. This is where the magic begins, as the spices infuse the liquid with flavor!
Step 2: Prepare the Chiles and Vegetables
While your pickling liquid is heating up, it’s time to give some love to the chiles and veggies. Start by rinsing the chiles under cold water to remove any dirt. Then, using a sharp knife, make a couple of small incisions on each chile. This helps them soak up all that delicious brine. Next, peel the carrots and slice them into thin rounds. For the red onion, just slice it into thin rings. And don’t forget about the garlic—leave those cloves whole for maximum flavor!
Step 3: Cook the Mixture
Once your pickling liquid is boiling, it’s showtime! Carefully add the chiles, carrots, onion, and garlic to the pot. Stir everything gently to ensure the veggies are well-coated in that flavorful brine. Lower the heat and let it simmer for about 10 to 15 minutes. You want the chiles to soften just a bit while still keeping their delightful crunch. Keep an eye on them; nobody likes mushy chiles!
Step 4: Cool and Store
After cooking, remove the pot from the heat and let the mixture cool down to room temperature. This is a great time to take a breather and maybe even sneak a taste of those veggies! Once cooled, grab a sterilized glass jar (you can do this by boiling it in water for a few minutes) and carefully transfer the chiles and vegetables along with the pickling liquid into the jar. Make sure everything is submerged in the brine—this is key for flavor!
Step 5: Refrigerate
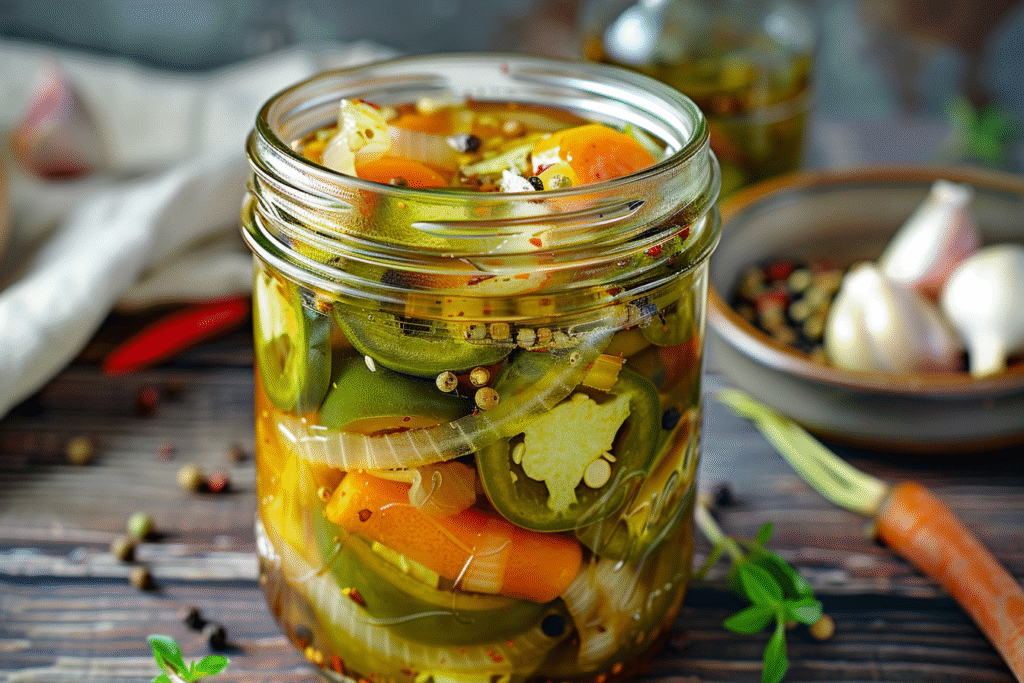
Now comes the hardest part—waiting! Seal the jar tightly and pop it in the refrigerator. Let those flavors meld together for at least 24 hours before diving in. Trust me, the wait is worth it! The longer they sit, the more delicious they become. You’ll have a jar of chiles en escabeche caseros that’s bursting with flavor, ready to elevate any meal!
Tips for Success
- Always use fresh chiles for the best flavor and crunch.
- Don’t skip the incisions on the chiles; they help absorb the brine.
- Feel free to adjust the spice level by choosing milder chiles or removing seeds.
- Experiment with additional veggies like cauliflower or radishes for variety.
- Store your chiles in a cool, dark place in the fridge for maximum freshness.
Equipment Needed
- Large pot: A sturdy pot for boiling the pickling liquid. A Dutch oven works great too!
- Sterilized glass jar: Use a mason jar or any glass container with a tight seal.
- Sharp knife: For slicing the vegetables. A good paring knife will do the trick.
- Cutting board: Essential for prepping your veggies safely.
- Measuring cups: To ensure you get the right amounts of liquid.
Variations
- Spicy Kick: For those who love heat, add sliced habaneros or serranos along with the jalapeños. Just be cautious—these little guys pack a punch!
- Herb Infusion: Experiment with fresh herbs like cilantro or thyme for a unique flavor twist. Toss in a few sprigs while cooking the brine.
- Sweet and Tangy: If you enjoy a sweeter profile, increase the sugar in the brine or add sliced bell peppers for a colorful, sweet crunch.
- Vegan Delight: This recipe is already vegan-friendly, but you can enhance it by adding other vegetables like zucchini or asparagus for extra nutrition.
- Garlic Lovers: If you can’t get enough garlic, feel free to double the amount of whole cloves for an extra punch of flavor!
Serving Suggestions
- Pair your chiles en escabeche caseros with tacos, tortas, or grilled meats for a zesty kick.
- Serve them alongside a refreshing guacamole and tortilla chips for a delightful appetizer.
- For drinks, try a chilled cerveza or a tangy margarita to complement the flavors.
- Present them in a colorful dish to showcase their vibrant hues—your guests will be impressed!
FAQs about Chiles en escabeche caseros
As you embark on your journey to make chiles en escabeche caseros, you might have a few questions. Don’t worry; I’ve got you covered! Here are some common queries I’ve encountered, along with their answers.
1. How long do chiles en escabeche last in the fridge?
Once you’ve made your chiles en escabeche caseros, they can last in the refrigerator for several weeks. Just make sure they’re always submerged in the brine to keep them fresh and flavorful!
2. Can I use other types of chiles?
Absolutely! While jalapeños and serranos are traditional, feel free to experiment with other varieties like banana peppers or even sweet bell peppers for a milder option. The key is to choose chiles that you enjoy!
3. What can I do if my chiles are too spicy?
If you find your chiles en escabeche caseros are a bit too fiery, you can balance the heat by adding a bit more sugar to the brine. Alternatively, serve them alongside creamy dips like sour cream or guacamole to mellow out the spice.
4. Can I make this recipe ahead of time?
Yes! In fact, making chiles en escabeche caseros ahead of time is a great idea. The flavors deepen and improve as they sit in the fridge. Just remember to give them at least 24 hours to marinate before serving!
5. Are there any dietary restrictions I should consider?
This recipe is naturally vegetarian and vegan-friendly. If you’re watching your sodium intake, you can reduce the amount of salt in the brine. Just keep in mind that salt is essential for preservation and flavor, so adjust carefully!
Final Thoughts
Making chiles en escabeche caseros is more than just a cooking project; it’s a delightful experience that brings a burst of flavor to your table. I love how this simple recipe transforms ordinary meals into something special, all while being quick and easy to prepare. Plus, it’s a fantastic way to bond with family over food, sharing stories and laughter as you enjoy these zesty pickles together. So, roll up your sleeves, gather your ingredients, and let the magic of pickling brighten your kitchen and your meals. You won’t regret it!
“`
Print
Chiles en escabeche caseros: descubre la receta perfecta
- Total Time: 30 minutos más 24 horas de refrigeración
- Yield: 1 frasco de 1 litro 1x
- Diet: Vegetarian
Description
Receta casera de chiles en escabeche, perfectos para acompañar tus platillos favoritos.
Ingredients
- 500 g de chiles jalapeños o serranos
- 2 zanahorias medianas, peladas y cortadas en rodajas
- 1 cebolla morada, en rodajas finas
- 4 dientes de ajo, pelados y enteros
- 1 taza de vinagre blanco
- 1 taza de agua
- 1 cucharada de sal
- 1 cucharadita de orégano seco
- 1 hoja de laurel
- 5 granos de pimienta negra
- 1 cucharadita de azúcar (opcional)
Instructions
- En una cacerola grande, mezcla el vinagre, el agua, la sal, el orégano, la hoja de laurel, los granos de pimienta y el azúcar. Calienta a fuego medio hasta que comience a hervir.
- Mientras tanto, limpia los chiles y realiza un par de incisiones en su piel para permitir que absorban mejor los sabores.
- Incorpora los chiles, las zanahorias, la cebolla y los ajos a la mezcla hirviendo. Cocina a fuego bajo durante 10 a 15 minutos, vigilando que los chiles se ablanden ligeramente pero mantengan su textura crujiente.
- Retira la cacerola del fuego y deja que la mezcla se enfríe a temperatura ambiente.
- Cuando esté a temperatura ambiente, vierte los chiles y las verduras junto con el líquido en un frasco de vidrio previamente esterilizado. Asegúrate de que todo quede bien sumergido en el líquido.
- Sella el frasco de forma hermética y guarda en el refrigerador por un mínimo de 24 horas para que los sabores se mezclen adecuadamente.
- Sirve tus chiles en escabeche como un delicioso acompañamiento para tacos, tortas o cualquier platillo que desees realzar.
Notes
- Los chiles en escabeche se pueden conservar en el refrigerador por varias semanas.
- Si prefieres un sabor más suave, puedes quitar las semillas de los chiles antes de cocinarlos.
- Esta receta es versátil; puedes añadir otros vegetales como coliflor o rábanos.
- Prep Time: 15 minutos
- Cook Time: 15 minutos
- Category: Acompañamiento
- Method: Esterilización y encurtido
- Cuisine: Mexicana
Nutrition
- Serving Size: 1 porción
- Calories: 50
- Sugar: 1 g
- Sodium: 300 mg
- Fat: 0 g
- Saturated Fat: 0 g
- Unsaturated Fat: 0 g
- Trans Fat: 0 g
- Carbohydrates: 10 g
- Fiber: 2 g
- Protein: 1 g
- Cholesterol: 0 mg