
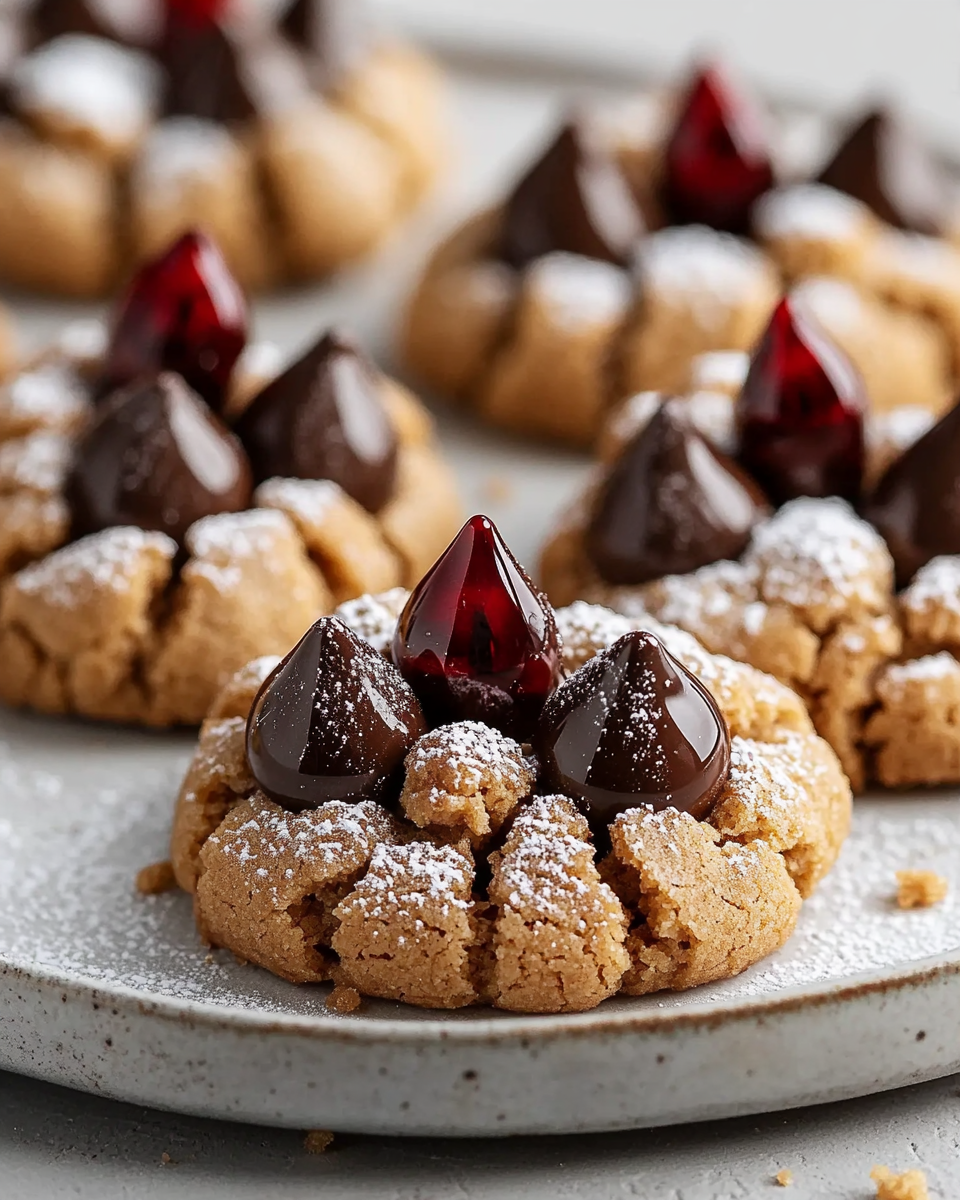
Introduction to Galletas de Mantequilla de Cacahuate con Flor de Chocolate Sin Gluten
Hola, amigas! If you’re anything like me, your days are a whirlwind of work, family, and a million little tasks that seem to multiply by the minute. That’s why I’m excited to share my recipe for Galletas de Mantequilla de Cacahuate con Flor de Chocolate Sin Gluten. These delightful cookies are not just a treat; they’re a quick solution for those busy afternoons when you need a little something sweet to lift your spirits. With their rich peanut butter flavor and a heart of chocolate, they’re sure to impress your loved ones without taking up too much of your precious time!
Why You’ll Love This Galletas de Mantequilla de Cacahuate con Flor de Chocolate Sin Gluten
Let’s be honest—life can get hectic, and finding time to bake can feel like a luxury. That’s why these Galletas de Mantequilla de Cacahuate con Flor de Chocolate Sin Gluten are a game-changer! They come together in just 27 minutes, making them perfect for a last-minute treat. Plus, the combination of creamy peanut butter and melty chocolate is simply irresistible. Your family will be begging for more, and you’ll love how easy they are to whip up!
Ingredients for Galletas de Mantequilla de Cacahuate con Flor de Chocolate Sin Gluten
Before we dive into the baking magic, let’s gather our ingredients for these scrumptious Galletas de Mantequilla de Cacahuate con Flor de Chocolate Sin Gluten. Each component plays a vital role in creating that perfect cookie experience. Here’s what you’ll need:
- Mantequilla de cacahuate natural: This is the star of the show! Choose a creamy or crunchy variety based on your preference. Natural peanut butter adds a rich flavor and a lovely texture.
- Azúcar moreno: This adds a hint of caramel flavor and moisture to the cookies. If you’re out, you can substitute it with regular sugar, but the taste will be slightly different.
- Azúcar blanca: This sweetens the cookies and helps them spread just right. You can use coconut sugar for a healthier twist, but keep in mind it may alter the color.
- Huevo grande: Eggs bind the ingredients together and give the cookies a nice lift. If you’re looking for an egg-free option, try using a flax egg (1 tablespoon of ground flaxseed mixed with 2.5 tablespoons of water).
- Extracto de vainilla: A splash of vanilla enhances the overall flavor, making the cookies taste even more delightful. You can also use almond extract for a different twist!
- Bicarbonato de sodio: This is your leavening agent, helping the cookies rise and become fluffy. Make sure it’s fresh for the best results.
- Sal: Just a pinch of salt balances the sweetness and enhances the flavors. Don’t skip it, as it’s essential for a well-rounded taste.
- Bombones de chocolate (tipo Kisses): These little gems are the cherry on top! They melt beautifully in the center of each cookie. If you prefer dark chocolate, feel free to swap them out.
- Azúcar extra para decorar: A light sprinkle of sugar on top adds a lovely finishing touch. It’s optional, but who doesn’t love a little sparkle?
For exact measurements, check the bottom of the article where you can find everything listed for easy printing. Now that we have our ingredients ready, let’s get to the fun part—baking!
How to Make Galletas de Mantequilla de Cacahuate con Flor de Chocolate Sin Gluten
Now that we have our ingredients ready, let’s dive into the delightful process of making these Galletas de Mantequilla de Cacahuate con Flor de Chocolate Sin Gluten. Follow these simple steps, and you’ll have a batch of cookies that will make your kitchen smell heavenly!
Step 1: Preheat the Oven
First things first, preheat your oven to 175°C (350°F). This step is crucial because it ensures that your cookies bake evenly. While the oven is warming up, line a baking sheet with parchment paper. This not only prevents sticking but also makes cleanup a breeze. Trust me, your future self will thank you!
Step 2: Mix the Peanut Butter and Sugars
In a large mixing bowl, combine the natural peanut butter with both sugars. Use a sturdy spatula or an electric mixer to blend them together until you achieve a smooth and creamy texture. You want it to be well combined, almost like a thick frosting. This mixture is the heart of your cookies, so take your time to get it just right!
Step 3: Add Egg and Vanilla
Next, crack in the large egg and pour in the vanilla extract. These ingredients are essential for binding everything together and adding that lovely flavor. Mix well until everything is fully incorporated. The batter should be thick and slightly glossy, which means you’re on the right track!
Step 4: Combine Dry Ingredients
In a separate bowl, mix the baking soda and salt. This step is important because it ensures that the leavening agent is evenly distributed throughout the dough. Once mixed, gradually add this dry mixture to your peanut butter blend. Stir until there are no lumps, and the dough is smooth. This is where the magic starts to happen!
Step 5: Form the Cookie Balls
Now it’s time to shape your cookies! Using a tablespoon or a cookie scoop, take portions of the dough and roll them into balls. Place them on the prepared baking sheet, leaving about two inches of space between each ball. They will spread while baking, so give them room to breathe. If you want uniform cookies, try to make them all the same size!
Step 6: Bake the Cookies
Pop the baking sheet into your preheated oven and bake for 10-12 minutes. Keep an eye on them! You’ll know they’re ready when the edges turn golden brown, but the centers should still look a bit soft. This is key to achieving that perfect chewy texture!
Step 7: Add Chocolate Kisses
As soon as you take the cookies out of the oven, it’s time for the chocolate kisses! While the cookies are still warm, gently press a chocolate kiss into the center of each cookie. The heat will melt the chocolate just enough to create a deliciously gooey center. Don’t be shy—make sure it’s nestled in there nicely!
Step 8: Cool the Cookies
Let the cookies sit on the baking sheet for a few minutes before transferring them to a wire rack to cool completely. This cooling period is important because it allows the cookies to firm up a bit. If you try to move them too soon, they might fall apart. Patience is a virtue, especially when it comes to cookies!
Tips for Success
- Use room temperature ingredients for better mixing.
- Don’t overmix the dough; it should be just combined.
- For a fun twist, add chopped nuts or a sprinkle of sea salt on top.
- Keep an eye on the cookies while baking to avoid overcooking.
- Store cookies in an airtight container to maintain freshness.
Equipment Needed
- Baking sheet: A standard cookie sheet works well, but you can also use a glass or ceramic baking dish.
- Parchment paper: If you don’t have this, greasing the baking sheet lightly will do.
- Mixing bowls: Any size will work, but a large bowl is best for mixing.
- Spatula or electric mixer: A spatula is great for mixing by hand, while an electric mixer saves time.
- Cookie scoop or tablespoon: A scoop ensures uniform cookie sizes, but a regular tablespoon works just fine!
Variations
- Nutty Delight: Add 1/2 cup of chopped walnuts or pecans to the dough for an extra crunch and flavor.
- Chocolate Lovers: Swap the chocolate kisses for dark chocolate chips or chunks for a richer chocolate experience.
- Peanut Butter Swirl: Mix in 1/4 cup of creamy peanut butter chips for an added layer of peanut butter goodness.
- Spiced Up: Add a pinch of cinnamon or nutmeg to the dough for a warm, cozy flavor that’s perfect for fall.
- Vegan Option: Replace the egg with a flax egg (1 tablespoon ground flaxseed mixed with 2.5 tablespoons water) and use maple syrup instead of sugar for a vegan-friendly treat.
Serving Suggestions
- Pair these Galletas de Mantequilla de Cacahuate con Flor de Chocolate Sin Gluten with a tall glass of cold milk for a classic treat.
- Serve them alongside a warm cup of coffee or tea for a cozy afternoon snack.
- For a festive touch, arrange the cookies on a decorative platter and sprinkle with colorful sprinkles.
- These cookies also make a delightful addition to lunchboxes or as a sweet surprise for after-school snacks.
FAQs about Galletas de Mantequilla de Cacahuate con Flor de Chocolate Sin Gluten
1. ¿Puedo hacer estas galletas sin gluten si no tengo mantequilla de cacahuate?
¡Claro! Si no tienes mantequilla de cacahuate, puedes usar mantequilla de almendra o incluso mantequilla de semillas de girasol. Solo asegúrate de que sean versiones naturales y sin gluten para mantener la receta adecuada para todos.
2. ¿Cuánto tiempo se pueden almacenar las galletas?
Estas Galletas de Mantequilla de Cacahuate con Flor de Chocolate Sin Gluten se pueden almacenar en un recipiente hermético a temperatura ambiente por hasta una semana. Si quieres que se mantengan frescas por más tiempo, ¡puedes congelarlas! Simplemente colócalas en una bolsa para congelar y estarán listas para disfrutar cuando lo desees.
3. ¿Puedo usar edulcorantes en lugar de azúcar?
Sí, puedes usar edulcorantes como stevia o eritritol si prefieres una opción más baja en azúcar. Sin embargo, ten en cuenta que esto puede cambiar un poco la textura y el sabor de las galletas. Te recomiendo hacer una pequeña prueba primero para ver cómo te gusta.
4. ¿Qué puedo hacer si la masa está demasiado pegajosa?
Si notas que la masa está demasiado pegajosa, puedes refrigerarla durante 15-30 minutos. Esto ayudará a que se endurezca un poco y sea más fácil de manejar. También puedes espolvorear un poco de harina sin gluten en tus manos al formar las bolitas.
5. ¿Puedo hacer estas galletas más saludables?
¡Definitivamente! Para hacerlas más saludables, puedes reducir la cantidad de azúcar o usar un sustituto más natural como el puré de plátano o compota de manzana. También puedes agregar avena sin gluten para aumentar la fibra y hacerlas más saciantes. ¡Experimenta y encuentra la combinación que más te guste!
Final Thoughts
Making Galletas de Mantequilla de Cacahuate con Flor de Chocolate Sin Gluten is more than just baking; it’s about creating sweet moments with your loved ones. The joy of pulling a warm batch from the oven, the delightful aroma wafting through your home, and the smiles on your family’s faces as they take that first bite—these are the little things that make life special. Whether it’s a busy weekday or a cozy weekend, these cookies are a simple way to spread happiness. So, roll up your sleeves, and let’s bake some love into your kitchen!
“` Print
Galletas de Mantequilla de Cacahuate con Flor de Chocolate Sin Gluten: ¡Descubre una delicia irresistible!
- Total Time: 27 minutos
- Yield: 24 galletas 1x
- Diet: Gluten Free
Description
Deliciosas galletas de mantequilla de cacahuate con un corazón de chocolate, perfectas para cualquier ocasión y sin gluten.
Ingredients
- 1 taza de mantequilla de cacahuate natural
- 1 taza de azúcar moreno
- 1/2 taza de azúcar blanca
- 1 huevo grande
- 1 cucharadita de extracto de vainilla
- 1/2 cucharadita de bicarbonato de sodio
- 1/4 cucharadita de sal
- 1 taza de bombones de chocolate (tipo Kisses)
- Azúcar extra para decorar
Instructions
- Comienza precalentando el horno a 175°C (350°F) y forra una bandeja para hornear con papel de hornear.
- En un bol amplio, combina la mantequilla de cacahuate con los azúcares y mezcla hasta que obtengas una textura suave y cremosa.
- Incorpora el huevo y el extracto de vainilla, batiendo bien hasta que todo esté bien integrado.
- En un recipiente aparte, mezcla el bicarbonato de sodio con la sal y luego añade esta mezcla a la masa, mezclando hasta que no queden grumos.
- Con la ayuda de una cuchara, toma porciones de masa y forma bolitas, colocándolas en la bandeja con suficiente separación entre ellas.
- Hornea las bolitas durante 10-12 minutos, vigilando que los bordes se tornen dorados.
- Al sacar las galletas del horno, coloca un bombón de chocolate en el centro de cada una mientras aún están calientes, presionando suavemente.
- Deja que las galletas reposen en la bandeja durante unos minutos antes de pasarlas a una rejilla para que se enfríen por completo.
- Si lo deseas, espolvorea un poco de azúcar extra sobre las galletas antes de servir.
Notes
- Estas galletas son perfectas para quienes buscan opciones sin gluten.
- Se pueden almacenar en un recipiente hermético por varios días.
- Para un toque extra, puedes añadir nueces picadas a la masa.
- Prep Time: 15 minutos
- Cook Time: 12 minutos
- Category: Postre
- Method: Hornear
- Cuisine: Americana
Nutrition
- Serving Size: 1 galleta
- Calories: 150
- Sugar: 10g
- Sodium: 100mg
- Fat: 8g
- Saturated Fat: 2g
- Unsaturated Fat: 6g
- Trans Fat: 0g
- Carbohydrates: 18g
- Fiber: 1g
- Protein: 3g
- Cholesterol: 20mg