
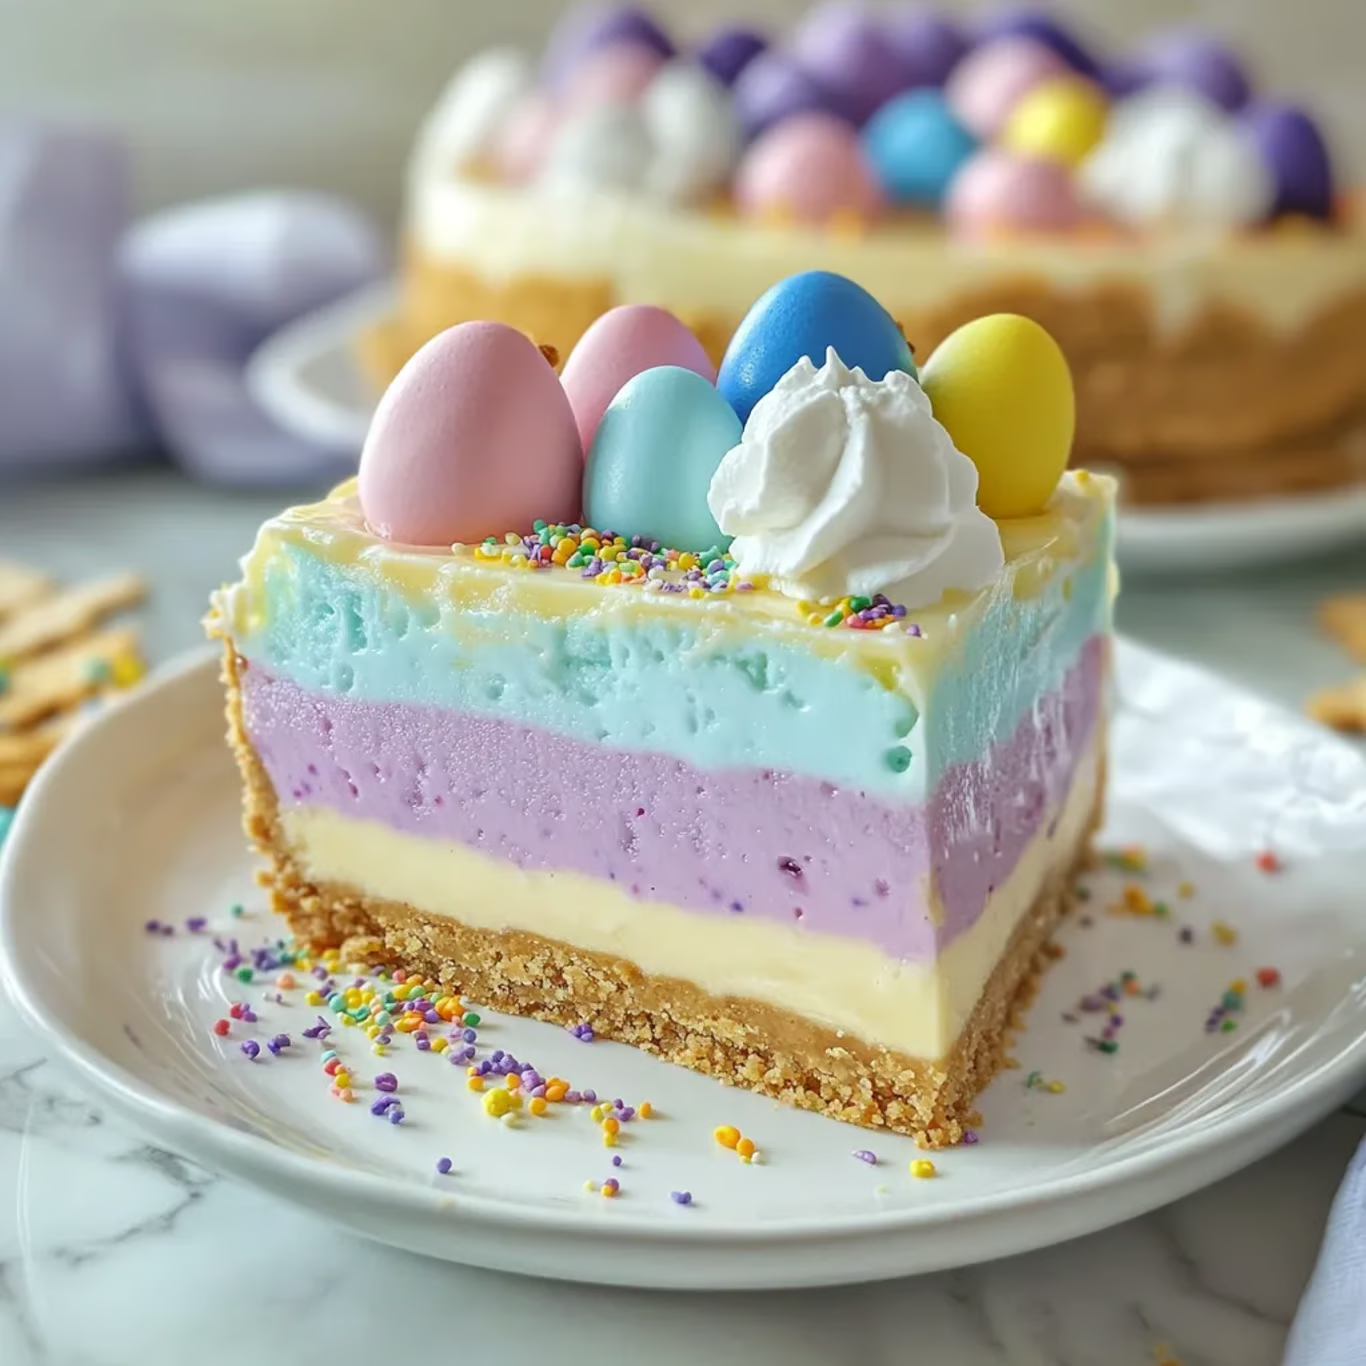
Introduction to Easter Jello Pie Recipe
Easter Jello Pie Recipe is a colorful and fun treat that brings joy to any gathering. This pie is not only visually appealing but also easy to make, making it a perfect choice for Easter celebrations. With its creamy filling and vibrant Jello layer, it’s sure to be a hit with both kids and adults alike.
What Makes the Easter Jello Pie Special?
The Easter Jello Pie stands out for several reasons. First, it combines the rich, creamy texture of cream cheese with the light, fruity flavor of Jello. This contrast creates a delightful experience for your taste buds. Additionally, the pie is visually stunning, with its bright colors reminiscent of spring flowers. It’s a dessert that not only tastes great but also adds a festive touch to your table.
Moreover, this pie is incredibly versatile. You can choose your favorite Jello flavor, making it customizable for any occasion. Whether you prefer strawberry, lime, or blue raspberry, the options are endless. Plus, it’s a no-bake dessert, which means less time in the kitchen and more time enjoying the company of family and friends.
A Brief History of Jello Desserts
Jello has a rich history that dates back to the late 19th century. Originally, it was a simple gelatin dessert that became popular in American households. Over the years, creative cooks began to experiment with flavors and presentations, leading to the creation of layered desserts like the Jello pie. This evolution has made Jello a staple in many celebrations, especially during holidays like Easter.
Today, Jello desserts are loved for their bright colors and fun textures. They are often associated with childhood memories and family gatherings. The Easter Jello Pie is a modern twist on this classic treat, combining nostalgia with a fresh, festive flair. It’s a dessert that brings people together, making it a perfect addition to your Easter festivities.
Ingredients for Easter Jello Pie Recipe
Easter Jello Pie Recipe, you will need a few simple ingredients. Each component plays a vital role in achieving the perfect balance of flavors and textures. Here’s what you’ll need:
- 1 ½ cups graham cracker crumbs
- ½ cup unsalted butter, melted
- 1 cup sugar
- 1 (8 oz) package cream cheese, softened
- 1 (8 oz) container whipped topping, thawed
- 1 (3 oz) package of your favorite flavored Jello (e.g., strawberry, lime, or blue raspberry)
- 1 cup boiling water
- 1 cup cold water
These ingredients come together to create a delicious pie that is both creamy and fruity. The graham cracker crust provides a crunchy base, while the cream cheese filling adds richness. The Jello layer on top brings a burst of flavor and color, making this dessert a showstopper at any gathering.
Feel free to get creative with your ingredient choices! You can mix and match different Jello flavors or even add fresh fruit to enhance the taste and presentation. The possibilities are endless, allowing you to customize the pie to suit your preferences.
Step-by-Step Preparation of Easter Jello Pie Recipe
Easter Jello Pie Recipe. Follow these simple steps to create a delicious dessert that will impress everyone at your gathering.
Step 1: Preparing the Crust
First, let’s start with the crust. In a mixing bowl, combine the graham cracker crumbs and melted butter. Mix them well until the crumbs are fully coated. This mixture should feel like wet sand. Next, press the mixture firmly into the bottom and up the sides of a 9-inch pie pan. Make sure it’s even and compact. This step is crucial for a sturdy crust.
Once you’ve shaped the crust, bake it in a preheated oven at 350°F for about 8-10 minutes. You want it to turn lightly golden. After baking, remove it from the oven and let it cool completely. This cooling time is important, as it helps the crust hold its shape when you add the filling.
Step 2: Making the Jello Layer
While the crust cools, you can prepare the Jello layer. In a separate bowl, dissolve the Jello powder in 1 cup of boiling water. Stir it well until the powder is completely dissolved. This step is key to achieving a smooth Jello layer. After that, add 1 cup of cold water to the mixture and stir again. Allow the Jello mixture to cool slightly, but don’t let it set just yet!
Step 3: Assembling the Pie
Now, it’s time to assemble your pie! In another mixing bowl, beat the softened cream cheese and sugar together until the mixture is smooth and creamy. This will create a rich filling that pairs perfectly with the Jello. Once combined, gently fold in the thawed whipped topping. Be careful not to deflate the whipped topping; you want to keep it light and airy.
Spread this creamy mixture evenly over the cooled graham cracker crust. Make sure it’s smooth and covers the entire base. After that, carefully pour the cooled Jello mixture over the cream cheese layer. Pour slowly to avoid disturbing the layers. This will create a beautiful, colorful pie that looks as good as it tastes!
Step 4: Chilling the Pie
Finally, it’s time to chill your pie. Place the assembled pie in the refrigerator and let it chill for at least 4 hours, or until the Jello is fully set. This step is essential for the Jello to firm up and hold its shape when you slice it. Once set, your Easter Jello Pie is ready to be served!
When you’re ready to enjoy, slice the pie into wedges and serve it chilled. Your guests will love the creamy filling and fruity Jello layer. It’s a delightful treat that’s perfect for any spring celebration!
Variation of Easter Jello Pie Recipe
Easter Jello Pie Recipe is not just a one-flavor wonder! You can easily switch things up to create a dessert that suits your taste. Here are some fun variations to consider.
Different Flavors to Try
One of the best parts of making an Easter Jello Pie is the variety of flavors you can choose from. While the classic options like strawberry, lime, and blue raspberry are always a hit, don’t hesitate to explore other fruity flavors. Here are some ideas:
- Peach: A sweet and juicy option that brings a taste of summer.
- Cherry: This flavor adds a tart twist that pairs well with the creamy filling.
- Orange: Bright and zesty, orange Jello can give your pie a refreshing kick.
- Mixed Berry: Combine different berry flavors for a colorful and delicious treat.
For an extra special touch, consider layering two different flavors of Jello. For example, you could use lime on the bottom and strawberry on top. This not only looks beautiful but also creates a delightful mix of flavors in every bite!
Alternative Crust Options
If you want to change up the crust, there are plenty of alternatives to the classic graham cracker base. Here are some ideas to inspire your creativity:
- Chocolate Cookie Crust: Use crushed chocolate cookies for a rich, chocolatey flavor that pairs perfectly with fruity Jello.
- Oreo Crust: Similar to the chocolate cookie crust, crushed Oreos add a delicious twist and a hint of creaminess.
- Shortbread Crust: A buttery shortbread crust can provide a lovely, crumbly texture that complements the creamy filling.
- Nut Crust: For a gluten-free option, consider using ground nuts mixed with butter to create a nutty, crunchy base.
These alternative crusts can add a new dimension to your Easter Jello Pie, making it even more enjoyable. Feel free to experiment and find the combination that you love the most!
Cooking Note for Easter Jello Pie Recipe
Easter Jello Pie Recipe, there are a few important cooking notes to keep in mind. These tips will help ensure that your pie turns out perfectly every time, making it a delightful addition to your Easter celebrations.
First, always use room temperature cream cheese. This makes it easier to blend with the sugar, resulting in a smooth and creamy filling. If your cream cheese is too cold, it can create lumps in the mixture, which you want to avoid.
Next, be patient when dissolving the Jello. Make sure to stir the boiling water thoroughly until the Jello powder is completely dissolved. This step is crucial for achieving a clear and smooth Jello layer. If any granules remain, they can affect the texture of your pie.
Additionally, allow the Jello mixture to cool slightly before pouring it over the cream cheese layer. If the Jello is too hot, it can melt the cream cheese layer, causing the colors to blend together. You want to maintain those beautiful layers for a stunning presentation.
Lastly, remember that chilling time is essential. While it may be tempting to cut into the pie sooner, letting it chill for at least 4 hours ensures that the Jello sets properly. This will help the pie hold its shape when sliced, making it easier to serve and more enjoyable to eat.
By following these cooking notes, you’ll create a beautiful and delicious Easter Jello Pie that will impress your family and friends. Enjoy the process and have fun with this festive dessert!
Serving Suggestions for Easter Jello Pie Recipe
Easter Jello Pie Recipe is ready, it’s time to think about how to serve it. This colorful dessert is not only delicious but also visually appealing, making it a centerpiece at any gathering. Here are some ideal pairings and presentation tips to enhance your pie experience.
Ideal Pairings with the Pie
To elevate your Easter Jello Pie, consider serving it with complementary flavors and textures. Here are some delightful pairings:
- Fresh Fruit: Serve slices of the pie with fresh berries, such as strawberries, blueberries, or raspberries. The natural sweetness and tartness of the fruit will enhance the flavors of the pie.
- Whipped Cream: A dollop of whipped cream on top of each slice adds a creamy touch that pairs beautifully with the fruity Jello layer.
- Mint Leaves: Garnish the pie with fresh mint leaves for a pop of color and a refreshing flavor that complements the sweetness.
- Iced Tea or Lemonade: Pair the pie with a refreshing drink like iced tea or lemonade. The citrusy notes will balance the sweetness of the dessert.
These pairings not only enhance the taste but also create a delightful dining experience for your guests. Feel free to mix and match based on your preferences!
Presentation Tips
Presentation is key when serving your Easter Jello Pie. Here are some tips to make your dessert look as good as it tastes:
- Use a Decorative Pie Plate: A colorful or patterned pie plate can add charm to your presentation. Consider using a spring-themed plate to match the festive occasion.
- Slice Neatly: Use a sharp knife to cut clean slices. Wipe the knife with a damp cloth between cuts for a tidy appearance.
- Add Colorful Toppings: Sprinkle some colorful sprinkles or edible flowers on top of the pie for a fun and festive look.
- Serve on a Cake Stand: Elevate your pie by placing it on a cake stand. This adds height and draws attention to your beautiful dessert.
By following these serving suggestions and presentation tips, your Easter Jello Pie will not only taste amazing but also look stunning on your table. Enjoy sharing this delightful dessert with your loved ones!
Tips for Perfecting Your Easter Jello Pie Recipe
Easter Jello Pie Recipe can be a fun and rewarding experience. However, there are a few common pitfalls that can occur along the way. By keeping these tips in mind, you can ensure that your pie turns out beautifully every time.
Common Mistakes to Avoid
Even the best bakers can make mistakes! Here are some common errors to watch out for:
- Using Cold Cream Cheese: Always use cream cheese that is at room temperature. Cold cream cheese can create lumps in your filling, making it less smooth.
- Not Dissolving the Jello Properly: Make sure to stir the Jello in boiling water until it is completely dissolved. Any undissolved granules can affect the texture of your pie.
- Pouring Hot Jello Over Cream Cheese: Allow the Jello to cool slightly before pouring it over the cream cheese layer. Hot Jello can melt the cream cheese, ruining the beautiful layers.
- Skipping the Chilling Time: Patience is key! Let the pie chill for at least 4 hours to ensure the Jello sets properly. Cutting too soon can lead to a messy slice.
By avoiding these common mistakes, you’ll be on your way to making a stunning and delicious Easter Jello Pie that everyone will love!
Storage Tips for Leftovers
If you happen to have leftovers (which is rare with such a tasty pie!), here are some storage tips to keep your Easter Jello Pie fresh:
- Refrigerate Promptly: Store any leftover pie in the refrigerator as soon as possible. This helps maintain its freshness and prevents spoilage.
- Cover Tightly: Use plastic wrap or an airtight container to cover the pie. This will help keep it from absorbing any odors from the fridge.
- Consume Within a Few Days: For the best taste and texture, try to eat the leftover pie within 3-4 days. The Jello may start to lose its firmness after that.
- Do Not Freeze: Freezing is not recommended for Jello pie, as it can alter the texture of the Jello and cream cheese layers.
By following these storage tips, you can enjoy your Easter Jello Pie for days to come, savoring every delicious bite!
Breakdown of Time for Easter Jello Pie Recipe
Easter Jello Pie Recipe can help you plan your baking session effectively. Here’s a breakdown of the time required for preparation, cooking, and chilling.
Prep Time
The prep time for this delightful pie is approximately 20-30 minutes. This includes gathering your ingredients, preparing the graham cracker crust, and mixing the cream cheese filling. Make sure to have everything ready before you start, as it will make the process smoother and more enjoyable.
Cooking Time
The cooking time is quite minimal, as you only need to bake the crust for about 8-10 minutes. This step is crucial for achieving a golden, crunchy base. After baking, allow the crust to cool completely before adding the filling and Jello layers.
Total Time
In total, you should expect to spend around 30-40 minutes actively working on the pie. However, don’t forget about the chilling time! The pie needs to chill in the refrigerator for at least 4 hours to set properly. So, while the active time is short, plan for a total of about 4 hours and 30 minutes from start to finish before you can enjoy your delicious Easter Jello Pie.
Nutritional Information for Easter Jello Pie Recipe
Easter Jello Pie Recipe can help you make informed choices while enjoying this delightful dessert. Here’s a breakdown of the key nutritional components per serving, which is based on an 8-serving pie.
Calories
Each slice of the Easter Jello Pie contains approximately 210 calories. This makes it a relatively light dessert option, especially when compared to many traditional pies. The combination of creamy filling and fruity Jello provides a satisfying treat without overwhelming your calorie intake.
Protein
In terms of protein, each serving offers about 2 grams. While this isn’t a high-protein dessert, the cream cheese does contribute some protein to the pie. If you’re looking to boost the protein content, consider adding a dollop of Greek yogurt on top when serving.
Sodium
The sodium content in each slice is around 150 mg. This is a moderate amount, making it suitable for most diets. However, if you are watching your sodium intake, be mindful of the ingredients you choose, especially the cream cheese and any additional toppings.
Overall, the Easter Jello Pie is a fun and festive dessert that can fit into a balanced diet. Enjoy it as a special treat during your Easter celebrations, and feel free to customize it to suit your dietary needs!
FAQs about Easter Jello Pie Recipe
Can I use sugar-free Jello for the Easter Jello Pie Recipe?
Easter Jello Pie Recipe. This is a great option for those who are watching their sugar intake. The flavor will still be delicious, and the pie will maintain its vibrant colors. Just follow the same instructions for dissolving the Jello, and you’ll have a delightful dessert that everyone can enjoy!
How long can I store the Easter Jello Pie?
You can store your Easter Jello Pie in the refrigerator for about 3-4 days. Make sure to cover it tightly with plastic wrap or place it in an airtight container. This will help keep it fresh and prevent it from absorbing any odors from the fridge. However, for the best taste and texture, it’s best to enjoy it within the first couple of days.
Can I make the Easter Jello Pie ahead of time?
Easter Jello Pie Recipe ahead of time is a fantastic idea! You can prepare it a day or two before your gathering. Just remember to allow enough chilling time for the Jello to set properly. This way, you can enjoy your time with family and friends without the stress of last-minute dessert preparations!
What are some creative toppings for Easter Jello Pie?
Get creative with your toppings to make your Easter Jello Pie even more festive! Here are some fun ideas:
- Fresh Fruit: Add slices of strawberries, blueberries, or kiwi on top for a burst of color and flavor.
- Shredded Coconut: Sprinkle some shredded coconut for a tropical touch that pairs well with fruity flavors.
- Chocolate Shavings: For a decadent twist, add chocolate shavings or mini chocolate chips on top.
- Edible Flowers: Decorate with edible flowers for a beautiful and elegant presentation.
- Colored Sprinkles: A sprinkle of colorful sprinkles can add a fun and festive look, especially for kids!
These toppings not only enhance the visual appeal but also add extra flavor and texture to your pie. Feel free to mix and match based on your preferences!
Conclusion on Easter Jello Pie Recipe
Easter Jello Pie Recipe is a delightful and vibrant dessert that perfectly captures the spirit of spring. With its creamy filling, colorful Jello layer, and crunchy graham cracker crust, this pie is sure to be a crowd-pleaser at any Easter gathering. Not only is it easy to make, but it also allows for endless customization, making it a versatile choice for any occasion.
As you prepare this festive treat, remember the joy it brings to family and friends. The bright colors and refreshing flavors are a wonderful way to celebrate the season of renewal. Whether you stick to classic flavors or experiment with new combinations, your Easter Jello Pie will surely be a hit.
So, gather your ingredients, follow the steps, and enjoy the process of creating this beautiful dessert. Don’t forget to share it with your loved ones, as the best part of any recipe is the memories made while enjoying it together. Happy baking, and may your Easter celebrations be filled with sweetness and joy!