
gutenberg
Introduction to Tarta de la Princesa (Prinsesstårta)
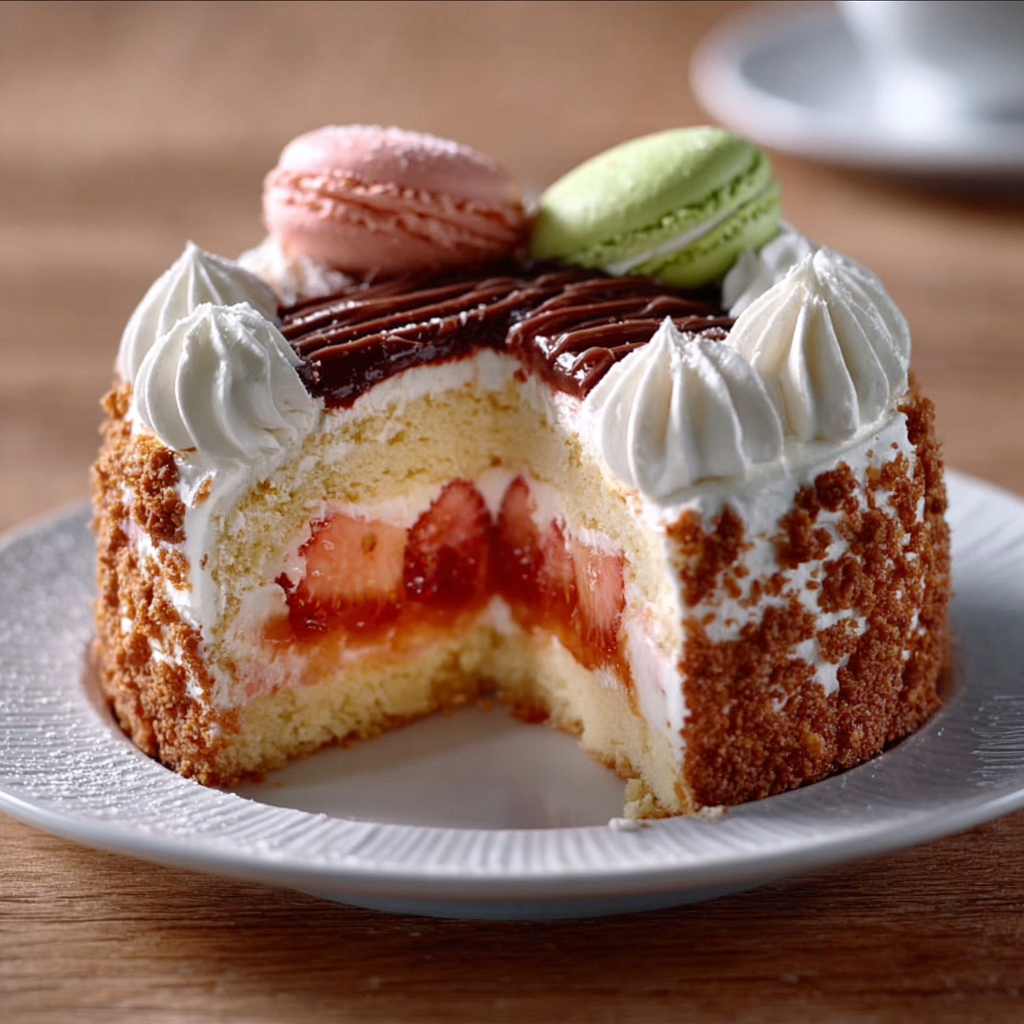
Hey there, fellow home cooks! If you’re anything like me, you know that life can get pretty hectic, especially when juggling work, family, and everything in between. That’s why I’m excited to share with you the delightful Tarta de la Princesa, or Prinsesstårta, a Swedish cake that’s not just a feast for the eyes but also a quick solution for a busy day. Imagine layers of fluffy sponge cake, sweet raspberry jam, and luscious whipped cream, all wrapped in a beautiful green marzipan coat. It’s a showstopper that will impress your loved ones without taking up your entire weekend!
Why You’ll Love This Tarta de la Princesa (Prinsesstårta)
This Tarta de la Princesa is a dream come true for busy women like us! It’s not only easy to make but also incredibly delicious. With just a few simple steps, you can whip up a stunning dessert that tastes like it came from a fancy bakery. Plus, the vibrant colors and flavors will brighten up any gathering, making it a perfect treat for birthdays, holidays, or just because you deserve something sweet!
Ingredients for Tarta de la Princesa (Prinsesstårta)
Let’s dive into the delightful ingredients that make up this stunning Tarta de la Princesa! Each component plays a vital role in creating that perfect balance of flavors and textures. Don’t worry; I’ll keep it simple and straightforward. You can find the exact measurements at the bottom of the article for easy printing!
- All-purpose flour: This is the backbone of our sponge cake, giving it structure and a light texture. You can also use cake flour for an even fluffier result!
- Baking powder: A must-have leavening agent that helps the cake rise beautifully. Make sure it’s fresh for the best results!
- Salt: Just a pinch enhances the sweetness and balances the flavors. It’s like the secret handshake of baking!
- Unsalted butter: Softened butter adds richness and moisture to the cake. If you’re in a pinch, you can use margarine, but butter is always best for flavor.
- Granulated sugar: This sweetener not only adds sweetness but also helps create that lovely fluffy texture when creamed with butter.
- Large eggs: Eggs provide moisture and act as a binding agent. They’re essential for that perfect sponge cake texture!
- Vanilla extract: A splash of vanilla adds warmth and depth to the flavor. You can use almond extract for a unique twist!
- Whole milk: This adds moisture and richness to the batter. If you’re dairy-free, almond or oat milk can work as substitutes.
- Heavy whipping cream: This is what makes our cake luscious and creamy. You can use coconut cream for a dairy-free option!
- Powdered sugar: This sweetener is used to whip the cream to soft peaks and adds a touch of sweetness without the graininess of granulated sugar.
- Raspberry jam: The star of the show! It adds a fruity burst of flavor that pairs perfectly with the cream and cake. Feel free to swap it out for strawberry or apricot jam if you prefer!
- Green marzipan: This sweet almond paste is what gives our Tarta de la Princesa its signature look. You can find it at most grocery stores or online. If you’re not a fan, you can skip it, but it does make for a stunning presentation!
- Powdered sugar (for dusting): A light dusting adds a touch of elegance to your cake. It’s like the icing on the cake—literally!
- Fresh raspberries and mint leaves (optional): These are perfect for garnishing your cake, adding a pop of color and freshness. Plus, they make it look extra fancy!
With these ingredients, you’re well on your way to creating a beautiful Tarta de la Princesa that will wow your family and friends. Remember, the exact quantities are listed at the bottom of the article, so you can easily grab what you need and get started!
How to Make Tarta de la Princesa (Prinsesstårta)
Now that we have our ingredients ready, let’s dive into the fun part—making this gorgeous Tarta de la Princesa! I promise, it’s easier than it looks, and I’ll guide you through each step. Just follow along, and soon you’ll have a stunning cake that will make you feel like a baking queen!
Step 1: Preheat and Prepare
First things first, preheat your oven to 350°F (175°C). This is crucial for getting that perfect rise in your cake. While the oven warms up, grab a 9-inch round cake pan and grease it with a bit of butter or cooking spray. Then, dust it with flour to prevent sticking. Trust me, you don’t want to wrestle with a stuck cake later!
Step 2: Mix Dry Ingredients
In a medium bowl, whisk together the all-purpose flour, baking powder, and salt. This step is important because it ensures that the baking powder is evenly distributed throughout the flour. It’s like giving your cake a little pep talk before it goes into the oven! Set this bowl aside for now.
Step 3: Cream Butter and Sugar
In a large mixing bowl, cream together the softened unsalted butter and granulated sugar until the mixture is light and fluffy. This usually takes about 3-5 minutes with an electric mixer. You want it to look pale and airy, like a cloud! Add the eggs one at a time, mixing well after each addition. Finally, stir in the vanilla extract. The aroma will make your kitchen smell heavenly!
Step 4: Combine Ingredients
Now it’s time to bring everything together. Gradually add the dry ingredients to the butter mixture, alternating with the whole milk. Start and end with the flour mixture. Mix until just combined—don’t overdo it! We want a tender cake, not a tough one. It’s like a gentle hug for your batter!
Step 5: Bake the Cake
Pour the batter into your prepared cake pan and smooth the top with a spatula. Pop it into the preheated oven and bake for 25-30 minutes. You’ll know it’s done when a toothpick inserted in the center comes out clean. While it bakes, take a moment to enjoy the delicious smell wafting through your home!
Step 6: Cool and Slice
Once the cake is baked, let it cool in the pan for about 10 minutes. Then, carefully transfer it to a wire rack to cool completely. Once it’s cool, slice the cake in half horizontally to create two layers. This is where the magic happens, so take your time and make sure the layers are even!
Step 7: Assemble the Cake
Now for the fun part! Spread a generous layer of raspberry jam on the bottom layer of the cake. Then, whip the heavy cream with powdered sugar and vanilla extract until soft peaks form. Spread half of this luscious whipped cream over the jam. Place the top layer of the cake on the whipped cream, and then spread the remaining whipped cream on top. It’s like building a delicious cake sandwich!
Step 8: Decorate with Marzipan
Roll out the green marzipan on a surface dusted with powdered sugar until it’s about 1/4 inch thick. Carefully drape the marzipan over the cake, smoothing it down the sides. Trim any excess marzipan from the bottom of the cake. If you’re feeling fancy, decorate the top with fresh raspberries and mint leaves for that extra pop of color. Voilà! Your Tarta de la Princesa is ready to shine!
Tips for Success
- Make sure your ingredients are at room temperature for better mixing.
- Don’t skip the cooling step; a warm cake can ruin your layers.
- Use a serrated knife for slicing the cake evenly.
- For a smoother marzipan finish, lightly dust your hands with powdered sugar.
- Feel free to customize the jam flavor to suit your family’s taste!
Equipment Needed
- 9-inch round cake pan: If you don’t have one, an 8-inch pan works too; just adjust the baking time.
- Mixing bowls: A set of various sizes is handy; you can also use any large bowl you have.
- Electric mixer: A hand mixer is perfect, but a whisk will do if you’re feeling strong!
- Spatula: A rubber spatula is great for scraping down the sides of the bowl.
- Wire rack: If you don’t have one, a plate can work for cooling the cake.
Variations of Tarta de la Princesa (Prinsesstårta)
- Chocolate Prinsesstårta: Substitute 1/4 cup of the all-purpose flour with unsweetened cocoa powder for a rich chocolate flavor that will satisfy any chocolate lover!
- Fruit-Filled Delight: Experiment with different fruit jams like strawberry, apricot, or even blueberry for a unique twist on the classic raspberry filling.
- Dairy-Free Option: Use coconut cream instead of heavy whipping cream and almond or oat milk in the batter for a delicious dairy-free version.
- Gluten-Free Version: Swap the all-purpose flour with a gluten-free flour blend to accommodate gluten sensitivities while still enjoying this delightful cake.
- Nutty Marzipan: If you love nuts, try adding finely chopped almonds or hazelnuts to the cake batter for an extra crunch and flavor boost!
Serving Suggestions for Tarta de la Princesa (Prinsesstårta)
- Pair your Tarta de la Princesa with a cup of freshly brewed coffee or tea for a delightful afternoon treat.
- Serve with a side of fresh fruit, like strawberries or blueberries, to add a refreshing contrast.
- For a festive touch, garnish with edible flowers or additional mint leaves for a pop of color.
- Consider a scoop of vanilla ice cream on the side for an indulgent dessert experience!
FAQs about Tarta de la Princesa (Prinsesstårta)
As you embark on your journey to create this stunning Tarta de la Princesa, you might have a few questions. Don’t worry; I’ve got you covered! Here are some common queries I’ve encountered, along with their answers to help you along the way.
1. Can I make Tarta de la Princesa (Prinsesstårta) ahead of time?
Absolutely! This cake can be made a day in advance. Just be sure to store it in an airtight container in the fridge. The flavors will meld beautifully overnight, making it even more delicious!
2. What can I substitute for marzipan?
If marzipan isn’t your thing, you can use fondant for a similar look. Alternatively, a simple dusting of powdered sugar or a light layer of whipped cream can also make for a lovely presentation!
3. How do I store leftover Tarta de la Princesa (Prinsesstårta)?
Store any leftovers in the fridge, covered with plastic wrap or in an airtight container. It should stay fresh for about 3-4 days. Just be aware that the marzipan may become a bit sticky over time.
4. Can I use a different type of jam for the filling?
Definitely! While raspberry jam is traditional, feel free to get creative. Strawberry, apricot, or even a mixed berry jam can add a delightful twist to your Tarta de la Princesa!
5. Is Tarta de la Princesa (Prinsesstårta) suitable for special diets?
Yes! You can easily adapt this recipe for various dietary needs. Use gluten-free flour for a gluten-free version, and substitute coconut cream and plant-based milk for a dairy-free option. Everyone can enjoy this delicious cake!
Final Thoughts
Creating a Tarta de la Princesa (Prinsesstårta) is more than just baking; it’s about bringing joy to your kitchen and your loved ones. This delightful cake, with its layers of fluffy sponge, sweet raspberry jam, and creamy whipped topping, is sure to become a cherished family favorite. Whether you’re celebrating a special occasion or simply treating yourself after a long week, this cake adds a touch of elegance to any moment. So roll up your sleeves, embrace the process, and enjoy the smiles that come with each slice. Happy baking, my friends!
“`
Print
Tarta de la Princesa: Create This Delightful Cake Today!
- Total Time: 1 hour
- Yield: 8 servings 1x
- Diet: Vegetarian
Description
Tarta de la Princesa, also known as Prinsesstårta, is a delightful Swedish cake featuring layers of sponge cake, raspberry jam, and whipped cream, all covered in a smooth layer of green marzipan.
Ingredients
- 2 cups all-purpose flour
- 1 teaspoon baking powder
- 1/2 teaspoon salt
- 1/2 cup unsalted butter, softened
- 1 cup granulated sugar
- 3 large eggs
- 1 teaspoon vanilla extract
- 1/2 cup whole milk
- 2 cups heavy whipping cream
- 1/4 cup powdered sugar
- 1 teaspoon vanilla extract (for the cream)
- 1 cup raspberry jam
- Green marzipan (about 1 pound)
- Powdered sugar (for dusting)
- Fresh raspberries and mint leaves for garnish (optional)
Instructions
- Preheat your oven to 350°F (175°C). Grease and flour a 9-inch round cake pan.
- In a medium bowl, whisk together the flour, baking powder, and salt. Set aside.
- In a large bowl, cream together the softened butter and granulated sugar until light and fluffy. Add the eggs one at a time, mixing well after each addition. Stir in the vanilla extract.
- Gradually add the dry ingredients to the butter mixture, alternating with the milk. Begin and end with the flour mixture. Mix until just combined.
- Pour the batter into the prepared cake pan and smooth the top. Bake for 25-30 minutes, or until a toothpick inserted in the center comes out clean. Let the cake cool in the pan for 10 minutes before transferring it to a wire rack to cool completely.
- Once the cake is completely cool, slice it in half horizontally to create two layers.
- Spread raspberry jam on the bottom layer, then whip the heavy cream with powdered sugar and vanilla extract until soft peaks form. Spread half of the whipped cream over the jam.
- Place the top layer of the cake on the whipped cream. Spread the remaining whipped cream on top of the cake.
- Roll out the marzipan on a surface dusted with powdered sugar to about 1/4 inch thick. Carefully drape the marzipan over the cake, smoothing it down the sides.
- Trim any excess marzipan from the bottom of the cake. Decorate the top with fresh raspberries and mint leaves if desired.
Notes
- For a chocolate version, substitute 1/4 cup of the flour with unsweetened cocoa powder.
- Experiment with different fruit fillings like strawberry or apricot jam for a unique twist on the classic flavor.
- Prep Time: 30 minutes
- Cook Time: 30 minutes
- Category: Dessert
- Method: Baking
- Cuisine: Swedish
Nutrition
- Serving Size: 1 slice
- Calories: 380
- Sugar: 20g
- Sodium: 150mg
- Fat: 25g
- Saturated Fat: 15g
- Unsaturated Fat: 10g
- Trans Fat: 0g
- Carbohydrates: 30g
- Fiber: 1g
- Protein: 5g
- Cholesterol: 100mg